MULE CROSSING: Achieving Balance and Harmony
By Meredith Hodges
Achieving balance and harmony with your equine requires more than just balancing and conditioning his body. As you begin finishing training on your equine, your awareness must now be shifted more toward your own body. Your equine should already be moving steadily forward in a longer frame and be basically obedient to your “aids” (your seat, legs and hands). The object in finishing training is to build the muscles in your own body so that your aids become more clearly defined and effective. This involves the shedding of old habits and the building of new ones. This takes a lot of time and should not be approached with impatience. There are no shortcuts!
In order to stabilize your hands and upper body, you need to establish a firm base in your seat and legs. Ideally, you should be able to drop an imaginary plumb line from your shoulder through your hips, through your heels and to the ground. To maintain this plumb line, you must work to make the joints and muscles in your body more supple and flexible through correct use, so that this line becomes your automatic posture.
 As you ride your equine through walking exercises, try to stay soft, relaxed and following forward in your inner thighs and seat bones. Get the sensation that your legs are cut off at the knees and let your seat bones walk along with your animal—lightly, and in rhythm with him. If he slows down, just bend your knees and nudge him alternately with your legs below your knees, while keeping your seat and upper legs stable and moving forward. While your legs are still, they should rest gently on his sides in a “hug.” Do not push forward in your seat, but allow him to carry you forward. When collecting the walk on the short side, just bend both knees at the same time, nudging your equine simultaneously on both sides, while you squeeze the reins at the same time.
In order to help you stay over the middle of your animal’s back on the large circle, keep your eyes up and ahead, shift your weight slightly to the outside stirrup, and “feel the movement.” Bend your knee and set your inside leg snugly against your equine at his girth. As you do this, be sure that your outside leg (the leg on the outside of the arc) stays in close contact with his body, well behind the girth. He will begin to bend his body through contact with your legs in this position. Your inside leg (the leg on the inside of the arc) will support the bend and help to keep him upright, and the outside leg will drive him forward through the arc of the turn, or circle. On straight lines, keep your legs even, slightly behind the girth and look straight ahead. To keep his shoulders from “dropping” while executing a turn, look up and a little to the outside of the circle. This will bring your inside seat bone slightly forward and your outside seat bone slightly back, allowing your legs to easily be in the correct position for the circle. Your weight should be shifted to the outside leg. This is particularly helpful during canter transitions.
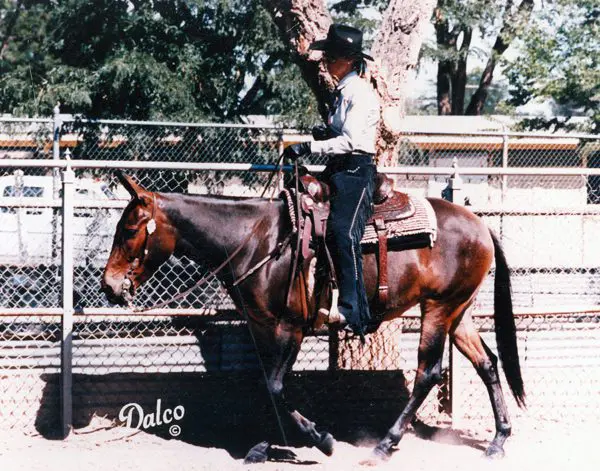 Most of us feel that we do not balance on our reins as much as we actually do. If there is any balancing on the reins at all by the rider, your equine will be unable to achieve proper hindquarter engagement and ultimate self-carriage. Here is a simple exercise you can do to help shift the weight from your hands and upper body to your seat and legs. Begin by putting your equine on the rail at an active working walk. On the long side, drop your reins on his neck and feel your lower-body connection with him as you move along. In order to maintain your shoulder-to-hip plumb line, you will find that you need to tip your pelvis forward and stretch your abdominal muscles with each step. If your lower leg remains in the correct position, this will also stretch the thigh muscles on the front of your leg from hip to knee. There is also a slight side-to-side motion as your animal moves forward that will cause your seat bones to move independently and alternately forward. There is no doubt that you can probably do this fairly easily right from the start, but to maintain this rhythm and body position without thinking about it takes time and repetition.
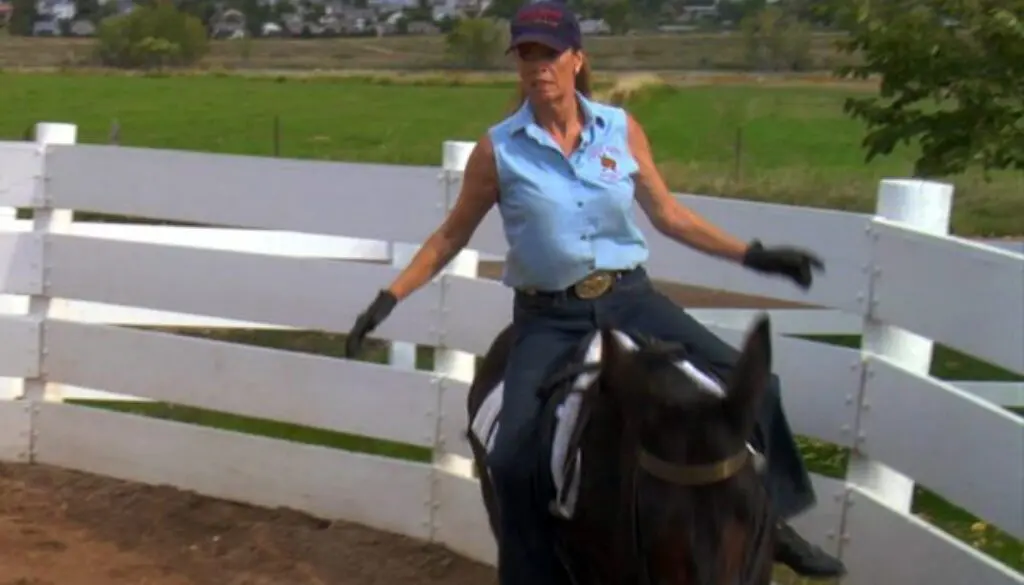
When you are fairly comfortable at the walk, you can add some variation at the trot. Begin with the posting trot on the rail. Always post down in your seat to meet the equine’s front leg that comes back and underneath your outside leg. Post upwards as the equine’s front leg goes forward. Once your equine’s hindquarters are adequately engaged, you will begin to feel his hind legs coming under your seat. However, when starting out, it is easier to learn to post using a visual of the front legs, and rely on the physical sensation of the hind legs coming under your seat later. When your mule is going along the rail in a fairly steady fashion, drop your reins on his neck and continue to post. As you post down the long side, remember to keep your upper body erect, your pelvis rocking forward from your seat, your knees bent such that your legs are gently hugging the barrel of your equine, and your arms raised and straight out in front of you, parallel to your shoulders.
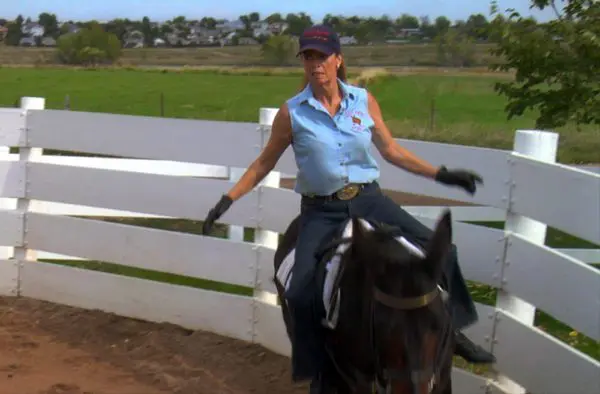
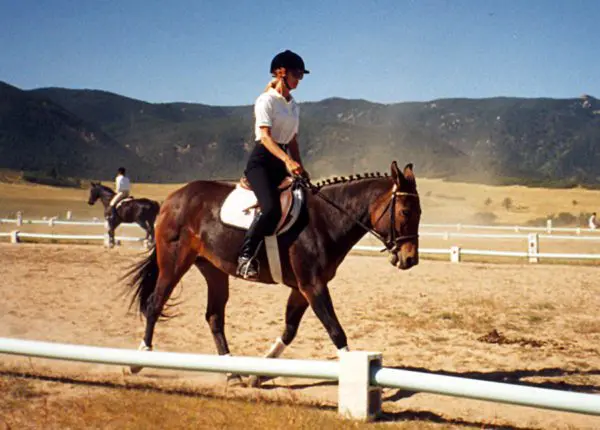 If your animal drifts away from the rail, you will need to post with a little more weight in your outside stirrup. As you go around the corners, be sure to turn your eyes a little to the outside of the circle to help your positioning. As you approach the short side of the arena, bring your arms backwards and straight out from your shoulders in a “T” formation, while keeping your upper body erect. As you go through the corners, just rotate your arms and upper body slightly toward the outside of your circle. When you come to the next long sides, bring your arms, once again, in front and parallel to your shoulders and repeat the exercise.
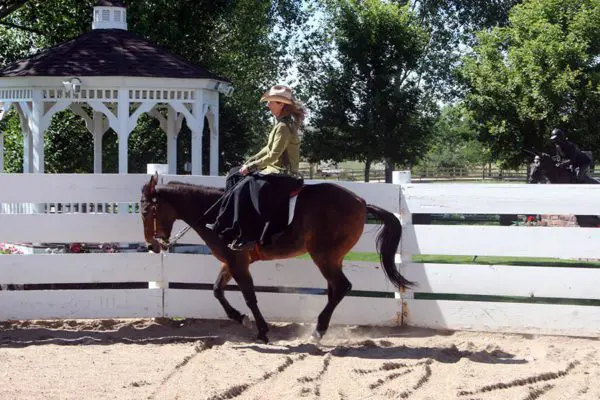 Notice the different pressure on your seat bones as you change your arm position. The forward arms will somewhat lighten your seat, while your arms to the side tend to exert a little more pressure. Consequently, you can send your animal more forward by using your seat as you go down the long sides, shortening that stride with a little added pressure from the seat bones on the short sides. When you wish to halt, put your arms behind you at the small of your back to support an erect upper body, and let your weight drop down through your seat bones and legs. Also, remember to use your verbal commands often in the beginning to clarify your aids (effect of the seat, legs and hands) to your equine. If your equine doesn’t stop, just reach down and give a gentle squeeze/release on the reins until he stops, but be sure to remain relaxed and continue to drop your weight into your seat and legs. Keep your inner thighs relaxed and flexible. Do NOT squeeze! Think DOWN through your legs on both sides. Before long, he will begin to make the connection between the weight of your seat and your command to “Whoa,” and your seat will take precedence over your reins.
When you and your equine have become adept at the walk and the trot, you can add the canter. At the canter, however, keep your arms out to the side and rotate them in small circles in rhythm with the canter. Be sure to sit back and allow only your pelvis, seat and thighs to stretch forward with the canter stride. Keep your upper body erect and your lower legs stable in the gentle “hugging” position. Once your equine has learned to differentiate seat and leg aids during each gait and throughout all transitions on the large circle, you can begin to work on directional changes through cones.
As you practice these exercises, you will soon discover how even the slightest shift of balance can affect your animal’s performance. By riding without your reins and making the necessary adjustments in your body, you will begin to condition your own muscles to work in harmony with those of your equine. As your muscles get stronger and more responsive, you will cultivate more harmony and balance with your animal. As you learn to ride more “by the seat of your pants,” you will encounter less resistance in your equine, as most resistance is initiated by tension in the seat and legs and by “bad hands,” an ineffective and uncommunicative dragging on the reins. Your hands should remain quiet and supportive in contact with the bit. Keeping your legs close to the sides of your equine’s body in a sort of hug will clarify the “track” he is to follow (much in the same way a train is confined to its tracks). As you learn to vary the pressure in your seat accordingly, so will you encounter less resistance in your animal through his back, and the stability in your lower legs will give him a clearer path to follow between your aids.
To learn more about Meredith Hodges and her comprehensive all-breed equine training program, visit LuckyThreeRanch.com, MEREDITH HODGES PUBLIC FIGURE Facebook page, or call 1-800-816-7566. Check out her children’s website at JasperTheMule.com. Also, find Meredith on Pinterest, Instagram, MeWe, YouTube and Twitter.
Covered in TRAINING MULES & DONKEY: A LOGICAL APPROACH TO TRAINING, TRAINING WITHOUT RESISTANCE, EQUUS REVISITED and A GUIDE TO RAISING & SHOWING MULES at www.luckythreeranchstore.com.
© 1992, 2016, 2017, 2024 Lucky Three Ranch, Inc. All Rights Reserved.

