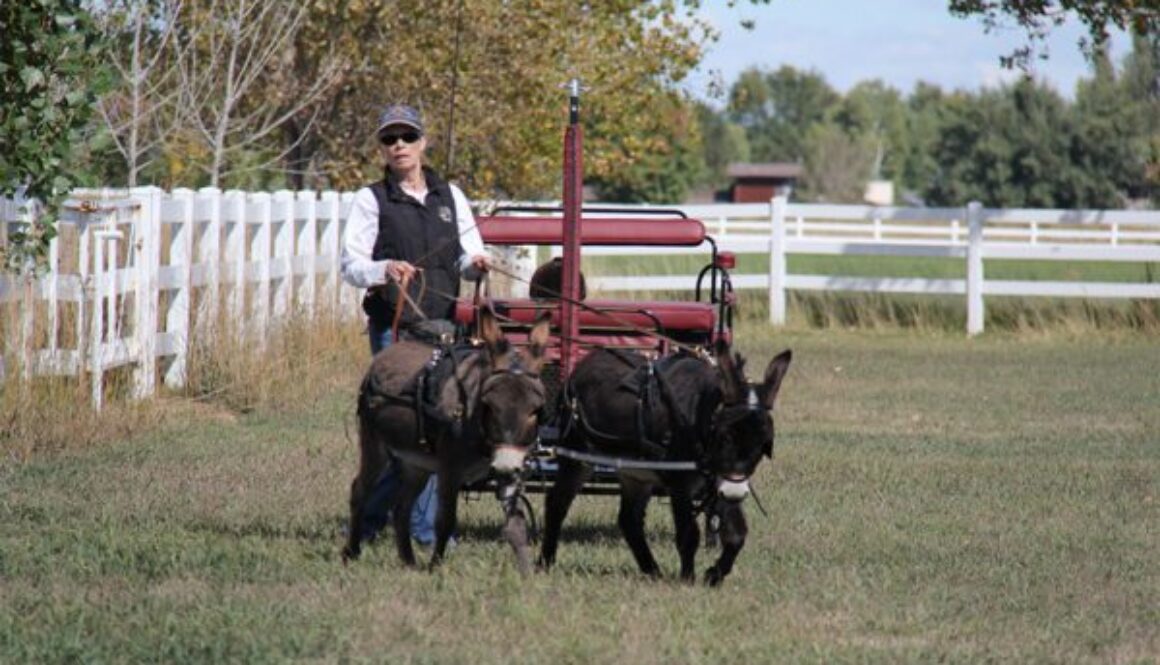
Driving


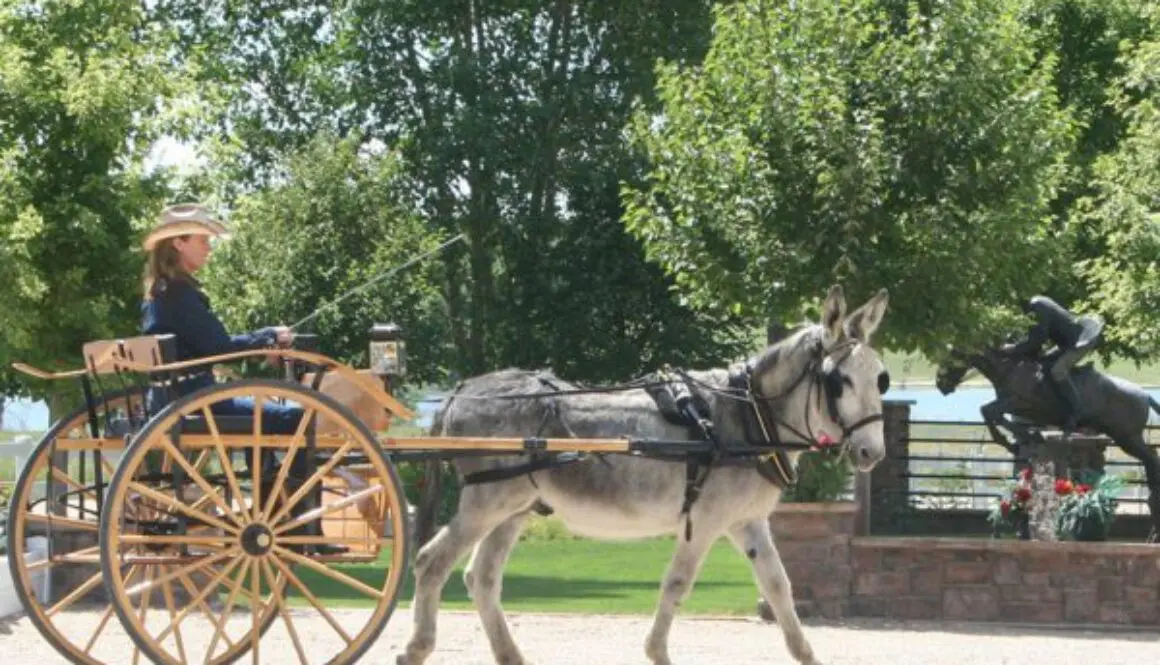

MULE TALK! PODCAST: Driving with Mules & Donkeys
- Selecting the right harness for your driving activity
- Ground driving and what it means to your animal
- Be patient during the training process
- How to build confidence in your animal to drive safely
- Not all animals make good driving companions
- Select a good-minded driving animal
- Driving is enjoyable from children to the eldest grandmother
- Working on verbal commands and more!
Learn more on Mule Talk podcast.

MULE CROSSING: Driving Activities
By Meredith Hodges
 With the introduction of the automobile came decreased interest in horse-drawn vehicles. Tractors replaced equine-driven vehicles in the fields. It seemed as if equines had been put out of a job! But, as with any change, this was only temporary. Modern society still has need of equine participation, especially from donkeys and mules. The well-schooled driving donkey or mule is much safer and more reliable than any horse. The reason for this is the donkey and mules’ natural sensibility and their positive response to verbal communication. Once they have learned the parameters of their job, if treated fairly, they will calmly and diligently go about their business, flicking their ears back and forth toward the driver, always listening for verbal reinforcement of their behavior. In a pinch, they can more often be prevented from “freaking out” with a few calm and reassuring words. Their strength and durability enables them to work longer and harder hours than can a horse and their variety of sizes and colors provides them as suitable driving animals for a number of driving-related activities.
 Most often we see driving animals in parades. Although it seems simple enough to drive down a parade route, there are a number of things to consider that can complicate the issue. Parade routes are lined with potential hazards and an overload of outside stimuli. Horses that become spooked have been known to bolt and actually run right through crowds of people. I have yet to hear of a donkey or mule that has done such a thing! Perhaps it is because the donkey or mule will not run into trouble if he can possibly avoid it. He will also be more likely to rely upon his driver for support and direction through the safest route. He will stop if in doubt of a situation when properly trained. Mules and donkeys are familiar with teamwork and will work as a team with their driver. The frightened horse just says, “Forget you!” and leaves!
Driving competitions are becoming more popular than ever these days as a number of different types of driving classes are being made available to contestants. For the really serious competitor, there are pleasure, obstacle, and Reinsmanship classes in which to measure one’s progress in performance.
 As the competitor improves, he may move into marathon driving, testing his skills across country and through obstacles (called hazards). The driver may use singles, or teams, depending on his personal preference. The American Driving Society has been more than generous, allowing mules and donkeys to compete in most of their events right along with the horses. For more fun-loving competitors, there are a lot of different driving games, gauged for the ability of the competitors. This allows even the most inexperienced driver some source of enjoyment from which he can derive a sense of accomplishment and excitement.
For those who want to enjoy a nice day in the country with their animals, there are rallies and organized picnic drives. This type of driving is more relaxing, but no less rewarding and satisfying than competitive events. Awards are sometimes given at rallies for coming in closest to the optimum time, but the pace is usually quite leisurely! Your donkey or mule will love the alternative to showing and will enjoy the activities as much as you do.
 Mules and donkeys are used in many tourist areas, pulling cabs and carriages of all varieties, taking tourists in a more leisurely fashion through the streets of history and tradition. Couples can romantically celebrate special moments in their relationships with a relaxing ride in a special cab or buggy. The sensible mule or donkey assures a safe and romantic memory that will stay with you for the rest of your life! We have used our mules to pull carriages for weddings and receptions, adding a touch of class and a little tradition to an otherwise fast-paced and chaotic world!
Because of their thoughtful and affectionate nature, donkeys and mules are ideal candidates for handicapped and disabled drive and ride programs. They are not as abruptly spooked as horses, and are therefore less likely to unseat a disabled rider, or run off with a disabled driver. Horses have fared reasonably well in riding programs for the disabled and handicapped, but are not really reliable enough for driving programs of this kind. This is where Longears can excel! Mule and donkey drive and ride programs, such as the Slade Centre at the Donkey Sanctuary in Great Britain, afford disabled and handicapped people the opportunity to enjoy the wonders of nature by offering them more mobility with the assistance of a new “friend” who is gentle and affectionate. These “friends” replace hopelessness with joy and fulfillment, helping to make life worth living!

Driving itself is a wonderful recreation for just about anyone, from the smallest child to the eldest grandmother. Driving donkeys or mules gives you that extra sense of security in an otherwise potentially dangerous situation. Driving a donkey or mule can provide a companion and friend to otherwise lonely and unfulfilled persons, keeping life more positive and enjoyable. Riding equines for enjoyment still requires a certain amount of training and practice. Learning to drive requires a lot less training and practice time for the driver, provided that the animal is well-schooled and obedient. Small farms today still use mules and donkeys for farm work. When they know their job, they do it with ease and sometimes work exclusively on verbal communication. Old farmers speak of their mules with pride and affection. It’s nice to have a “hand” that doesn’t talk back and isn’t afraid of a little hard work! In this fast-paced world, sometimes it’s nice to go a little slower and take in all the beautiful and fulfilling things that life has to offer, like a relaxing drive in the country with your very best friend!
To learn more about Meredith Hodges and her comprehensive all-breed equine training program, visit LuckyThreeRanch.com, MEREDITH HODGES PUBLIC FIGURE Facebook page, or call 1-800-816-7566. Check out her children’s website at JasperTheMule.com. Also, find Meredith on Pinterest, Instagram, MeWe, YouTube and Twitter.
Covered in TRAINING MULES & DONKEY: A LOGICAL APPROACH TO TRAINING, TRAINING WITHOUT RESISTANCE, EQUUS REVISITED and A GUIDE TO RAISING & SHOWING MULES at www.luckythreeranchstore.com.
© 2013, 2016, 2024 Lucky Three Ranch, Inc. All Rights Reserved.

MULE CROSSING: Showing in Harness
By Meredith Hodges
 Now that you have spent many months teaching your mule to drive and he is doing so well, you have decided that it might be fun to show him in harness. So, what are that kinds of things that a judge looks for in a driving class of mules? Well, it’s basically the same as it is with horses.
The first and foremost consideration for a judge is your mule’s manners. His manners will exhibit just how safe your mule is for driving. As with people, a judge can get an overall impression from the expression on your mule’s face! An attentive and pleasant expression is definitely preferred. The expression on his face will reflect his overall comfort within a situation. If he is comfortable, he responds to minimal aids calmly,  confidently, yet promptly. He should reinback easily upon request, and stand quietly at the halt with all four legs squared. His ears will be relaxed, but attentively turned to the driver most of the time. Ears that are rapidly in motion indicate anxiety and distraction.
A major contributing factor in your mule’s overall manners is his conditioning. If your mule has been brought along with a carefully planned exercise program, his muscle growth and strength will increase with little or no stress, as it should in most athletes. The mule that is conditioned in this way will have the strength to pull while maintaining a smooth, steady and effortless gait. He is comfortable in his work. Properly conditioned mules will not exhibit the tenseness that comes from overexertion, a tenseness that can inhibit his entire performance.
How can you tell if your mule is well-conditioned? Touching his body with your fingers at the neck, shoulders, barrel, loins, stifles and rump can tell you a lot. These muscles should be hard and not mushy to the touch. Standing behind your mule, you should begin to see considerable gaskin development. A driving class lasts approximately 20 to 30 minutes. If you condition your mule at the medium trot for 20 minutes straight, without any sweating or breathing hard, he should be able to handle the class with no problem. Another helpful hint is to condition him on uneven ground. Then, when he performs on the flat ground, it will seem a lot easier to him. Remember to condition slowly to avoid overexertion, muscle soreness or injury. If you condition your mule beyond what is expected in the class, you won’t have to worry about him being fit for class! And, as long as he is so well conditioned, be sure he is well-groomed as well.
Your mule’s way of going is another important consideration for the judge. In the driving class, your mule will be asked for the walk, collected trot, working trot and the reinback. The walk should be “regular and unconstrained, energetic, but calm with even and determined steps with distinctively marked four equally spaced beats.” In the collected trot, “the neck is raised, thus enabling the shoulders to move with greater ease in all directions, the hocks well-engaged and maintaining energetic impulsion not withstanding the slower movement.” The mule’s steps are shorter, but are lighter and more mobile. The working trot is a pace between the collected and extended trots. The mule “goes forward freely and straight, engaging the hind legs  with good hock action, on a taut, but light rein, the position being balanced and unconstrained. The steps are
even as possible and the hind feet touch the ground in the foot prints of the fore feet.” The reinback is “a kind of walk backwards. The legs being raised and set down simultaneously by diagonal pairs, the hind legs remaining well in line and the legs being well raised.” The mule that is conditioned slowly with special attention given to core strength, straightness, balance and bend will begin to carry himself in good equine posture and exhibit these true gaits naturally after a period of practice time.
 The next consideration is the appropriateness of the animal to the vehicle he is pulling. A smaller mule should never be used to pull a large wagon, nor should the larger draft mule be used to pull a pony cart! Select a vehicle that pulls easily for your mule and one that is proportionate to his size. The overall picture should be balanced and harmonious. Fifty percent of your total class score will include your mule’s manners, his conditioning, his way of going and the appropriateness of the general turnout.
Twenty percent of your total score is judged on you, the whip or teamster. Your hands should be held at waist level, about three inches in front of your body and about 10 inches apart. “A rein passes between the forefinger and middle finger of each hand and is held secure with pressure from the thumb; the whip is held in the right hand.” You should always sit in good posture and the use of your aids should be almost imperceptible. An expert Reinsman rarely exceeds a 12″ imaginary box around his hands. Your dress should be appropriate to the vehicle in which you ride.
For instance, a formal coach would require a more formal dress than would a two-wheel country cart. Dress must be conservative for the times. Western dress is permitted  where appropriate. Hat, gloves, coat, tie, and a lap apron are required. A whip must be held in hand at all times! Always look where you are going, check the judge for instructions periodically and pay attention to spacing in the arena! The remaining considerations for a judge are the vehicle and the harness with each carrying 15% of your total score. The vehicle should be in good repair, appropriate size and style for your mule, and should fit him properly through the shafts and tugs. The harness should fit him as well as possible and should be adjusted correctly, especially the breeching so it can do its job in the reinback.
Often, it is difficult to find horse harnesses that will fit the lighter and smaller mules or donkeys properly, but you can approximate the size you need (i.e. pony, cob, horse, draft) and then make the necessary adjustments, or have a professional harness-maker help you. Your mule should be fastened snugly to the vehicle. Be sure that your collar or breast collar fits your mule properly as this can create soreness and make for a very unhappy mule! Adjust the breeching snugly enough to make your “brakes” effective! One of the most common mistakes made by beginning drivers is adjusting the breeching too loose. This makes it difficult for your mule to either slow down or back straight and evenly, and the resulting slack will make his transitions look abrupt and awkward!
 There is a lot to consider as a driving judge, but judges are also human beings, and basically the judge is going to select those mules for placement in the class that HE would most like to drive. If you follow the guidelines that I have described, your Longears will be one of the judge’s favorites!
To learn more about Meredith Hodges and her comprehensive all-breed equine training program, visit LuckyThreeRanch.com, MEREDITH HODGES PUBLIC FIGURE Facebook page, or call 1-800-816-7566. Check out her children’s website at JasperTheMule.com. Also, find Meredith on Pinterest, Instagram, MeWe, YouTube and Twitter.
Covered in TRAINING MULES & DONKEY: A LOGICAL APPROACH TO TRAINING, TRAINING WITHOUT RESISTANCE, EQUUS REVISITED and A GUIDE TO RAISING & SHOWING MULES at www.luckythreeranchstore.com.
© 1991, 2016, 2024 Lucky Three Ranch, Inc. All Rights Reserved.


MULE CROSSING: Good Basic Training Includes Common Sense, Part 4
By Meredith Hodges
In Part3, your equine was properly strengthened and balanced in good posture during the more passive exercises in leading training over obstacles. Now, in the fourth and final part of this article, you and your equine will head to the round pen and learn how to balance correctly on the circle at the faster gaits. You’ll also learn the more advanced and quicker moves that are required under saddle and in harness.
 Only after you have adequately completed lead line flatwork and obstacle training is your equine truly ready to move on to the round pen and begin lunging and learning to balance on a circle at the more active gaits. At this stage, he should be complying willingly, walking with the lead rope slung over his neck and with his head at your shoulder. By now, his core muscles should be properly conditioned and strong enough to support his skeletal system during more active use and more complicated movements. Note: The equine that has not had this prior lead line balance and good posture training will have difficulty in the round pen because he has not learned to stay erect and bend his body through the rib cage when on arcs and circles.
When you are lunging your equine, stand close to the center of the round pen, focus your eyes on the lower part of your equine’s haunches, and then give the verbal command to “Walk on.” Let your eyes and whip follow his haunches while you stand in the center of the round pen. If you want him to stop, say “Whoa,” and then move your eyes and body sideways so that you are more in front of him. Then raise your head and eyes to meet his eyes. If you want him to do a reverse, give the verbal command to “Reverse,” move your body sideways and crack the whip smartly in front of him. You should now be almost directly in front of him, looking him straight in the eye. It is the movement of your body that will make the difference between the halt and the turn. Notice how these subtle differences in your body affect what he does. If you practice these movements correctly and consistently, you will begin to see an improvement in your own body language and in your equine’s response. It doesn’t matter what anyone else does or says; you go right ahead and take the time you need to work out each maneuver with your equine. Accuracy is preferred over speed.
Lunging involves a lot more than just running your equine around in a circle. It affords you a tremendous opportunity to see the affect your body language has on your equine’s reactions. Lunging also helps you to understand how you can fine-tune the communication between the two of you while developing balanced, cadenced and rhythmic gaits in your animal. So start slow and don’t let things go beyond what you can easily control.
With the use of the “Elbow Pull” (instructions on how to make an “Elbow Pull” are given in the Equus Revisited DVD), your equine will begin to build muscle over a correct postural frame. This is much better than letting him develop muscle out of good posture, and then having to go back later and break down established muscle that is out of frame and causing problems. The “Elbow Pull” is not in any way abusive. It is, in fact, a “self-correcting” support, designed to simply suggest to an equine that he stay in good posture. If he stays in good posture, he feels nothing uncomfortable. But if he gets out of good posture, it puts a humane but firm pressure on his poll, his bit, behind his forearms and over his back. This is not unlike the grandmother who insisted that, to assure good posture, you walk with a book on your head. It may have sounded silly at first, but as you got older, you were happy you did it because it taught you good posture that eventually became a healthy and habitual way of moving. The “Elbow Pull” serves the same purpose for your equine and provides support when he cannot consistently hold good posture—he learns a healthy and habitual way of moving.
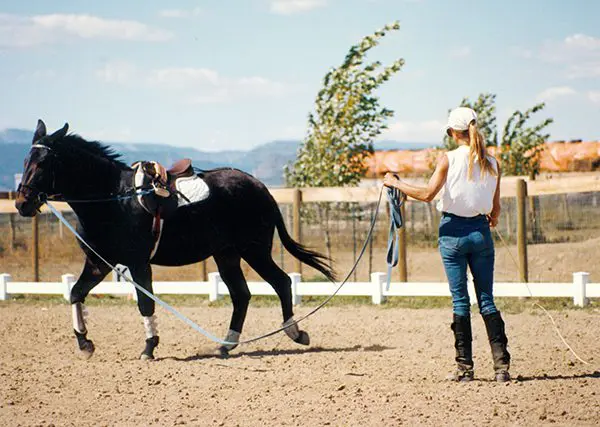 Before your equine learns to balance with a rider, he must first build muscle so he can sustain his own balance on the circle before carrying a rider. This is also true if you want your animal to learn to lunge on a lunge line. An equine that has not had enough time in the round pen establishing strength, coordination and balance on the circle will have difficulty on the lunge line, because even the slightest pressure on the line will pull him off-balance. Loss of balance will cause stress and even panic in your equine, which can result in him pulling the lunge line right out of your hands and running off. This is not disobedience but rather, fear caused by a loss of balance so do not punish him for this reaction. The animal that has had strength built on the circle before lunging and riding will not exhibit these undesirable behaviors, which are often misinterpreted as disobedience.
Lunging will begin to develop hard muscle over the core muscles and tendons you have already spent so many months strengthening. It will further enhance your equine’s ability to perform and stay balanced in action. As this becomes his true way of going, you will notice that even his play patterns begin to change dramatically. Be sure to be consistent with your verbal commands during these beginning stages, as they set the stage for better communication going forward.
After your equine has learned verbal commands while lunging, your next step is to train him to be equally responsive to verbal commands in conjunction with the drivelines. This is done first in the round pen, and then in an open arena, (which will introduce him to a larger space where he will need to become even more responsive to your rein cues).
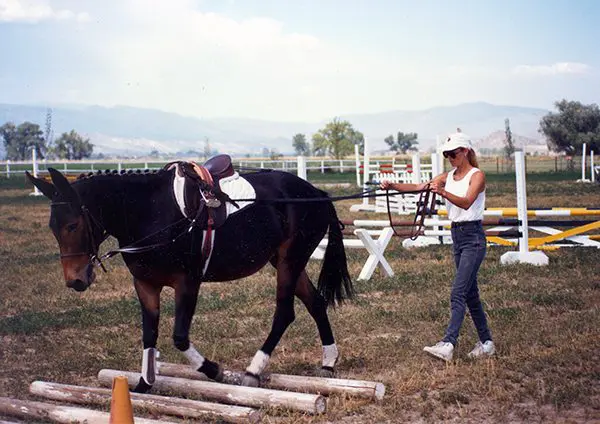 I have found that, in most cases, the larger the animal, the more docile the personality, which seems to be a general rule of thumb. I have also learned that, if a donkey or mule has a tendency to bolt and run, it’s because they don’t necessarily agree with what you are trying to do or how you are trying to do it. Even though horses usually comply fairly easily, it is important to remember that any disobedience on the part of any equine is ALWAYS the handler’s fault. Regardless of the personality type of an equine, he will always have an honest response to any stimulus. If you ask in the right way, you will get the desired response.
If your equine wants to bolt when you ground-drive from behind, walk beside him and gradually lengthen the distance, one inch at a time, until he has accepted the drivelines correctly—no matter how long it takes. But don’t work on lessons more than 20 to 40 minutes every other day, and make sure he gets his crimped oats reward for “Whoa” and “Back.” I give a lot of “Back” commands while ground driving close to an animal, and I repeat “Back” frequently at every increased or decreased distance behind him. Keep things at a very slow walk until you feel relaxation through the drivelines (there should be no hint of pulling). Stay calm and deliberate and go slowly—be willing to take all the time in the world, if necessary. Whether you are just beginning training, or are already working under saddle, while you and your equine are going to and from the work areas, and during any ground interaction, always review the lessons in showmanship covered in DVDs #1, #8 and #9 of my series, Training Mules & Donkeys before moving on to any new exercises. This will help your equine to really and truly bond with you on a very personal level. If you have multiple equines, be sure to treat every equine as your very favorite whenever you interact with them.
Certain personality types such as slow learners, over-achievers or sensitive individuals do take longer to come around, but when treated with plenty of patience, kindness, trust and respect, they usually do. These personality types may not necessarily be suitable for driving, but they can be quite suitable for under saddle. In fact, once they do come around, the more “difficult” equines, especially those that have previously been neglected or abused, often bond more strongly with you and look to you as their “protector.” They are grateful for your patience and kindness. These are sometimes the ones who will end up having more “spirit” and thus, more athletic tendencies and ability.
Because I have dealt with many animals that were high strung, I have learned that they require tremendous patience, but I also know that they can come around. You might just need to back up and do things even more slowly and more meticulously than you ever thought you would need to, but if you do, you should see some positive results. If you lower your expectations for a while and try to have more fun with the basics, chances are that your equine will, too.
Always make sure you work in areas that are adequately and safely fenced so that, if your equine bolts, you can more easily catch him again. If he bolts, DO NOT, under any circumstances, hold onto the reins, lead or drivelines. Just let go of the lead or drivelines if you are on the ground, and let the reins loose if you are in the saddle. Whether he is on the lead line, in the drivelines or under saddle, when your equine realizes that you aren’t going to play “tug-o-war,” that he will get a reward for staying put, and that it is a waste of his energy to keep running, he will bolt less and less until the unwanted behavior has stopped.
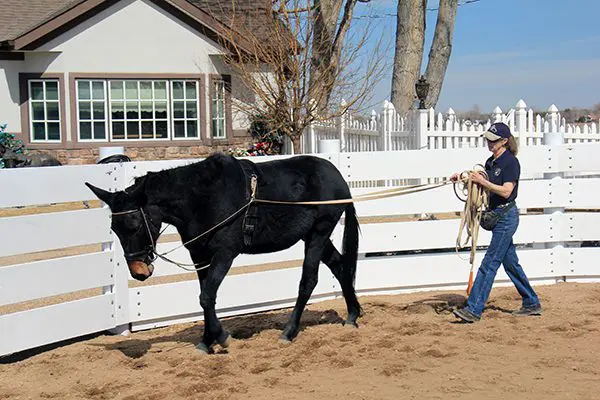 When ground driving, you should not worry about the whip while in the round pen, as the walls will help guide your animal in maintaining the correct position. What you really need to do is keep even contact on both lines (reins) when going in a straight line (or, when in the round pen, on the circle). To get your equine to begin stepping laterally, slightly tighten the outside driveline while maintaining contact on the inside driveline, so that he cannot complete the turn. Stay directly behind his haunches and urge him forward. This will cause him to begin to step sideways, with his face to the wall. Take only a couple of steps this way, and then slowly straighten him out again—you can build-in more lateral steps as he begins to understand what you want. Be sure to reward him with crimped oats every time you halt.
Once you begin ground driving in the open, you can then carry your whip in your right hand. Feed the line into your right hand under your third, fourth and fifth fingers, and then up between your thumb and index finger. The whip handle will be held in the palm and also come up between your thumb and index finger. Tilt this hand to tap the right and left sides of your animal’s body. The left-hand driveline is fed over the index finger and held by the thumb, and then falls down through the palm. To set the bend for the leg yield (opposite from the way your equine will be tracking), shorten the inside rein and hold it steady. Not too much of a bend—you just want to be able to see his eye on that side. Then squeeze and release the directing (right-hand) driveline to indicate that you want him to move in the direction you are squeezing and releasing. Be sure to give plenty of release between pulls so he doesn’t go too far sideways at first. This should be a leg yield action and not a “side pass.” The “side pass” will come later, as he better understands what you want. If he doesn’t follow your leading rein, you can encourage him to move over by tapping him gently on his opposite side. It can be very awkward at first, but with time and patience, these movements (both his and yours) will continue to improve.
Only after he is light and responsive to all commands in the round pen and he ground-drives well in the open arena, should you mount him and begin riding in the round pen. When he is light and responsive in the bridle in the round pen, you can then ride in the open, but continue to work in the open arena on perfecting his technique and his responsiveness in the snaffle bit.
You need to be willing to spend the time to teach these things slowly and in an order that will make sense to your equine, so he is not faced with learning too much too quickly. As you have probably already experienced, when you hurry through this process, he may be able to do certain movements, but he will not be responsive to your cues. Unresponsiveness is a sure sign that there has just not been enough time for the lessons he is learning to become his habitual way of responding.
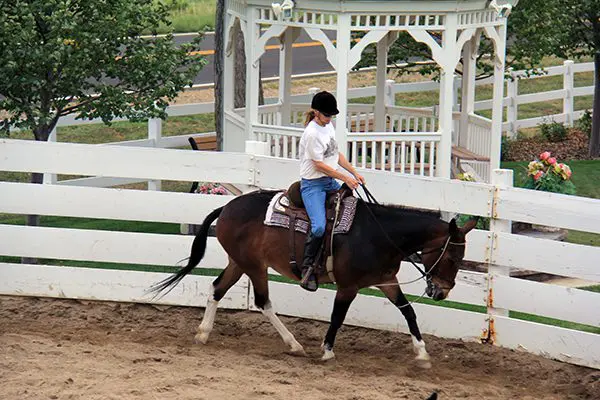 If an animal is trained with sequential, resistance-free training techniques and is given adequate time on groundwork training (a minimum of one year on the lead line and a second year on lunging and ground driving), he will warm up to other people more easily and will be more “sensible” than those animals that are not trained this way. Each new owner should take the time to review these techniques with newly acquired equines, just to create their own personal relationship with that animal and dispel the negativity of any prior relationships the animal might have had. Spending time doing simple basic groundwork training before actually riding allows your relationship with your equine to develop in a safe and healthy way. It will teach both you (the handler) and your equine how to communicate clearly and effectively. The exercises described in this article will condition your equine’s body so he can more easily carry a rider (whether the rider is balanced or not), and help your equine to be more capable of executing whatever demands the future may hold.
Remember that patience, kindness, respect and consideration from you will yield the same qualities in return from your equine. When you take the time to cultivate a good relationship with him, you will find that you have a much safer and happier riding and driving companion.
To learn more about Meredith Hodges and her comprehensive all-breed equine training program, visit LuckyThreeRanch.com, MEREDITH HODGES PUBLIC FIGURE Facebook page, or call 1-800-816-7566. Check out her children’s website at JasperTheMule.com. Also, find Meredith on Pinterest, Instagram, MeWe, YouTube and Twitter..
Covered in TRAINING MULES & DONKEY: A LOGICAL APPROACH TO TRAINING, TRAINING WITHOUT RESISTANCE, EQUUS REVISITED and A GUIDE TO RAISING & SHOWING MULES at www.luckythreeranchstore.com.
© 2015, 2016, 2020, 2024 Lucky Three Ranch, Inc. All Rights Reserved.

MULE CROSSING: Good Basic Training Includes Common Sense, Part 2
By Meredith Hodges
Proper training is much more than just teaching your equine to do “movements.” You are conditioning his body so he can do those movements easily, which in turn produces an equine with a happy and healthy working attitude. In order to do this, you need to be prepared to spend plenty of time during the leading stage of training both on flat ground and then over obstacles, conditioning the “core” muscles that support your animal’s skeletal frame. When training any equine for saddle or driving, you will need to spend an adequate amount of time on correctly conditioning his body. To assure that there is no undue stress on his body, your equine should be at least three years of age when a rider is introduced. If you look at the configuration of the equine spine, it’s easy to see how important it is to strengthen the muscles that support the tall, finger-like spinus processes that protrude from the equine’s interlocking vertebrae—these spinus processes are what a rider actually sits on and must be supported along the topline by strengthened musculature on both sides of the spine.
Approach to Obstacles, Stage One:
At this stage, you need only focus on negotiating the obstacle: replacing fear with curiosity, instilling trust and confidence, and just getting your equine through the obstacle. When doing obstacles on the 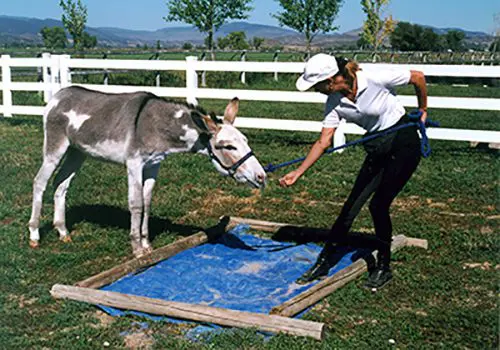 lead line, keep in mind that you are not only teaching your equine to negotiate an obstacle, you are also conditioning the muscles (especially the ones that are closest to the bones) while, at the same time, teaching balance, coordination and self control. In showmanship training, you focused on strength and balance on the flat ground. While working with obstacles on the lead line, you will now begin to add coordination during this second phase of obstacle training. Remember: Do not put obstacles in your equine’s stable area and/or living quarters, in an attempt to make him “live” with the obstacle. This only serves to create insensitivity and in some cases, cause greater fear. The stable area should always be your animal’s resting place, just as our bedrooms are for us—a place of rest, relaxation and privacy.
If your equine is not easily approaching an obstacle such as a bridge, tarp, ground poles, etc., do not wait and withhold the reward until he actually makes it over or through the obstacle. Lower your expectations and go back to your lead line training: Walk to the end of your lead line, hold it taut and wait for your equine to step toward you. Even if he only takes one step at first to comply with your request, give him his crimped oats reward, tell him how brave he is being and praise him for his accomplishment. Let him settle, leave him where he is and walk to the end of the lead line again, getting even closer to the obstacle, and repeat the same routine. When you finally reach the obstacle, step up onto the bridge or tarp, or over the first ground rail, and ask again. Stop him if he tries to run through or over the obstacle and reward him for standing with his front feet on the obstacle. You might even want to back him up, and then reward him for doing the back up before proceeding forward. Next, lead your animal away from the obstacle and then come back, requesting that he put all four feet onto or into the obstacle. Repeat this procedure again and ask him to negotiate the entire obstacle slowly and in control. Breaking the obstacle down into small steps like this will facilitate your animal’s body control and help him to learn to keep his attention on you—and don’t forget your verbal commands.
 When your equine is more willing to come through the obstacle, you can regain your showmanship position, with your left hand carrying the lead line and your right arm extended in front of you, pointing toward the direction in which you will be going. When he is finally listening and will follow at your shoulder over or through the obstacle and stop or back up at any point during the negotiation of the obstacle, you can then turn your attention to whether he is actually traveling forward and backing up in a straight line, and whether or not he is stopping squarely. Do this the same way first on the lead line, then much later in the drivelines and, lastly, under saddle. How he negotiates the obstacles will have a direct bearing on how his muscles are being conditioned and how his balance and coordination are being affected so don’t be afraid to ask for more precision going forward.
Approach to Obstacles, Stage Two:
Now you will be going through the same obstacles, but with body strengthening and coordination in mind. Since, in the beginning, balance is very sketchy at best, you should break all of the following obstacles down into very small steps.
 Ground Rails and Cavalletti: Four ground rails and four cavalletti are good tools for straight, forward exercises that will promote stretching of the body in true and correct forward motion. These exercises will also develop rhythm, balance, cadence and suspension within the gaits, first on the lead line, and then later during ground driving and under saddle. Ground rails and cavalletti are also great for enhancing your ability to stay in stride with your animal. You should first do the exercises over the ground rails. Then, for jumping training, you can graduate to the 6″ cavalletti setting, then the 12″ cavalletti setting and, finally, the 18″ cavalletti setting. Your equine will learn to suspend and place his feet in a balanced and deliberate fashion while you learn to do the same. Getting in rhythm with your animal’s stride will improve your equine training experience and make things a lot easier and safer.
The Bridge: The bridge obstacle will help develop your animal’s eye/hoof coordination. Those first steps onto a bridge will determine how the rest of the body will follow. Approach the bridge, and then  stop at the base, square up your equine and stand for a few seconds. Then ask him to put his two front feet on the bridge, square up and, again, stand for a few seconds. Next, ask him to put all four feet on the middle of the bridge, square up and stand still for a few seconds. Now ask him to take his two front feet off the bridge and leave the two back feet on it and square up again. Most equines can do the first few positions pretty easily, but when the front feet go off the bridge, the equine’s balance is often thrown forward and they find it very difficult to stop in this position. If he is able to sustain this position for several seconds before you give the command to continue forward, he has completed the bridge work.
If your animal is having difficulty with this position on the bridge with you in the showmanship position, you can use a second technique when coming off the bridge. Stand directly in front of your equine and hold the halter on both sides of his face to help keep him from falling forward. This is one time when it is preferred to have a nylon webbed halter that fits his face. If he has been properly trained up to this point, he should not run over you, but will accept the aid of your arms to help support him in the correct position. This is one time when it is acceptable to violate the rules of being in the “danger zone,” which is the area directly in front of your equine. The equine that is trained in this manner will be able to negotiate the bridge and halt at any time upon request with no visible effort (i.e., no change in stride, balance, rhythm or cadence) and will learn to wait and listen carefully to each of your commands, first on the lead line, and then later on the drivelines and finally under saddle.
To learn more about Meredith Hodges and her comprehensive all-breed equine training program, visit LuckyThreeRanch.com, MEREDITH HODGES PUBLIC FIGURE Facebook page, or call 1-800-816-7566. Check out her children’s website at JasperTheMule.com. Also, find Meredith on Pinterest, Instagram, MeWe, YouTube and Twitter.
Covered in TRAINING MULES & DONKEY: A LOGICAL APPROACH TO TRAINING, TRAINING WITHOUT RESISTANCE, EQUUS REVISITED and A GUIDE TO RAISING & SHOWING MULES at www.luckythreeranchstore.com.
© 2015, 2016, 2020, 2024 Lucky Three Ranch, Inc. All Rights Reserved.

MULE CROSSING: Getting Down with Minis, Part 5
By Meredith Hodges
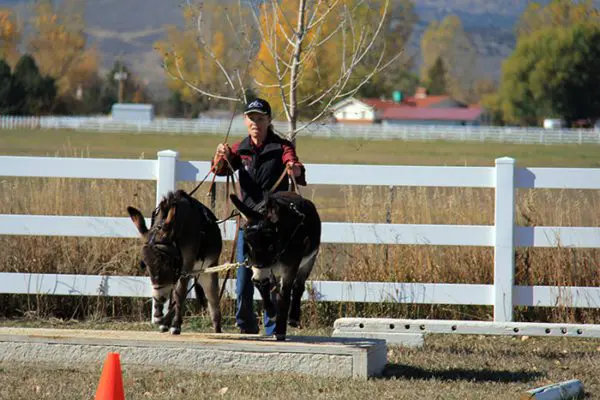 In Part 1 of Getting Down with Minis, you learned how to begin the relationship with your miniature equine in a positive and natural way that fosters good behavior and a solid relationship between you. You also learned the importance of getting down to your mini’s eye level so that he can make eye contact with you, which discourages striking, jumping on you and other bad behaviors that are common when working with miniature equines. In Part 2, I discussed how important it is to successfully complete the tasks in Part 1 before moving on to Part 2 and explained why it is advisable to work minis in groups, as they perform better when they are with their friends. You also learned how to train minis to go over and around various obstacles. Remember that all of this is to be done with no expectations that may overwhelm your mini—it is better if you maintain an attitude of fun and games. In Part 3, we got down to some serious groundwork training so your mini can be used for the purpose of driving and showing in hand. He learned to lunge and to be ground driven in the round pen and in the open arena through the hourglass pattern and if part of a team, how to do these things as a team. In Part 4, you worked on obstacle exercises on the drive lines to increase strength and coordination.
The fifth and final part of this series will illustrate how you can keep things controlled and will help you to consistently set up an environment for success. NOTE: If you are training two minis, it is really just a matter of teaching each of them the same thing, but at each stage of the ground-driving and hitched lessons, you need to teach each mini separately first and then as a team.
These exercises will require an assistant, so ask someone you trust to help you. Make sure, each step of the way, that you tell your assistant clearly and specifically exactly what you need him or her to do. To begin, take your mini back to the round pen and review your previous ground-driving lessons (“walk,” “trot,” “whoa” and “back”) with an “S” turn through the middle in order to change directions. NOTE: Do not use the “reverse” command during these lessons. Do use the “back” command, but only to loosen the traces when detaching your mini from the tire. Attach a tire to the harness traces as a drag so your mini can get used to pulling weight behind him. To do this, first thread some baling twine through the slits at the ends of your traces to create “loops.” The slits in the traces are usually too narrow to allow a line to slide freely back and forth through them, but the baling twine will work well to accommodate this.
Next, take a piece of flat nylon stripping such as a strip of lunge line and tie it to a tire with about six to eight feet of extra line. This extra line will be threaded through the baling twine loops and then be handed back into the hands of your assistant. Now ask your assistant to walk alongside and slightly behind you, holding on to the piece of nylon stripping as you ground drive your mini. Always make sure your assistant is walking on the side away from the fence so as not to trap him or her if things go wrong. If, for any reason, your mini bolts, tell your assistant to simply let go of the nylon stripping. Your mini will quickly be released from the tire. NOTE: If training a team, do the “drag” exercise with each single mini first before exercising them as a team. Working one mini at a time first will help to avoid any major wrecks that can cause your mini(s) any anxiety or distrust.
 Spend as many tire drag lessons as it takes in the round pen to be sure your mini is driving easily and smoothly before graduating him to the open arena with the tire. Just as you did with simple ground driving, once he is ready, let your mini drag the tire while ground driving him through two rotations of the hourglass pattern, and then cross the long diagonal and do two more rotations in the opposite direction. Make halts often so rewards can be dispensed for a job well done. Do not make any abrupt turns or try to add speed before you are completely competent with the lines and your mini is responding obediently. Ground driving is as much for you to learn good Reinsmanship as it is for your mini to learn to drive correctly. If training more than one mini, just tie whichever mini you’re not working with at the moment off to the side and have him wait his turn before ground driving the two as a team. The frequent halts with rewards will teach him to stay clam and remain still when asked.
 Before actually hitching your mini to the vehicle, be sure to check all harness straps and make sure they are correctly adjusted. While you do this, you will also be teaching your mini (or minis if a team) to stand still in the cross ties, which will make hitching much easier. Checking all harness straps can be done anywhere that your fences or hitch rails are close enough together to accommodate the cross ties and still allow enough room for a single mini (or team) and the vehicle. During this lesson, all you need to do is put on and adjust the harness, hitch to your vehicle, have your mini (or team) stand quietly while being rewarded and then take everything back off. Before leading your mini(s) away from the vehicle, spend some time rewarding again for standing still and staying in position.
To begin the next lesson, first review the steps in the previous lesson and make sure your mini (or minis in the case of a team) is standing quietly in the crossties before harnessing to the vehicle. When ground driving a single animal, ask  your assistant to stand in front and to the side of your mini with a lead rope attached to a ring on the noseband (not the bit) of your mini’s harness bridle. When ground driving a team, you will need to use two assistants. Ask each assistant to stand on either side of the team. Once your mini is harnessed, and when you are seated in the vehicle and ready to go forward, ask your assistant to unsnap the cross ties and release your mini while your assistant stands at his head. Now ask your mini to “walk on.” Let him go just a few steps and then ask him to “Whoa.” If your mini does not stop promptly, your assistant can help by pulling back on the lead rope with a pull/release motion while, at the same time, you pull back on the drive lines with a pull/release motion. When he does stop, have your assistant give him his oats reward. Let your mini settle before asking him to back a couple of steps and halt again. Reward him for halting and end the lesson there. The object is to allow your mini enough time to understand what you are trying to teach him and respond accordingly so he can be rewarded without spending so much time that he gets bored and sucks you into a confrontation.
Now your mini is ready to go to the open arena to be driven for the very first time. For the sake of safety, use your assistant (or, in the case of a team, assistants) during lessons until your mini (or team) is driving easily and responding to all of your cues and verbal commands promptly and calmly. Using an assistant helps to guide your mini through his lessons when he can no longer see you out in front. Your assistant will also help your mini to drive forward with confidence, as well as being on-hand to aid you if your mini has problems with turns and backing. Using an assistant also allows you more time to perfect your Reinsmanship and your ability to plan your movements in an organized and logical way.
 When your mini is hitched to a vehicle, make a very large hourglass pattern to accommodate your vehicle. His familiarity with this pattern will help him to feel calm and gain confidence while being driven. Every time you end a lesson, keep your assistant at your mini’s head until your mini is fully unhitched from the vehicle. NOTE: Always remove the harness bridle last. Once he is unhitched, make your mini stand where he is while you come to him, then reward him and lead him away. This is how he will learn to wait for you and will not become antsy and uncontrollable. Routinely practicing good manners, setting up an environment for success and approaching your mini with a calm and deliberate attitude will all help him to become a quiet, safe and reliable driving animal.
To learn more about Meredith Hodges and her comprehensive all-breed equine training program, visit LuckyThreeRanch.com, MEREDITH HODGES PUBLIC FIGURE Facebook page, or call 1-800-816-7566. Check out her children’s website at JasperTheMule.com. Also, find Meredith on Pinterest, Instagram, MeWe, YouTube and Twitter.
Covered in TRAINING MULES & DONKEY: A LOGICAL APPROACH TO TRAINING, TRAINING WITHOUT RESISTANCE, EQUUS REVISITED and A GUIDE TO RAISING & SHOWING MULES at www.luckythreeranchstore.com.
© 2013, 2014, 2015, 2016, 2019, 2024 Lucky Three Ranch, Inc. All Rights Reserved.

MULE CROSSING: Getting Down with Minis, Part 4
By Meredith Hodges
 In Part 1, you learned how to begin the relationship with your miniature equine in a positive and natural way that fosters good behavior and a good relationship between you. You also learned the importance of getting down to your mini’s eye level so that he can make eye contact with you, which discourages striking, jumping on you and other bad behaviors that are common when working with miniature equines. In Part 2, I discussed how important it is to successfully complete the tasks in Part 1 before moving on to Part 2, and I explained why it is advisable to work minis in groups, as they perform better when they are with their friends. You also learned how to train minis to go over and around various obstacles. Remember that all of this is to be done with no expectations that may overwhelm your mini—it is better if you maintain an attitude of fun and games. In Part 3, we got down to some serious groundwork training so that your mini can be used for driving and showing in hand. He learned to lunge and to be ground driven in the round pen and in the open arena through the hourglass pattern and, if part of a team, how to do these things as a pair.
In Part 4, you will learn how toteach your mini to pull correctly and in good equine posture in the hourglass pattern, but without actually pulling anything such as a tire, log or vehicle. We are only concerned with his moving forward in good equine posture while initiating thrust or “impulsion” from the hindquarters. (This training is very similar to a human learning to “lift” correctly using his legs instead of his back.). In order to learn how to do this, your mini will need to be equipped with my self-correcting restraint for equines called the “Elbow Pull.” (How to make the “Elbow Pull” is covered in my Equus Revisited DVD.) When he is in good equine posture, the “Elbow Pull” will remain loose, but if he tries to raise his head too far, it will restrict that movement so that he cannot hollow his neck and back and begin to build muscle in this undesirable posture. The “Elbow Pull” does not pull his head down. Rather, it gives him something to lean against for a few strides at a time until he is able to resume good equine posture and self-carriage again. At first, when the muscles are not able to sustain good posture at all times, he will move in and out of good posture. 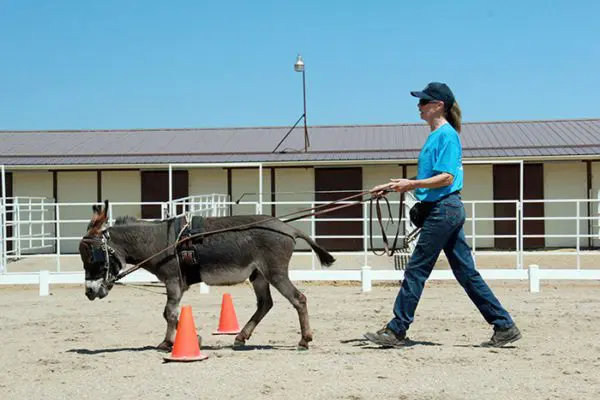 The “Elbow Pull” supports good equine postural balance and acts much like the balance bar that is used by a ballet dancer until she or he is strong enough to hold any postural position in the middle of the room without support. This becomes very important when your mini is in draught (pulling an obstacle or vehicle) in order to make sure he will pull correctly, and symmetrically condition his body’s muscles to avoid future injury to the internal structures within his body.
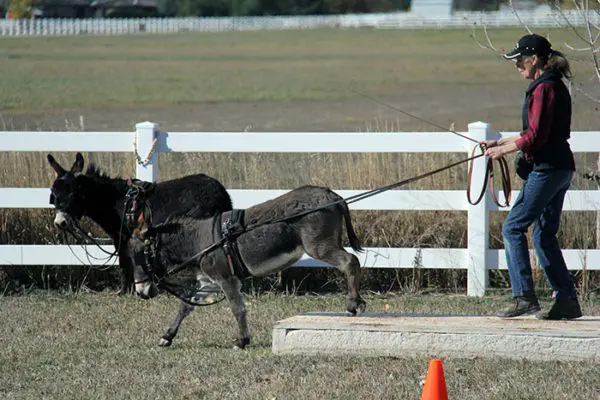 By now your mini has already learned to ground-drive the hourglass pattern and has negotiated the obstacle course on the lead line. There are still more obstacle exercises you can do to strengthen your mini and improve his strength and coordination to prepare him for driving before he is ever hitched to a cart or carriage. Now he is ready to learn to ground-drive the obstacle course. The obstacle course exercises will increase his confidence in being in the lead and help him to go bravely ahead of you upon command.
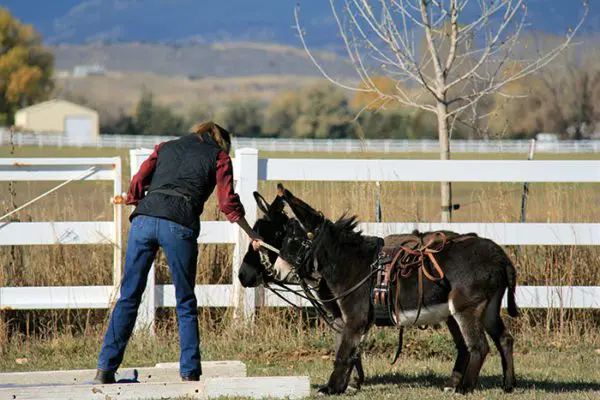 Approach each obstacle on the drive lines and if he balks and refuses to go forward, just stop, gently lay the lines over his back and then lead him through. Then go back and try again on the drive lines. In order to alleviate any fear or confusion your mini may feel, remember to “get down” to his eye level whenever possible. NOTE: Don’t forget to always reward him with his favorite crimped oats for compliance.
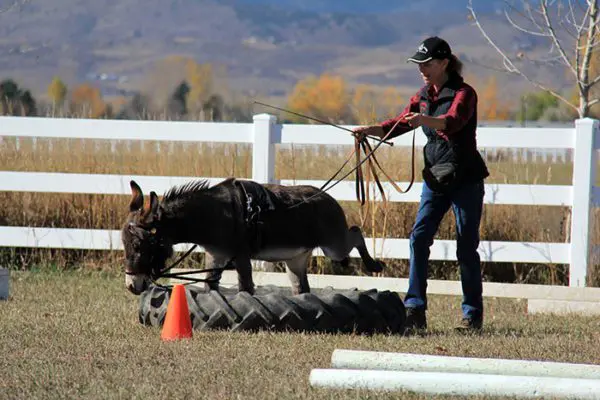 Once your mini is willing to go straight through the obstacle with a calm attitude and no balking, you can then begin to break each obstacle down into smaller, easier steps, rewarding and praising him for each success. If he is apprehensive about any obstacle, you should lead him through these smaller steps with frequent halts before attempting to ground-drive him through. He may need these detailed “explanations” before he is willing to “take the lead.”
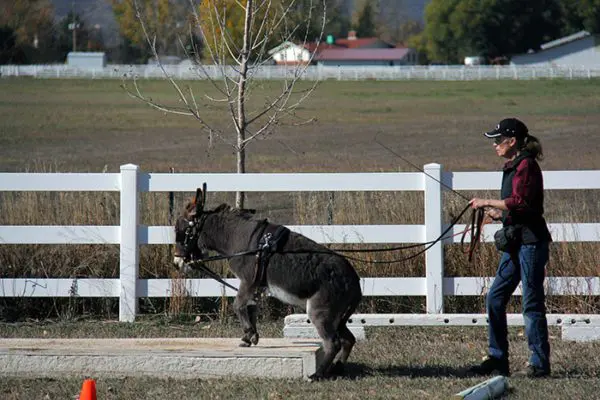 If you are training him on the bridge obstacle, go to the landing, stop, square up, put the lines up and reward, then resume your position and drive him up onto the bridge, but with only his front feet on the bridge, and then stop again. Put up the lines, walk forward and reward. Then drive him completely onto the bridge, stop, square up, put up the lines and reward. If he is having problems squaring up on the lines, then just square him up when you get to his head before you reward him.
 The most difficult move your mini will have to do is to put two front feet on the ground while he leaves two back feet on the bridge. Just as you did on the lead line, hold steady on the drive lines and, if necessary, before you ask him to ground-drive ahead of you and hold the position, walk forward to help him to first get into and hold the position. Be sure to give him his reward once he is in the correct stance. You want him to succeed with every effort and you should be ready and willing to help him whenever he really needs it.
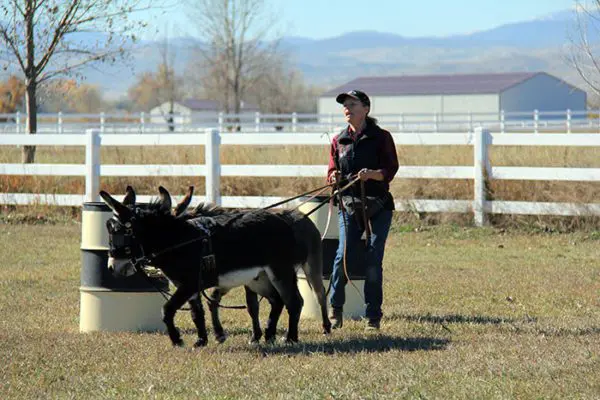 You can ask him to take full responsibility for perfect balance and negotiation of the obstacle later. For now, your primary task is to help him get through the obstacles successfully and with as little help as possible. Breaking obstacles down into smaller steps will increase his balance, coordination, agility and self-confidence. Even after he has become competent while hitched to the vehicle, you can use ground-driving obstacle exercises in the “Elbow Pull” to finesse his movements during future lessons. It will add variety to your mini’s lessons and continue to promote health, coordination and good equine posture.
To learn more about Meredith Hodges and her comprehensive all-breed equine training program, visit LuckyThreeRanch.com, MEREDITH HODGES PUBLIC FIGURE Facebook page, or call 1-800-816-7566. Check out her children’s website at JasperTheMule.com. Also, find Meredith on Pinterest, Instagram, MeWe, YouTube and Twitter.
Covered in TRAINING MULES & DONKEY: A LOGICAL APPROACH TO TRAINING, TRAINING WITHOUT RESISTANCE, EQUUS REVISITED and A GUIDE TO RAISING & SHOWING MULES at www.luckythreeranchstore.com.
© 2013, 2014, 2015, 2016, 2019, 2024 Lucky Three Ranch, Inc. All Rights Reserved.


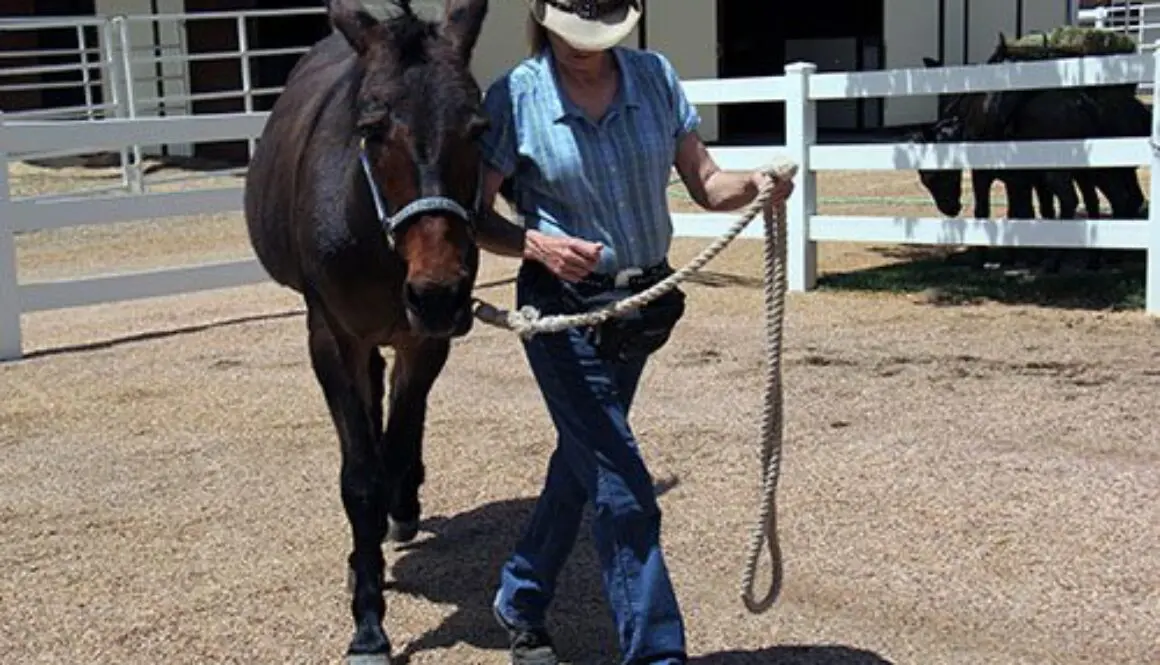
LTR Training Tip #58: Getting in Sync on the Drive Lines
Good posture, consistent rhythm and regularity of footfall patterns are key to achieving calmness in your equine. After getting into sync with your equine on the lead rope by matching steps with his front legs, getting into sync with his back legs will help him to stay calm while ground driving him from behind at the walk.

MULE CROSSING: LTR Training Mules & Donkeys: General Information
By Meredith Hodges
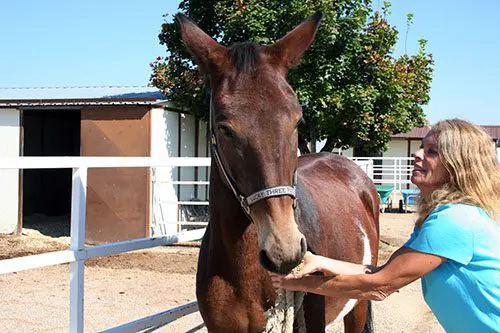 Mules and donkeys are very gregarious and affectionate animals and have a need to really bond with their owners. It is important to know the steps involved in this bonding process to get the best from your mule or donkey, and even horses. Routine management and our training process called Behavior Modification (Reward System Training) will make your time together safe and enjoyable.
When mules and donkeys are treated with patience and kindness, they can be as capable as horses in all kinds of equine activities. The fun you can have with your mule, or donkey, is only limited by your own imagination and your approach to training. Mules can do…and donkeys, too!
Since mules and donkeys bond to the person who trains them, we encourage owners to do the training themselves with the help of our resistance free video training series that provides a solid base for any equine activity.
This series will help you get the best from your equine whether he is large or small, a donkey, mule, or even a horse. It is designed like grade school is for children.
Although we begin our DVD series with Foal Training, no matter how old, you should always begin training with imprinting and move forward from there with attention to feed as well. This will insure a positive introduction and will help to build a good relationship with your equine. Our methods are meant to be done in a sequence and taking shortcuts or changing our method in some way will not yield the same results. After many years of training for other people, I have found that equines, especially mules and donkeys, bond to the person who trains them. When they go away to other people, they do not get the benefit of this bonding and can become resistant over time when they return home. After all, you wouldn’t ask someone else to go out and make a friend for you, would you? This is the primary reason I put my entire training program in books and videos, in a natural order like grade school is for children, for people to use as a resistance-free correspondence training course instead of doing clinics and seminars. People are encouraged to use the series and to contact me via mail, email or telephone for answers to any questions. This way your questions can be answered promptly.
No matter how old or how well trained the equine, they still need time doing the simplest of things to get to know you before they will learn to trust and have confidence in you. The exercises that you do should build the body slowly, sequentially and in good equine posture. No human or equine is born in good posture. It is something that needs to be taught and practiced repetitively if it is to become a natural way of moving the body. When the body is in good posture, all internal organs can function properly and the skeletal frame will be supported correctly. Just as our children need routine, ongoing learning and the right kind of exercise while they are growing up, so do equines. They need boundaries for their behavior clearly outlined to minimize anxious behaviors and inappropriate behavior, and the exercises that you do together need to build their strength and coordination in good equine posture. The time spent together during leading training and going forward builds a good solid relationship with your equine and fosters his confidence and trust in you because you actually help him to feel physically better. A carefully planned routine and an appropriate feeding program is critical to healthy development.
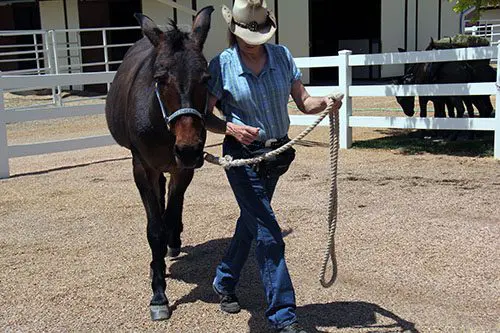 Most equines never experience core muscle strength and this becomes even more important as they age. We do leading training for a full year to not only get them to learn to lead and to develop a good relationship with them, but also to develop good posture and core muscle strength in preparation to carry a rider.
Leading lessons for postural strength and balance need only be done for 15-20 minutes once a week to be certain that they aren’t fighting balance problems later when you mount and ride. Even an older equine with previous training would still need this for optimum performance and longevity. During the time you do the leading training strengthening exercises, you should NOT ride the animal as this will inhibit the success of the preliminary exercises. If you ride while you do these exercises, it will not result in the same proper muscle conditioning, habitual behavior and new way of moving. The lessons need to be routine and done in good posture to acquire the correct results. Hold the lead rope in your LEFT hand, keep his head at your shoulder, match your steps with his front legs, point in the direction of travel with your right hand and look where you are going while you track straight lines, gradual arcs and square him up with equal weight over all four feet EVERY TIME you stop. We are building NEW habits in their way of moving and the only way that can change is through routine, consistency in the routine and correctness in the execution of the exercises. Since this also requires that you be in good posture as well, you will also reap the benefits from this regimen. Along with feeding correctly (as described below), these exercises will help equines to drop fat rolls and to begin to take on a more correct shape and become strong in good posture.
 Today’s general horse training techniques do not generally work well with mules and donkeys. Most horse training techniques used today speed up the training process so people can ride or drive sooner and it makes the trainers’ techniques more attractive, but most of these techniques do not adequately prepare the equine physically in good posture for the added stress of a rider on his back. Mules and donkeys have a very strong sense of self preservation and need work that builds their bodies properly so they will feel good in their new and correct posture, or you won’t get the kind of results you might expect. Forming a good relationship with your equine begins with a consistent maintenance routine and appropriate groundwork. Most equines don’t usually get the well-structured and extended groundwork training on the lead rope that paves the way to good balance, core muscle conditioning and a willing attitude. This is essential if he is truly expected to be physically and mentally prepared for future equine activities. With donkeys and mules, this is critically important.
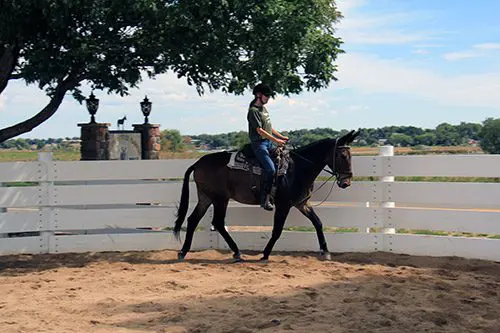 The equine should be at least four years of age when the rider is finally introduced to insure that there is no undue stress on his body at the earlier stages of development. Equines generally run through the bit and exhibit other bad behaviors because they become anxious, lose their balance and don’t really have complete physical control of their bodies. They are unable to physically comply with your wishes without losing their balance, which makes them nervous and causes resistance. Changing bits or rushing through groundwork training so you can ride or drive sooner NEVER really works. Training is more than just teaching the equine to do “movements.” You should be creating an environment for success and conditioning his muscles to do movements easily and with minimal stress. This produces an equine with a happy and healthy working attitude. In order to get your mule to be soft and submissive in the snaffle bit, you need to be prepared to spend six months on flatwork leading training (also known as Showmanship training for strength in good posture) and another six months leading through obstacles (turning fear into curiosity and then adding coordination to his strength and balance) before moving to the round pen work in DVD #2. Longears and horses do much better in a number of ways when you are patient enough to do this: a calmer attitude because they know what to expect, development of symmetrical muscle strength in good equine posture, a better response to verbal commands, better balance, better coordination and the ability to perform correctly.
The information about equine management and training materials that we offer are listed below.
Training Mules and Donkeys: A Logical Approach to Longears is the first book to be published, has a more abbreviated view of the overall training process and general information about the psychology of mules and donkeys.
The book, Donkey Training is basically the same as DVD’s #9 and #10 without the benefit of the moving pictures (and has bonus information that the DVDs do not have) and illustrates the things that are different about training donkeys as opposed to horses and mules. Donkeys often do things in a different order and sometimes, they don’t need to learn to lunge at all until much later in their training…after they are already going well under saddle, or in harness. This DVD is designed to be used in conjunction with DVD #1 through DVD #8 when training donkeys.
The book, A Guide to Raising & Showing Mules has a lot of valuable general information that complements the resistance free DVD training series with more about breeding, mare and foal care, and general mulemanship and maintenance issues. It is the perfect complement to the video series and a must-have for beginners and 4-H projects.
In DVD #1: Foal Training, you will not only be imprinting your animal and training for the simple tasks such as tying and leading, but you will also learn how to be prompt and appropriate with your rewards. The exercises will start your equine on a program that will begin to strengthen his muscles and promote coordination. Imprinting is not just something you do with a foal and then it’s done. Imprinting is the way you touch and handle your animal every time you are with him throughout his entire life. As you learn how he likes to be touched, you can use this to help him to stay calm and accepting. How you touch him will determine whether, or not, he develops confidence and trust in you! When your equine is approached with patience and kindness, and is rewarded for standing quietly, it will be easier to handle him for such things as deworming and doctoring and he will be more willing to stand still to be mounted. The leading exercises in this DVD will start your equine on a program that will begin to strengthen his muscles and promote balance and coordination.
In DVD #2: Preparing for Performance: Groundwork, you will begin your lunging and ground driving lessons. The exercises will increase in their demand and begin to develop more bulk muscle in preparation for work in harness and riding. Equines will be introduced to the snaffle bit and other tack in this DVD. We use English bridles with a noseband and drop noseband over a mild snaffle bit right from the beginning, so they never even try to get their tongue over the bit. This teaches them to accept the bit easily and to form the good habit of taking contact with the bit instead of avoiding it and allowing bad habits to start. It is easier to prevent a bad habit than it is to try to break it later.
You will see how putting the animal in the correct frame (or posture) from the beginning in the round pen with what we call the “elbow pull” enables him to build his muscles correctly and symmetrically throughout his body You will learn how your body language affects his movement in the round pen and on the drivelines. Your equine may begin to be aggressive for his reward and you will learn how to set limits to these aggressive behaviors to set the stage for a polite and well-mannered equine. If biting, or kicking, has been a problem in DVD #1, you will learn how to correct these behaviors in DVD #2.
DVD #3: Preparing for Performance: Driving, provides all the information you need to safely train your equine to drive. It covers carts and carriages, hitching training, Reinsmanship, Pleasure Driving, Obstacle Driving, working in harness, lateral exercises, obstacles, driven dressage and driving rules. You can begin this DVD after you have completed the foundation work in DVD’s #1 and #2.
DVD #4: Basic Foundation for Saddle. If you don’t wish to drive, you can go straight to DVD #4 and begin your equine’s riding training in a natural and non-stressful manner that eliminates adverse behaviors such as bucking or running off. We address both the needs of the rider and the equine as a team focusing on the right approach, good balance and coordination of both equine and rider. You can begin this DVD after you have completed DVD’s #1 and #2.
When you finally mount your equine and start riding, the only thing left for him to do is to get used to your shifting weight on his back and the new leg cues he will feel on his sides. Because he has learned to carry his own body in good, strong equine posture and has already learned what rein cues mean through ground driving, he will be better able to do all the different moves that you ask of him under saddle without being generally overwhelmed by too many things happening all at once. As you progress under saddle, you will be better able to perfect your own riding skills and your equine will become lighter in the bridle and more responsive to your cues. You both will not have to deal with the weakness, awkwardness, confusion and disobedience that originate from a lack of preparation for the tasks.
In DVD #5: Intermediate Saddle Training, we help the rider fine tune his own skills and begin to cultivate a harmonious rapport between equine and owner with fun, safe and simple exercises that will enhance your riding experience whether it is for show, or pleasure. You can begin this DVD after you have completed DVD’s #1 and #2 and #4.
DVD #6: Advanced Saddle Training will begin to prepare the rider for specific disciplines and help them to make choices about what they might enjoy more. It demonstrates how the simple elements of Dressage are the basis for all equine disciplines including Gymkhana, Reining, Cutting, English and Western pleasure, Trail, or even simply weekend trail riding. This kind of training is not just for show, but to keep both of you safe and happy during your time together. You can begin this DVD after you have completed DVD’s #1 and #2, #4 and #5.
DVD #7: Jumping gives the owner the opportunity to learn the fundamentals of jumping and condition their equine in a safe and methodical manner and… how to ride, build and evaluate jump courses. It covers exercises to prepare your equine to carry him safely over any obstacle, multi-level terrain or jumps. You can begin this DVD after you have completed DVD’s #1 and #2, #4, #5 and #6.
DVD #8: Management, Fitting & Grooming. Of course, your equine needs to be fed and maintained properly to get the best response from him during training and this is done in DVD #8. We also offer grooming tips and more advanced lessons in showmanship at the end of this video.
DVD’s #9 and #10 cover techniques that are specific to donkeys and these two DVDs are designed to be used in conjunction with the other video tapes.
DVD #9: Keys to Training the Donkey: Introduction and Basic Training covers groundwork technique that is specific to donkeys, how to train jacks to breed mares for mule production and how to measure your animal for athletic potential and should be used in conjunction with DVDs #1 and #2.
DVD #10: Keys to Training the Donkey: Saddle Training & Jumping covers saddle training and jumping and should be used in conjunction with DVD’s #4 through #7. You can also purchase our book, Donkey Training which is the same as DVD’s #9 and #10, but sometimes having the moving pictures can be more helpful than still shots. Also, if you want to teach your donkey to drive, you would also need DVD’s #1, #2, and #3.
Training Without Resistance (DVD’s #1 – #7) and Equine Management & Donkey Training(DVD’s #8 – #10) are exactly the same as the electronic workbooks that accompany the DVDs. These two manuals are also helpful to those who cannot afford the DVD series or for those who would like a professionally published workbook. They are both translated into French, German and Spanish, so our non-English speaking friends can read along with the DVD series in their own language.
Equus Revisited: A Complete Approach to Athletic Conditioning. This comprehensive 4-part DVD and companion manual explains WHY it is so important to spend plenty of time on groundwork and development of the core strength of your equine. It covers multiple aspects of your equine’s care in great detail with a team of experts. It has a lot of special features about various subjects and in-depth explanations about the anatomy and physiology of the equine.
Why So Many Different Books and Videos?
I do offer Packages because each of the materials covers the elements of management and training from a different perspective with a different focus:
Training Mules and Donkeys: A Logical Approach to Longears book is an overview or summary of the entire training program
Donkey Training book is mostly about what things are done differently with donkeys than with horses and mules during the training process at each stage
A Guide to Raising & Showing Mules book includes management (housing, fences, disease, teeth, hooves, etc.), breeding and showing information with some regard to training
10-DVD Training Mules and Donkeys DVD series is a collection of the exercises that you DO in what order with each DVD representing roughly 1 year of training (except for 8, 9 and 10…see explanations in detail above)
Training Without Resistance manual is a collection of DVD’s #1 through #7 with extra detailed information in print and available in French, German and Spanish translations.
Equine Management & Donkey Training manual is a collection of DVD’s #8 through #10 with extra detailed information in print and available in French, German and Spanish translations.
Equus Revisited manual/DVD combo addresses WHY you are doing all the things that you do in the books and videos. If you had to pick just one book, I would suggest the Equus Revisited manual AND the companion DVD.
However, buying the Horse/Mule Complete Package (at a discount rather than buying products individually) would give you all you need because basically the Donkey Training book (that is left out) is exactly the same as DVD #9 and #10 and the Equine Management and Donkey Training manual only the manual has extra information that the book does not have.
 For more information and purchase of our products, you can call 1-800-816-7566 or visit our website at www.LuckyThreeRanch.com. Our website is also translated into French and Spanish for foreign convenience. Under “Training,” be sure to read archived articles posted in the “Mule Crossing” section, peruse commonly asked questions in “Ask Meredith,” get more details in our “Training Tips” and watch our new shows and past RFD-TV shows with Video on Demand. If you don’t have a computer, you can go to a library and use their computer, or ask a friend to help you out. Take time to peruse our Classified Ads section (this is a free service and an open forum, so we caution buyers to beware and check carefully). Under Resources, we post contact information for mule and donkey clubs and rescue organizations, keep you up to date about Equine Welfare in the news and heavily support Therapeutic Riding. Click our Homepage links for YouTube, Facebook and Twitter. And, don’t forget to check out our children’s website at www.JasperTheMule.com. Join the American Donkey & Mule Society (www.lovelongears.com, adms@lovelongears.com) to receive their bimonthly magazine with even more valuable information for a mere $27/yr. Learn together, enjoy the time with your equine and excel together!
To learn more about Meredith Hodges and her comprehensive all-breed equine training program, visit LuckyThreeRanch.com, MEREDITH HODGES PUBLIC FIGURE Facebook page, or call 1-800-816-7566. Check out her children’s website at JasperTheMule.com. Also, find Meredith on Pinterest, Instagram, MeWe, YouTube and Twitter.
Covered in TRAINING MULES & DONKEY: A LOGICAL APPROACH TO TRAINING, TRAINING WITHOUT RESISTANCE and EQUUS REVISITED at www.luckythreeranchstore.com.
© 1998, 2016, 2024 Lucky Three Ranch, Inc. All Rights Reserved.


