By Meredith Hodges
My philosophy is based on the principle that I am not, in fact, “training” donkeys and mules. Rather, I am cultivating relationships and establishing a lifestyle with them by assigning meaning to my body language that they can understand, while I learn what they are trying to indicate to me with their body language.
In the same way that my own level of understanding changes and grows over time, I believe that my animals’ understanding grows, too. In the beginning, the emotional needs of a young mule or any equine are different from those of an older animal. The young animal needs to overcome many instincts that would protect him in the wild, but are inappropriate in a domestic situation. In a domestic situation, the focus must be on developing friendship and confidence in the young equine, while establishing my own dominance in a non-threatening manner. This is accomplished through the use of a great deal of positive reinforcement early on, including gentle touches, a reassuring voice and lots of rewards for good behavior. Expressions of disapproval should be kept to a minimum and the negative reinforcement for bad behavior should be clear, concise and limited.
 As your young equine grows and matures, he will realize that you do not wish to harm him. Next, he will develop a rather pushy attitude in an attempt to assert his own dominance (much like teenagers do with their parents), because he is now confident that this behavior is acceptable. When this occurs, reevaluate your reward system and save excessive praise for the new exercises as he learns them. Note, however, that a gentle push with his nose might only be a “request” for an additional reward and a polite “request” is quite acceptable in building a good relationship and good communication with your equine. Allow the learned behavior to be treated as the norm, and praise it more passively, yet still in an appreciative manner. This is the concept, from an emotional standpoint, of the delicate balance of give and take in a relationship. As in any good relationship, you must remain polite and considerate of your horse, mule or donkey. After all, “You can catch more flies with sugar than you can with vinegar.”
Many details of both animal and trainer must also be considered from a physical standpoint. In the beginning, unless you are a professional trainer with years of proper schooling, you are not likely to be the most balanced and coordinated of riders, and you may lack absolute control over your body language. By the same token, the untrained equine will be lacking in the muscular coordination and strength it takes to respond to your request to perform certain movements. For these reasons, you must modify your approaches to fit each new situation, and then modify again to perfect it, keeping in mind that your main goal is to establish a good relationship with your animal and not just to train him. It is up to you, the trainer, to decide the cause of any resistance from your equine, and to modify techniques that will temper that resistance, whether it is mental or physical.
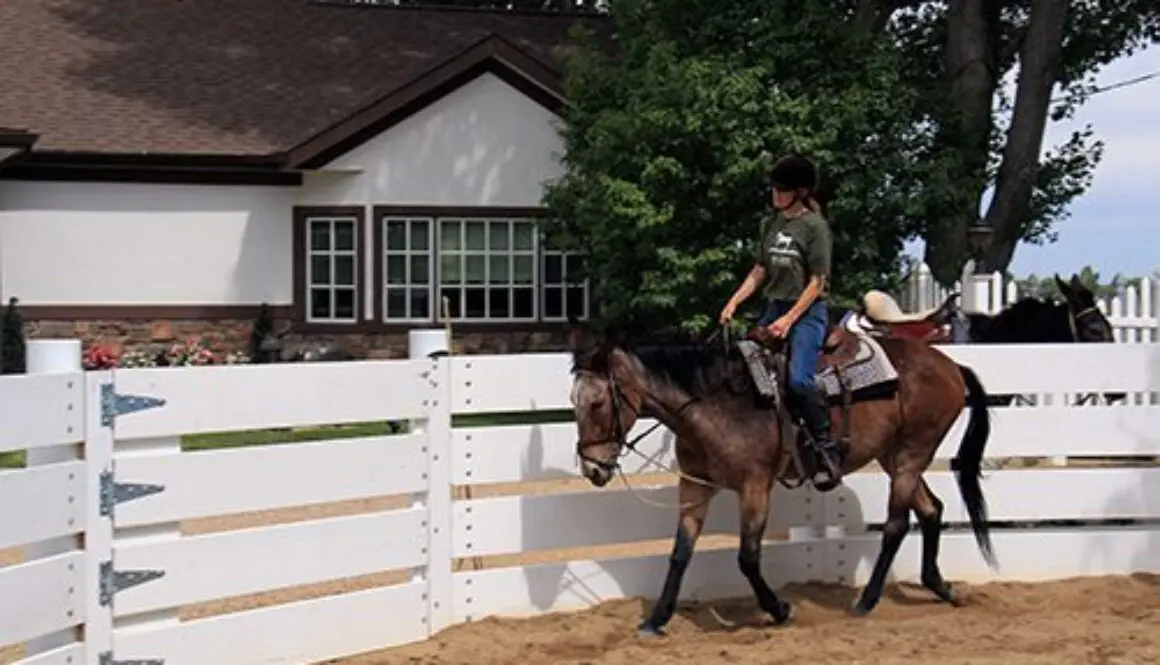
 Here is an example: I had a three-year-old mule that was learning to lunge without the benefit of the round pen. The problem was that he refused to go around me more than a couple of times without running off. I first needed to assess the situation by brainstorming all the probable reasons why he might keep doing such an annoying thing. Is he frightened? Is he bored? Is he mischievous? Has he been calm and accepting of most things until now? And, most important, is my own body language causing this to occur? Once I was willing to spend more time with regard to balance on the lead rope exercises and proceeded to the round pen to learn to balance on the circle, I soon discovered that developing good balance and posture was critical to a mule’s training. The reason my mule was pulling on the lunge line so hard was because he just could not balance his own body on a circle. Once I reviewed the leading exercises with him—keeping balance, posture and coordination in mind—and then went to the round pen to learn to balance on the circle, I noticed there was a lot less resistance to everything he was doing. I introduced the lunge line in the round pen and taught him how to circle with slack in the line. And, I realized that it was also important to time my pulls on the lunge line as his outside front leg was in suspension and coming forward. It didn’t make much difference in the round pen, but it was critical to his balance in the open arena so the front leg could be pulled onto the arc of the circle without throwing his whole body off balance. After learning that simple concept, lunging in the open arena on the lunge line was much easier and he did maintain the slack in the line while circling me.
 Like humans, all animals are unique, and like humans, each learns in his own way. Learn to be fair and flexible in your approach to problems. It is best to have a definite program that evolves in a logical and sequential manner that addresses your equine’s needs physically, mentally and emotionally. Be firm in your own convictions, but be sensitive to situations that can change, and be willing to make those changes as the occasion arises. This is what learning is all about for both you and your equine.
Just as mental changes occur, so do physical changes. As your equine’s muscles develop and coordination improves, you will need to do less and less to cause certain movements. For example, in the case of the leg-yield, you may have to turn your animal’s head a little too far in the opposite direction to get him to step sideways and forward. You will need to guide him more strongly with the reins and kick harder. As he becomes stronger and more coordinated, and begins to understand your aids, you can then start to straighten his body more toward the correct bend and stay quieter with your aids. Granted, you began by doing things the “wrong” way by over-bending your equine and by over-using your aids, yet you put him “on the road” to the right way. You assimilated an action in response to your leg that can now be perfected over time. In essence, you have simply told your equine, “First you must learn to move away from my leg, and then you can learn to do it gracefully.”
The same concept works in the case of the trainer or the rider. Sometimes you must do things that are not quite right in the beginning to get your own body to assimilate correctness. In the beginning, a rider cannot “feel” the hind legs coming under his seat, so he needs to learn by watching the front legs moving forward along with his hands. With practice, the rider will develop the “feel” and will no longer need to watch the front legs moving forward. Remember, we all perceive things a little differently, and our perception depends on how we are introduced to something and on whether or not we can understand or perform a task.
It is nearly impossible for the inexperienced horseman to perceive and control unused seat bones as a viable means of controlling the animal. Reins and legs are much more prevalent. In order to help such a rider perceive their seat bones more clearly, it sometimes helps to start by involving the whole lower body. Earlier in this book, I suggested that, to begin facilitating this action, you pedal forward in conjunction with the front legs. Connecting this action with the front legs of the equine allows you to “see” something concrete with which you can coordinate, plus the pedaling encourages necessary independent movement in the seat bones from side to side and forward. When you begin to “feel” this sensation, you can begin to understand that when the foreleg comes back, the corresponding hind leg is coming forward under your seat bone. When you understand this, both mentally and physically, you can begin to pedal backward, which will cause you to be in even closer synchronization with your equine’s body. As your leg muscles become more stable, actual movement in your own body becomes less, more emphasis is directed toward your center of gravity and more responsibility is placed on your seat bones. Using this approach, your muscles are put into active use and coordinated with your animal’s body through gymnastic exercises, which will eventually lead to correct positioning and effective cueing.
 Achieving balance and harmony with your equine requires more than just balancing and conditioning his body. As you begin to finish-train your equine, you should shift your awareness more toward your own body. Your equine should already be moving forward fairly steadily and in a longer frame, and basically be obedient to your aids. The objective of finish-training is to build the muscles in your own body, which will cause your aids to become more effective and clearly defined. This involves shedding old habits and building new ones, which takes a lot of time and should be approached with infinite patience. There are no shortcuts. In order to stabilize your hands and upper body, you need to establish a firm base in your seat and legs. Ideally, you should be able to drop a plumb line from your ear to your shoulder, down through your hips, through your heels and to the ground. To maintain this plumb line, work to make your joints and muscles in your body more supple and flexible by using them correctly. Don’t forget to always look where you are going to keep your head in line with the rest of your body.
As you ride your equine through the walking exercise, try to stay soft, relaxed and flexible in your inner thighs and seat bones. Get the sensation that your legs are cut off at the knees, and let your seat bones walk along with your animal, lightly and in rhythm with his body. If he slows down, just bend your knees and bump him alternately with your legs below the knees, while you keep your seat and upper legs stable and moving forward. To collect the walk on the short side, just bend both knees at the same time, bumping your equine simultaneously on both sides, while you squeeze the reins at the same time. Your legs should always have contact with your animal’s body in a light “hugging” fashion and real pressure should only come during the cues.
In order to help you stay over the middle of your equine’s back on the large circle, keep your eyes up and looking straight ahead. Shift your weight slightly to the outside stirrup, and feel it pull your inside leg snugly against your animal. Be sure that your outside leg stays in close to his barrel as you do this. On straight lines, keep your legs even, but on the arc, and look a little to the outside of the circle. This will bring your inside seat bone slightly forward, allowing your legs to be in the correct position for the circle. This technique is particularly helpful during canter transitions.
Most people feel that they do not balance on the reins as much as they actually do. If you balance on the reins at all, your equine will be unable to achieve proper hindquarter engagement and ultimate balance. To help shift the weight from the hands and upper body to the seat and legs, first put your equine on the rail at an active working walk. On the long side, drop your reins on his neck and feel your lower body connect with his body as you move along. You will need to tip your pelvis forward and stretch your abdominal muscles with each step in order to maintain your shoulder to hip plumb line. If your lower leg remains in the correct position, your thigh muscles will be stretched over the front of your leg from your hip to your knee. There is also a slight side-to-side motion as your animal moves forward that will cause your seat bones to move independently and alternately forward. There is no doubt that you can probably do this fairly easily right from the start, but to maintain this rhythm and body position without thinking about it takes time and repetition.
 When you are fairly comfortable at the walk, you can add some variation at the trot. Begin at the posting trot on the rail. When your equine is going around in a fairly steady fashion, drop your reins on his neck and continue to post. As you post down the long side, keep your upper body erect and your pelvis rocking forward from your knee. Your knee should be bent so that your legs are positioned on the barrel of your animal. Raise your arms out in front of you, parallel to your shoulders. If your equine drifts away from the rail, you need to post with a little more weight in your outside stirrup. As you go around corners, be sure to turn your eyes a little to the outside of the circle to help maintain your position. As you approach the short side of the arena, bring your arms back, straight out from your shoulders, and keep your upper body erect. As you go through the corners, just rotate your arms and upper body slightly toward the outside of your circle. When you come to the next long side, once again bring your arms in front of and parallel to your shoulders, and repeat the exercise.
Notice the different pressure on your seat bones as you change your arm position. When your arms are forward it will somewhat lighten your seat, while having your arms to the side will tend to exert a little more pressure. Consequently, you can send your equine more forward with your seat as you go down the long sides. On the short sides, you can shorten that stride with a little added pressure from the seat bones. When you wish to halt, put your arms behind you at the small of your back to support an erect upper body. Let your weight drop down through your seat bones and legs to total relaxation and an entire halting of movement. Remember to use your verbal commands—especially in the beginning—to clarify your aids to your animal. If your equine doesn’t stop, just reach down and give a gentle tug on the reins until he stops. Before long, he will begin to make the connection between your seat and your command to “Whoa,” and your seat will take precedence over your reins.
When you and your equine have become adept at the walk and the trot, add the canter. At the canter, however, keep your arms out to the side and rotate them in small backward circles in rhythm with the canter. Be sure to sit back and allow only your pelvis, your seat and your thighs to stretch forward with the canter stride. Keep your upper body erect and your lower leg stable from the knee down. Once your equine has learned to differentiate seat and leg aids in each gait and through the transitions on the large circle, you can begin to work on directional changes through the cones.
As you practice these exercises, you will soon discover how even the slightest shift of balance can affect your animal’s performance. By riding without your reins and making the necessary adjustments in your body, you will begin to condition your own muscles to work in harmony with those of your equine. As your muscles get stronger and more responsive, you will cultivate more harmony and balance with him. As you learn to ride more “by the seat of your pants,” you will encounter less resistance in your equine, because most resistance is initiated by “bad hands” due to an unstable seat. As you learn to vary the pressure in your seat accordingly, you will also encounter less resistance in your animal through his back. Having a secure seat will help to stabilize your hands and make rein cues much more clear to your equine. The stability in your lower leg will also give him a clearer path to follow between your aids. Riding a balanced seat is essential to exceptional performance.
To learn more about Meredith Hodges and her comprehensive all-breed equine training program, visit LuckyThreeRanch.com, MEREDITH HODGES PUBLIC FIGURE Facebook page, or call 1-800-816-7566. Check out her children’s website at JasperTheMule.com. Also, find Meredith on Pinterest, Instagram, MeWe, YouTube and Twitter.
Covered in TRAINING MULES & DONKEY: A LOGICAL APPROACH TO TRAINING, TRAINING WITHOUT RESISTANCE, EQUUS REVISITED and A GUIDE TO RAISING & SHOWING MULES at www.luckythreeranchstore.com
© 1990, 2016, 2017, 2024 Lucky Three Ranch, Inc. All Rights Reserved.
 Think of it in terms of teaching children. Children have difficulty learning and paying attention when they have not been eating in a healthy way or exercising properly, when the teacher is unclear in their delivery and the material does not flow together easily, when the teacher moves along too quickly, when there is too much repetition and when they have to stay in one position too long. When the teacher is more aware of the elements of learning, delivers the information in a logical and sequential manner with attention to mental and physical health, and provides solutions, the students will thrive!
 Leading training is not just teaching to follow and many people spend too little time on leading training. In leading training, the equine gets the benefit of isometric-type exercises that strengthen the muscles closest to the bone while you work on forward and backward straight lines, smooth arcs through the turns and square halts, all facilitating good balance and proprioception (body awareness). This promotes good core muscle strength that will enable your equine to move to the round pen stage of training and do remarkably well because he won’t be fighting his own awkwardness and lack of balance while trying to balance on the circle at all three gaits.
 When you walk, make sure your legs are following the movement of their front legs, stepping forward with your corresponding feet and not stepping any further forward than they do. When you stop, stop with your own feet together (in a balanced fashion), turn and face the equine’s shoulder and square up his feet every single time you stop. This causes the equine to be conscious about balancing weight over all four feet evenly that will result in the balance becoming steadier as the task demands and speed increases.
 compliance though all he has learned without you touching him. Next, we add the element of coordination during lead line training over obstacles. The first task of lead line obstacle training would be to introduce the obstacles and ask for reasonable negotiation of the obstacle to instill confidence in the equine and trust in you. The second stage would be to break the obstacles down into smaller steps to manipulate coordination and balance and to instill adequate self carriage through the obstacles.
 By the time you finally do ride, your equine will not only be strong, balanced and coordinated enough to do more complicated activities, but if you are unbalanced at all, he will be better able to cope with that as well. This is particularly important with cycling females as they already have a marginal, but normal amount of aches and pains while they cycle. If they are to maintain a good attitude and good balance with a rider, they need good core muscle strength, so they can overcome the normal menstrual aches and pains and deal with the rider in a reasonable way. They will also be more mentally and emotionally tuned into you and less likely to become disengaged. It is my observation that most disobedience is due to a lack of balance whether it is mental, emotional or physical.
 By Meredith Hodges
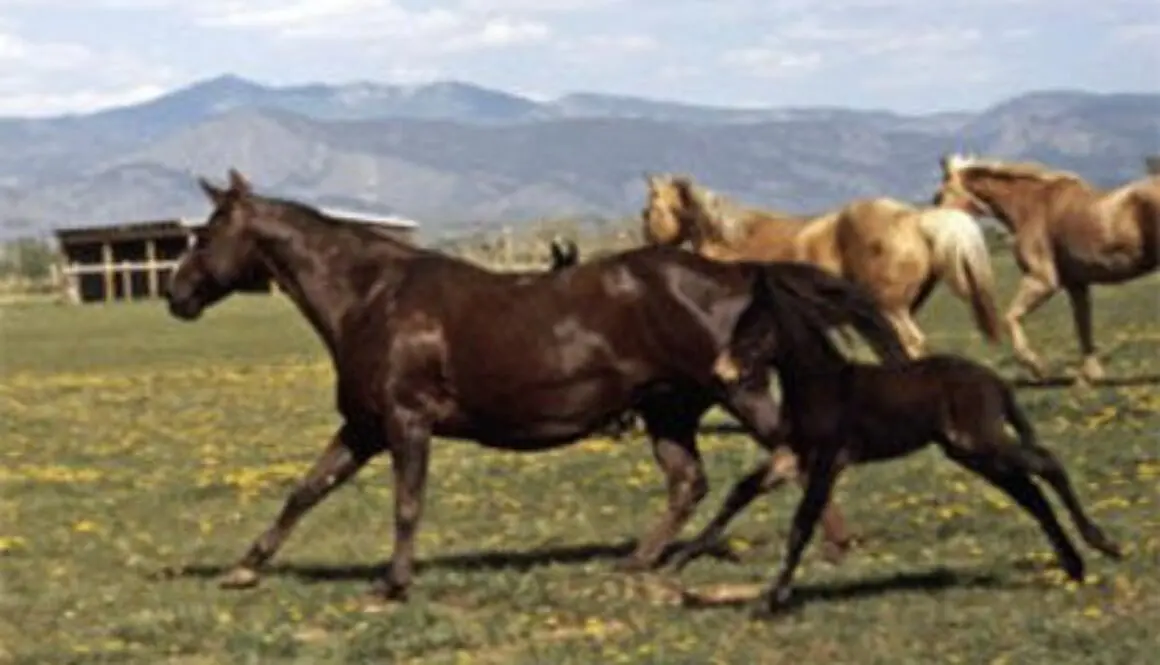
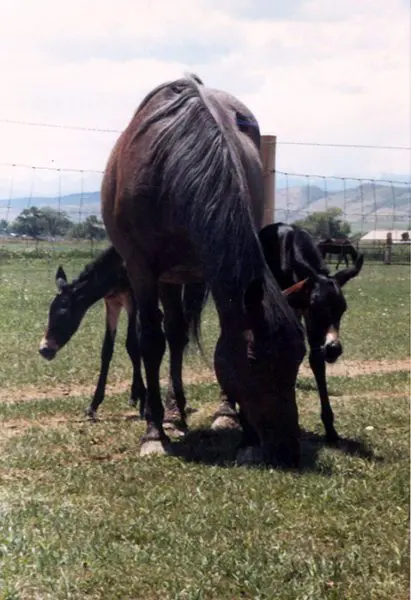 Mule foals are not too much different than human infants in their emotional needs. They require lots of attention, love, guidance and praise if they are to evolve into loving, cooperative and confident adults. In your efforts to get your young foal trained, bear in mind that he is still a child. If he is expected to fulfill too many adult responsibilities too quickly, he can become overwhelmed, frustrated and resistant. This is why it is important to allow your foal to have a childhood. You can turn this time into a learning experience by playing games with your foal that will help him to prepare for adulthood without imposing adult expectations on him when he is too young.
 The first component of developing a well-adjusted adult mule is to establish a routine that will give your mule foal a sense of security and trust in you. Having a definite feeding schedule can help a lot. If you take a few minutes each morning and evening to scratch and pet your foal while your foal’s dam is eating and after he has finished nursing, he will associate you with a very pleasurable experience. If his dam is busy eating, she will be less likely to think about running off with him. If your animals are on pasture, a short visit once or twice a day with a ration of oats and plenty of petting while paying special attention to the intensity of your touch on his body will accomplish the same thing.
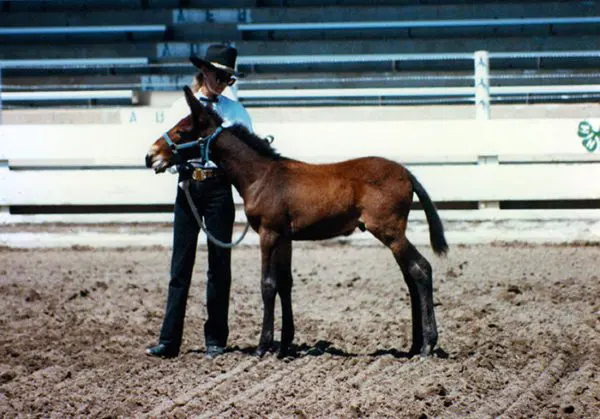 When your mule gets a little older and is ready to be halter broken, you can use your pleasurable status with him to your advantage. First, halter him and tie him to a fence with a safety knot (see DVD #1 n my Training Mules and Donkeys series). Leave him like this each day after breakfast for about half an hour, making sure to return to him every ten minutes. Each time you return, if he doesn’t become tense and struggle, untie him and ask him to follow you. If he refuses, just tie him up again and come back again ten minutes later and try again. If he comes with you, even if it is only one step the first time, take his halter off and play with him for a little while and then end the lesson. This will maintain your pleasurable status with your foal while he learns the things he will need to know as a young adult. In the next lesson you can ask for more steps before playing and ending the lesson
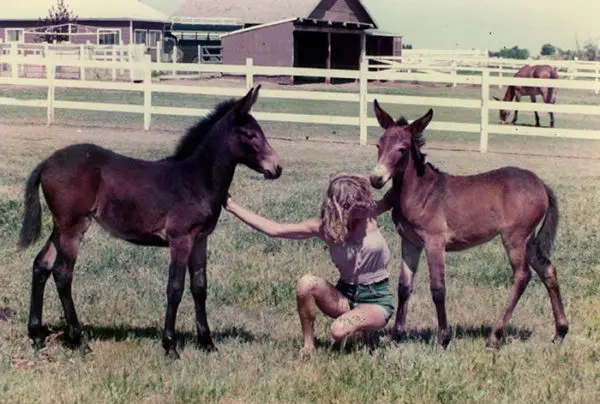 When handling your mule foal, always be sure to give him time to relax and accept a situation…and he probably will. Never get in a hurry and do not try to force anything—or your foal will be happy to oblige you with more resistance than you ever imagined possible! And remember, you can catch more flies with sugar than you can with vinegar, so go out there and have a good time with your little longeared pal. He’ll be glad to be your best friend if you learn how to be his best friend.
 As you ride your equine through walking exercises, try to stay soft, relaxed and following forward in your inner thighs and seat bones. Get the sensation that your legs are cut off at the knees and let your seat bones walk along with your animal—lightly, and in rhythm with him. If he slows down, just bend your knees and nudge him alternately with your legs below your knees, while keeping your seat and upper legs stable and moving forward. While your legs are still, they should rest gently on his sides in a “hug.” Do not push forward in your seat, but allow him to carry you forward. When collecting the walk on the short side, just bend both knees at the same time, nudging your equine simultaneously on both sides, while you squeeze the reins at the same time.
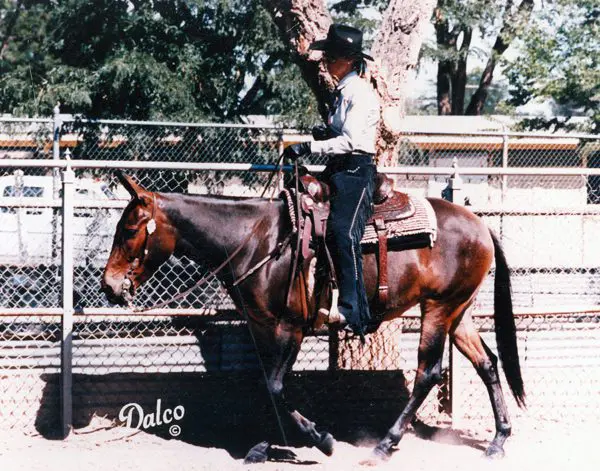 Most of us feel that we do not balance on our reins as much as we actually do. If there is any balancing on the reins at all by the rider, your equine will be unable to achieve proper hindquarter engagement and ultimate self-carriage. Here is a simple exercise you can do to help shift the weight from your hands and upper body to your seat and legs. Begin by putting your equine on the rail at an active working walk. On the long side, drop your reins on his neck and feel your lower-body connection with him as you move along. In order to maintain your shoulder-to-hip plumb line, you will find that you need to tip your pelvis forward and stretch your abdominal muscles with each step. If your lower leg remains in the correct position, this will also stretch the thigh muscles on the front of your leg from hip to knee. There is also a slight side-to-side motion as your animal moves forward that will cause your seat bones to move independently and alternately forward. There is no doubt that you can probably do this fairly easily right from the start, but to maintain this rhythm and body position without thinking about it takes time and repetition.
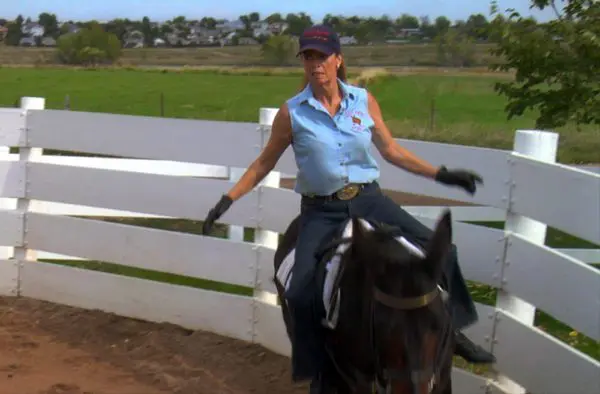
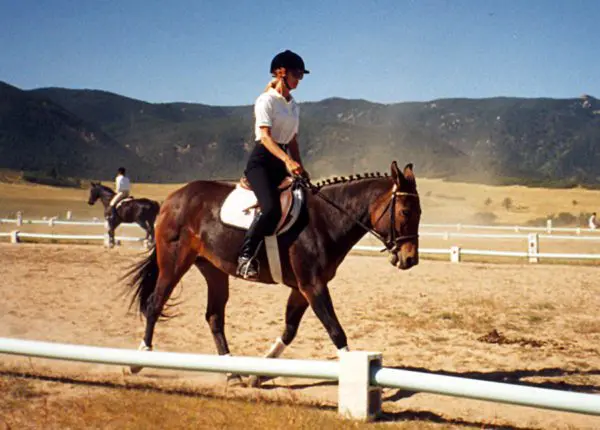 If your animal drifts away from the rail, you will need to post with a little more weight in your outside stirrup. As you go around the corners, be sure to turn your eyes a little to the outside of the circle to help your positioning. As you approach the short side of the arena, bring your arms backwards and straight out from your shoulders in a “T” formation, while keeping your upper body erect. As you go through the corners, just rotate your arms and upper body slightly toward the outside of your circle. When you come to the next long sides, bring your arms, once again, in front and parallel to your shoulders and repeat the exercise.
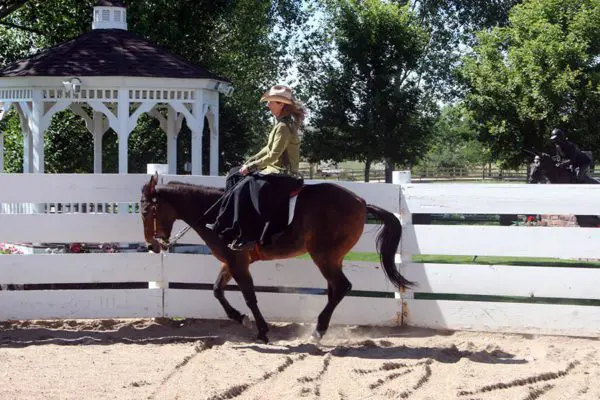 Notice the different pressure on your seat bones as you change your arm position. The forward arms will somewhat lighten your seat, while your arms to the side tend to exert a little more pressure. Consequently, you can send your animal more forward by using your seat as you go down the long sides, shortening that stride with a little added pressure from the seat bones on the short sides. When you wish to halt, put your arms behind you at the small of your back to support an erect upper body, and let your weight drop down through your seat bones and legs. Also, remember to use your verbal commands often in the beginning to clarify your aids (effect of the seat, legs and hands) to your equine. If your equine doesn’t stop, just reach down and give a gentle squeeze/release on the reins until he stops, but be sure to remain relaxed and continue to drop your weight into your seat and legs. Keep your inner thighs relaxed and flexible. Do NOT squeeze! Think DOWN through your legs on both sides. Before long, he will begin to make the connection between the weight of your seat and your command to “Whoa,” and your seat will take precedence over your reins.

 will not give you an accurate feeling for any specific task—you must plan your course of action. If, for instance, you set up your mule to bend through and impulse out of the corner, you can close your eyes for a few seconds down the long side and feel the balance that comes out of that corner when the movement is executed correctly. In this particular situation, once you’ve closed your eyes, you may notice that your animal is starting to leans lightly to the inside. A squeeze/release from your inside leg, sending your mule forward and into the outside rein, corrects the balance and keeps him going straight down the long side.
 If he “ducks out” with you and begins to run, keep your connection on the rein that he has pulled as best as you can, and try to stop him by pulling on both reins together with a light squeeze/release action. Try to verbally calm him, and when he finally stops, praise him for stopping. Then, turn him with the rein that he has just pulled out of your hand, and return him to the task. Do not try to pull him around with the other rein, because this will cause him to lose his balance and will frighten him even more. If he is praised for stopping, he will not be afraid to stop. If he’s punished for running, he may never want to stop.
 I ride my equines diagonally through the aids to get the best lateral and vertical response. I want to maintain a good forward movement, which means that the impulsion must come from the hindquarters and from the push forward. Think of your hands and legs as four corners of a box that contains your mule. If you push forward on one side at a time from, say, left leg to your left hand, it leaves the other whole side of the animal unchecked, and he will proceed forward with a tendency to drift into the “open” side. This is why you have to ride alternately and diagonally from the left leg to the right hand and from the right leg to the left hand. It is why you ride from back to front, leg to hand, in a diagonal fashion—it pushes your mule from the outside leg forward into a straight and balanced inside rein, and from the supportive inside leg to the outside rein—he remains upright on the arcs and sufficiently bent. The wider the space between your legs and between your hands, the more lateral “play” you will feel in your mule. If you keep your hands close together and your legs snugly around his barrel, there is a lot less lateral “play” and a great deal more accuracy when doing your patterns. Think of your legs and hands creating a “train track” with rails between which your mule must move. The wider the space between your hands and legs, the more “snakier” his movements will become.
 As your young equine grows and matures, he will realize that you do not wish to harm him. Next, he will develop a rather pushy attitude in an attempt to assert his own dominance (much like teenagers do with their parents), because he is now confident that this behavior is acceptable. When this occurs, reevaluate your reward system and save excessive praise for the new exercises as he learns them. Note, however, that a gentle push with his nose might only be a “request” for an additional reward and a polite “request” is quite acceptable in building a good relationship and good communication with your equine. Allow the learned behavior to be treated as the norm, and praise it more passively, yet still in an appreciative manner. This is the concept, from an emotional standpoint, of the delicate balance of give and take in a relationship. As in any good relationship, you must remain polite and considerate of your horse, mule or donkey. After all, “You can catch more flies with sugar than you can with vinegar.”
 Here is an example: I had a three-year-old mule that was learning to lunge without the benefit of the round pen. The problem was that he refused to go around me more than a couple of times without running off. I first needed to assess the situation by brainstorming all the probable reasons why he might keep doing such an annoying thing. Is he frightened? Is he bored? Is he mischievous? Has he been calm and accepting of most things until now? And, most important, is my own body language causing this to occur? Once I was willing to spend more time with regard to balance on the lead rope exercises and proceeded to the round pen to learn to balance on the circle, I soon discovered that developing good balance and posture was critical to a mule’s training. The reason my mule was pulling on the lunge line so hard was because he just could not balance his own body on a circle. Once I reviewed the leading exercises with him—keeping balance, posture and coordination in mind—and then went to the round pen to learn to balance on the circle, I noticed there was a lot less resistance to everything he was doing. I introduced the lunge line in the round pen and taught him how to circle with slack in the line. And, I realized that it was also important to time my pulls on the lunge line as his outside front leg was in suspension and coming forward. It didn’t make much difference in the round pen, but it was critical to his balance in the open arena so the front leg could be pulled onto the arc of the circle without throwing his whole body off balance. After learning that simple concept, lunging in the open arena on the lunge line was much easier and he did maintain the slack in the line while circling me.
 Like humans, all animals are unique, and like humans, each learns in his own way. Learn to be fair and flexible in your approach to problems. It is best to have a definite program that evolves in a logical and sequential manner that addresses your equine’s needs physically, mentally and emotionally. Be firm in your own convictions, but be sensitive to situations that can change, and be willing to make those changes as the occasion arises. This is what learning is all about for both you and your equine.
 Achieving balance and harmony with your equine requires more than just balancing and conditioning his body. As you begin to finish-train your equine, you should shift your awareness more toward your own body. Your equine should already be moving forward fairly steadily and in a longer frame, and basically be obedient to your aids. The objective of finish-training is to build the muscles in your own body, which will cause your aids to become more effective and clearly defined. This involves shedding old habits and building new ones, which takes a lot of time and should be approached with infinite patience. There are no shortcuts. In order to stabilize your hands and upper body, you need to establish a firm base in your seat and legs. Ideally, you should be able to drop a plumb line from your ear to your shoulder, down through your hips, through your heels and to the ground. To maintain this plumb line, work to make your joints and muscles in your body more supple and flexible by using them correctly. Don’t forget to always look where you are going to keep your head in line with the rest of your body.
 When you are fairly comfortable at the walk, you can add some variation at the trot. Begin at the posting trot on the rail. When your equine is going around in a fairly steady fashion, drop your reins on his neck and continue to post. As you post down the long side, keep your upper body erect and your pelvis rocking forward from your knee. Your knee should be bent so that your legs are positioned on the barrel of your animal. Raise your arms out in front of you, parallel to your shoulders. If your equine drifts away from the rail, you need to post with a little more weight in your outside stirrup. As you go around corners, be sure to turn your eyes a little to the outside of the circle to help maintain your position. As you approach the short side of the arena, bring your arms back, straight out from your shoulders, and keep your upper body erect. As you go through the corners, just rotate your arms and upper body slightly toward the outside of your circle. When you come to the next long side, once again bring your arms in front of and parallel to your shoulders, and repeat the exercise.