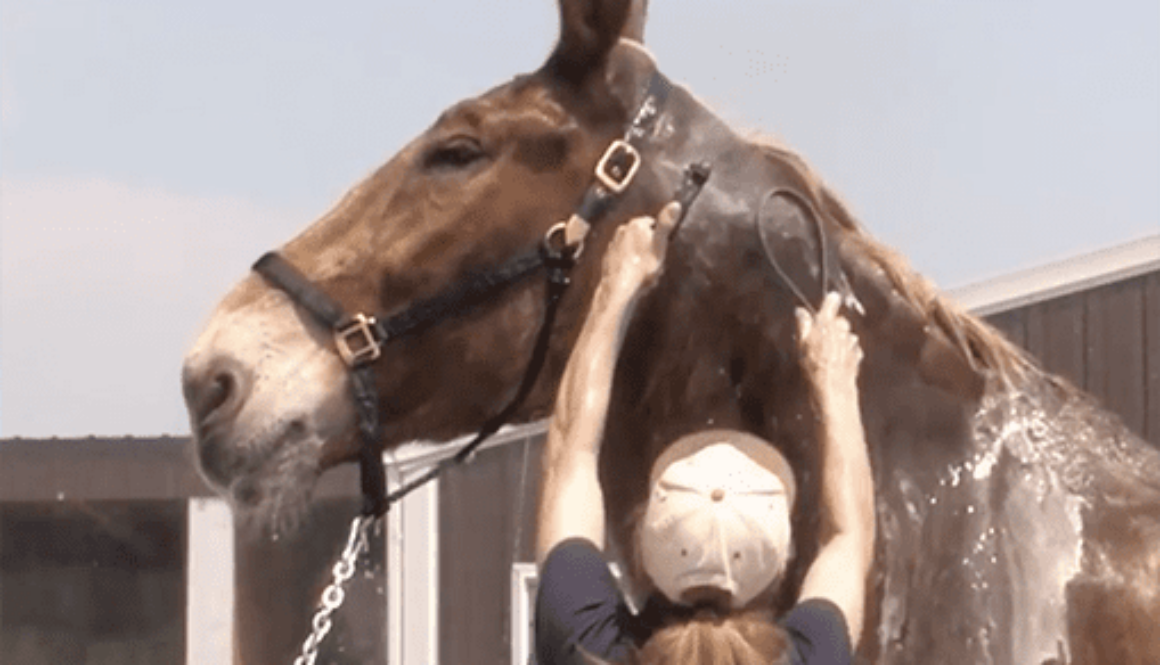
grooming

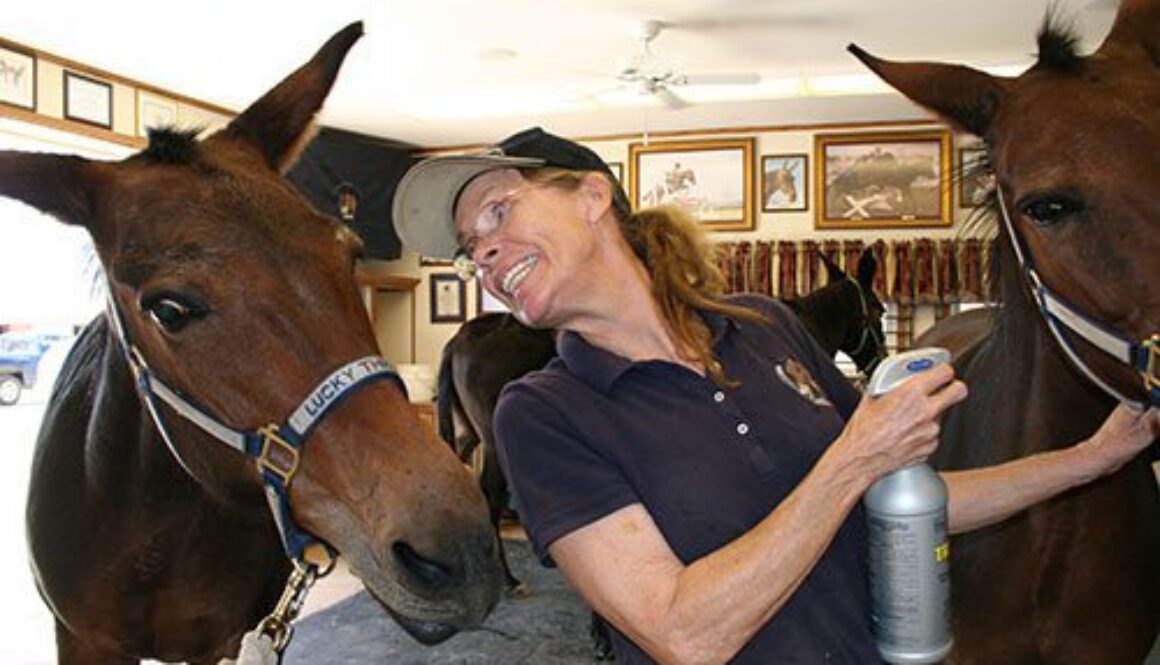
LTR Training Tip #3: Work Stations
Meredith gets a lot of letters and emails from people with training questions about their equines. Here, she discusses how to set up a work station for tack and grooming your equine.

LTR MULES: Musing on Mini Grooming
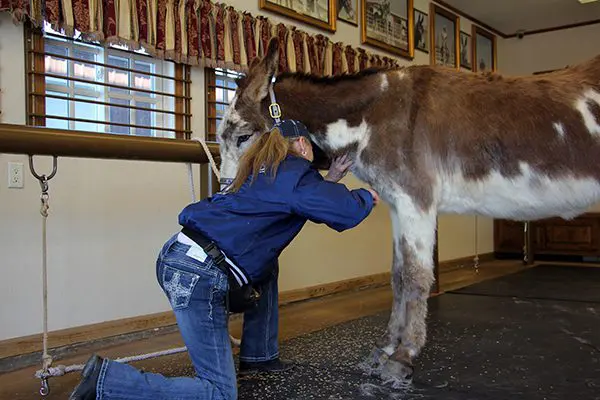
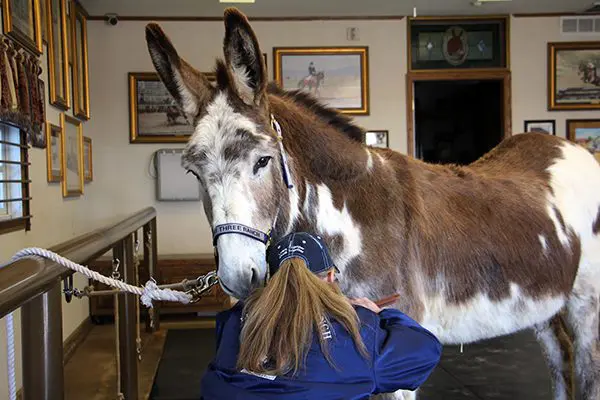
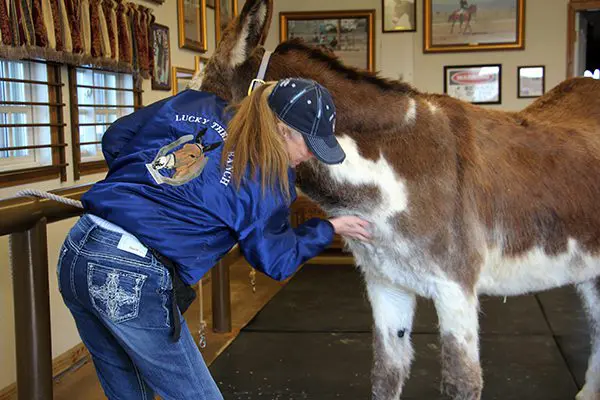
Since I now have 16 equines, 3 donkeys, 12 mules and a miniature horse, it is not always convenient to bring them all up to the Tack Barn work station for grooming. I used to have 32 equines! As I get older, I find myself a lot busier (One would think it would be the other way around…LOL!). I am glad I have less animals to groom each week! My show days have long since passed, so I limit the training to those who need core strength tune-ups and simple pleasure rides around the ranch. Forunately, my routine way of management and training resulted in good behaviors and a willingness to comply with my wishes. Sometimes, to save time, I just fill a bucket with my grooming tools (Plastic human hairbrush, Johnson’s Baby oil, clippers, Cool Lube, scissors for ergots, Neosporin and Tri-Tech 14 fly spray) and groom them in turnout areas, or in the stalls and runs. I call them to the gate, give them a reward for coming and begin my routine grooming.

I start by clipping their bridle paths in the summer and fall. This keeps them from getting over-heated. I will let their bridle paths grow out in the winter and spring to keep the warmth within their bodies. Grooming gives them great pleasure when it is done correctly and politely!


They are always rewarded for cooperating during grooming, so they hang around and don’t wander off. I even reward the ones in the neighboring pens to reinforce “handing out.” I always clean ears, eyes and nostrils, and will do this daily with donkeys that typically have runny eyes. It isn’t their favorite, but they will tolerate it for the crimped oats reward! They all like to SUPERVISE the grooming of each other! They are pretty funny! It makes our time together very enjoyable!

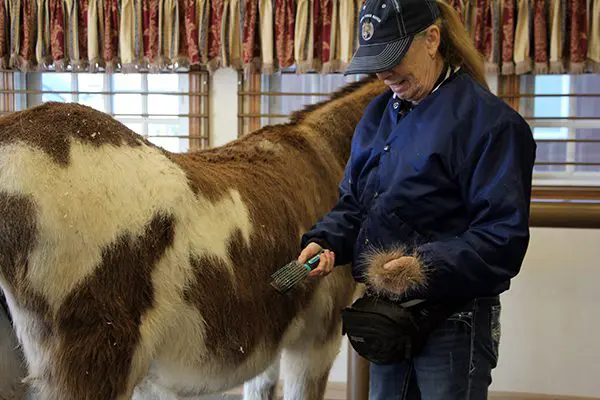
I use my multi-bristled, plastic human hairbrush both to apply the lightly-sprinkled Johnson’s baby oil AND to go over their bodies as they are shedding. It gets all the way to the roots, flips out the dirt, and promotes a well-aerated, healthy hair coat. When the coats are short, I can use a dandy brush, or bring them up for vacuuming with yearly baths in July.

A common practice is to braid manes and tails to get them to grow longer. I have found that this will often cause the hair to break. Plus, it is difficult for the animals to swat flies with braided manes and tails. Quite simply put, it hurts! I use Johnson’s Baby oil during weekly grooming, sprinkled in the manes and tails. It does a good job of protecting the hair and doesn’t get as greasy as you might think. The day before a show, I bathe them with water only over the body and scrape off the dirt with a shedding blade. I only use Tres Semme shampoo and Aussie #X conditioner in the manes and tails. If I am going to show them, I let the manes and tails partially dry and braid them for overnight. When you take out the braids the next day, their manes and tails will be much fuller! Even the thinner and wilder manes on mules will respond positively to this treatment.
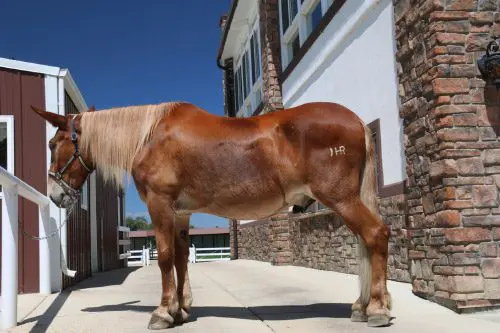

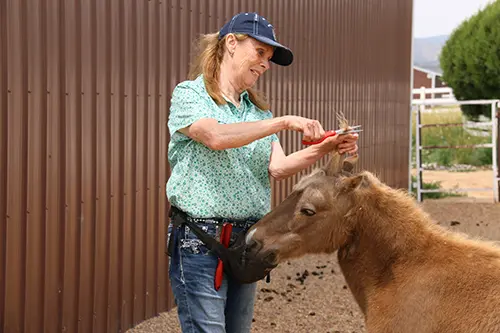
Lots of my animals are older and have issues with runny eyes. If I am not showing them, I will “cut their bangs” to keep the hair from irritating their eyes. Even when showing, I can trim the bangs so they aren’t cut straight across and look funny.


The minis are much calmer when I try to stay down at their level whenever possible. I gather the excess hair and remove it from the areas where I groom. If they decide to eat it, it could cause impactions. Better to be safe than sorry!


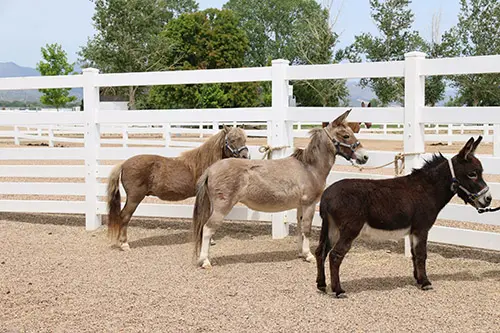
Although they are all fine with fly spray, this time, I am going to take pictures for this article so I am haltering them and tying to the fence. Then I will just go down the line and fly spray them all at once. They are very willing to stand the way I position them for the pictures. When I am done, I release them! Grooming is FUN!!!


To learn more about Meredith Hodges and her comprehensive all-breed equine training program, visit LuckyThreeRanch.com, MEREDITH HODGES PUBLIC FIGURE Facebook page, or call 1-800-816-7566. Check out her children’s website at JasperTheMule.com. Also, find Meredith on Pinterest, Instagram, MeWe, YouTube and Twitter.
Covered in TRAINING MULES & DONKEY: A LOGICAL APPROACH TO TRAINING, TRAINING WITHOUT RESISTANCE and A GUIDE TO RAISING & SHOWING MULES at www.luckythreeranchstore.com.
© 2013, 2016, 2022 Lucky Three Ranch, Inc. All Rights Reserved.
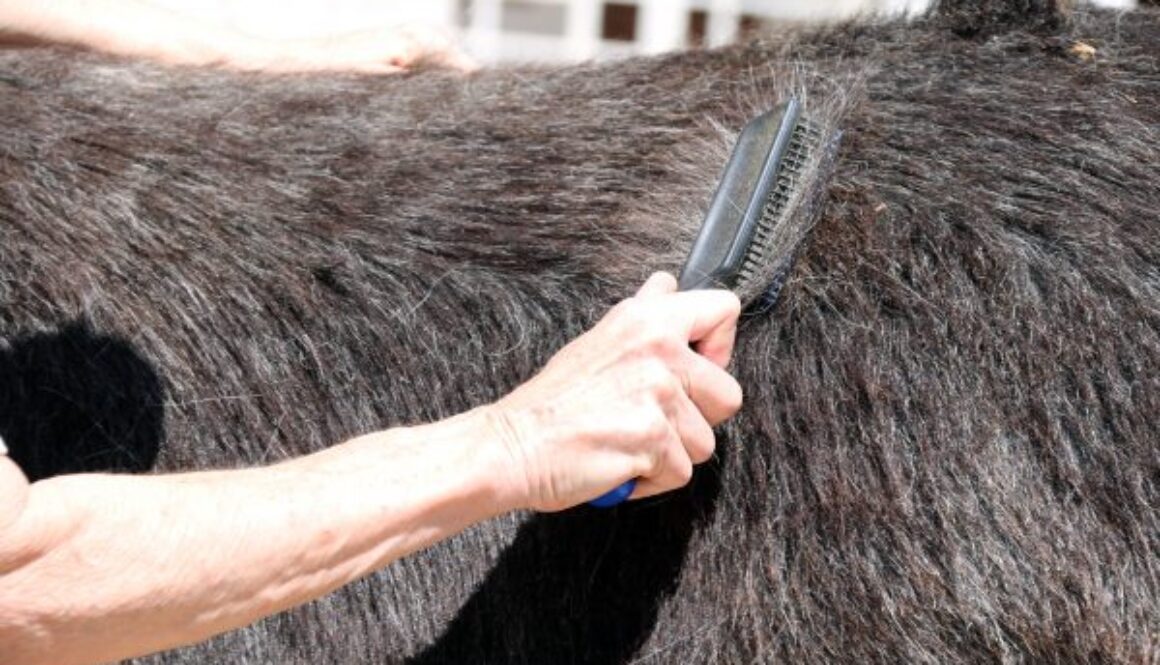
MULE TALK! PODCAST: Maintenance & Grooming with Mules & Donkeys
- Use grooming tools that are comfortable for your mules and donkeys.
- Expensive horse/equine grooming tools are not all necessary to keep in your tack room or trailer.
- Insect control around the barn – what works.
- If showing: when to body clip your mule and how to body clip.
- Treating sores/scabs.
- Group grooming.
- Pasteworming is effective in controlling insects and flies – learn what to use!
Learn more on Mule Talk podcast.
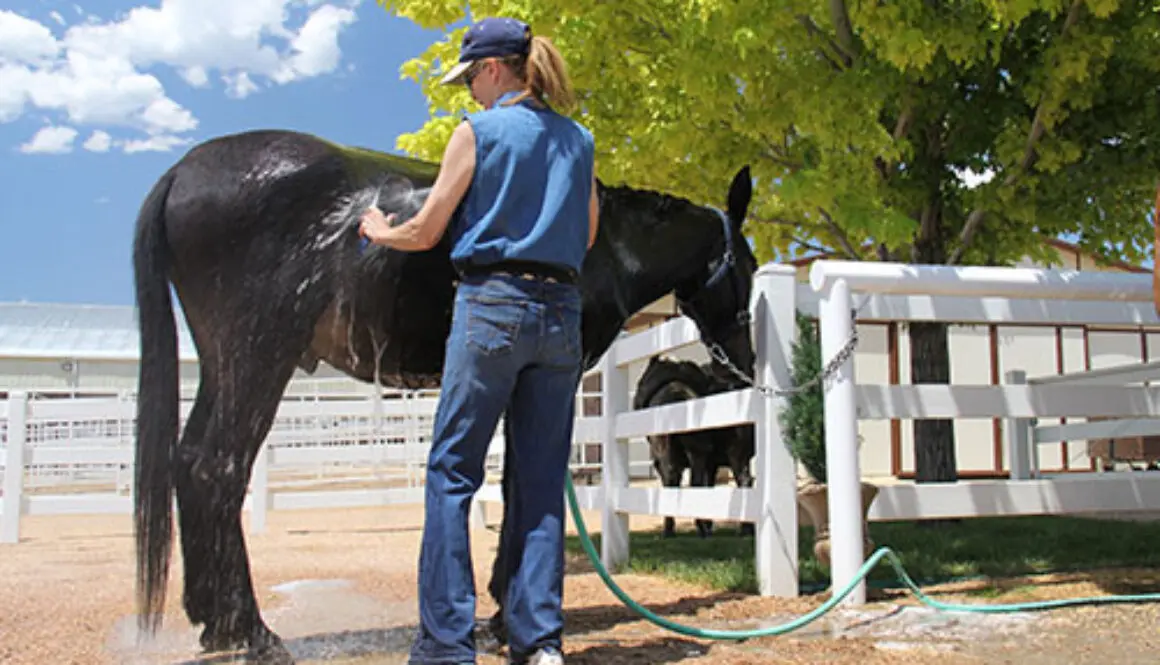
MULE CROSSING: Maintenance & Grooming
By Meredith Hodges
 Your equine depends upon you for his safety and well-being. The best feed in the world won’t keep him in good health if you neglect other important areas such as vaccinations and worming. It’s up to you to create a program to prevent disease and control parasites. Here are some suggestions for a general health program:
1) Cleanliness is very important. Make sure feed boxes are clean and manure is removed from stalls and paddocks. Do not feed hay or grain on the floor or anywhere it may become contaminated with manure. Similarly, small, heavily used pastures tend to build up a heavy parasite load. Pastures should be rotated and harrowed as frequently as possible to break the life cycle of the parasites.
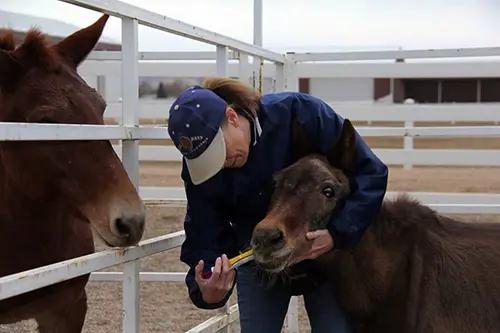 2) Internal parasites are the most common danger to the health and well-being of your mule, and you must be prepared to wage a constant battle to control these worms. Follow your vet’s advice to set up a parasite-prevention and control program through regular worming. The drugs that are available today are very effective in removing parasites and breaking the cycle of re-infection. At Lucky Three Ranch, we worm every eight weeks in January, March, May, July and September with Ivermectin and then break the cycle and worm with Strongid in November. Don’t forget to watch out for bot eggs and remove them immediately.
3) Avoid letting your equine drink from public watering facilities. Use your own clean water buckets. Keep an eye out for anything that might injure your equine, and remove or repair it.
Proper treatment of diseases and injuries depends on two very important factors: correct diagnosis and knowledge of the proper treatment. Your job is to become familiar with equine diseases and their symptoms. In case of sickness or injury, know what to do for your animal before help arrives. Understand what simple treatments and remedies are safe to follow. Above all, know when to call a veterinarian.
4) There are many resources available to help you learn how to be better prepared including books, clinics and, especially, advice from an expert such as your own veterinarian or farrier.
Assemble your own equine first aid kit and, with the help of your veterinarian, learn the proper use of each item in the kit. Be prepared to handle the situation before the vet arrives.
When signs of infectious disease appear, isolate infected animals promptly and call your veterinarian right away.
5) Seek your vet’s recommendations for shots and immunizations, and faithfully follow an annual vaccination program. Make sure you keep good records of vaccinations and worming, and be sure to keep track of when they’re next due.
6) One of the best ways to monitor your equine’s health is by establishing a daily grooming routine. Not only will he be rewarded with a shiny coat, but you can watch for cuts and bruises and check the condition of the feet.
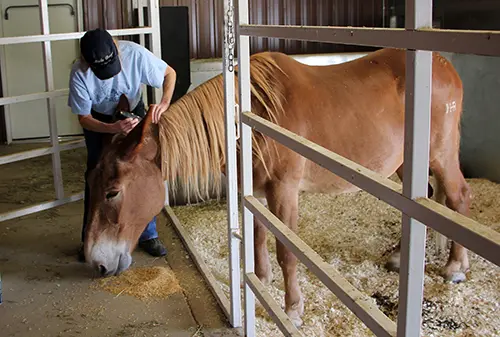 Basic grooming tools include a rubber currycomb to rough up the hair and bring dirt to the surface, a dandy brush to lift out the dirt, a body brush to smooth and shine, a hoof pick to clean the feet and a mane and tail comb and brush. A sweat scraper is handy to remove excess water during and after a bath, or sweat after a workout. A grooming cloth can be used to polish the coat and bring out the shine. In the springtime, a plastic multi-bristled hairbrush and shedding blade are also nice tools to have on-hand to remove dead hair, and a sponge can be used to clean muddy legs.
Begin your routine by using a hoof pick to clean the feet. Start with the near front foot, move to the near hind, then the off fore and off hind. If your young mule is skittish, work in whatever order he is comfortable. As he becomes accustomed to having his feet cleaned, you can do them in a consistent order. Clean from heel to toe and watch for infections like thrush and injuries from rocks or nails. This is also a good time to check his shoes. Mules should be shod (if working regularly on very hard surfaces), or trimmed, approximately every six to eight weeks according to use.
Next, begin to groom the body, starting on the left side at the head. Hold the currycomb in one hand, keeping the other hand on your animal to steady him. Gently curry in small circular strokes, working your way down and back, ending with the hind leg. Next brush vigorously, first with the hairbrush and then with the body brush. During springtime shedding, use your plastic bristle brush on the body to reach the dead hair in the undercoat before you use the shedding blade. Make sure that you apply only as much pressure as feels good to your equine (lighter pressure over bony areas). This should be an enjoyable experience for him.
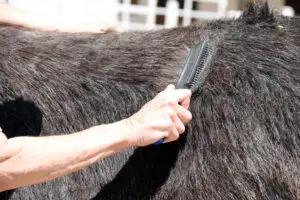 After grooming the left side, move to the right side. Brush the head with a Dandy brush and use a multi-bristled human hairbrush on the mane and tail. By adding a little Johnson’s Baby oil to the mane and tail during grooming, you can train a mane to fall to one side and keep other equines from chewing on manes and tails. Finish with a soft body brush. Finally, use the grooming cloth to wipe around the ears, face, eyes, nose, lips, sheath (if it’s a male) and the dock of the tail.
While paying this much attention to your mule’s body, you will be sure to see anything abnormal such as an abscess, a cut, mites or insects, or a sore. Early discovery and treatment keep problems small.
Besides routine grooming, your equine’s longer hairs can be trimmed as often as needed. Clip the long hairs from the head, the outsides of the ears, on the jaw and around the fetlocks for a neat and clean appearance.
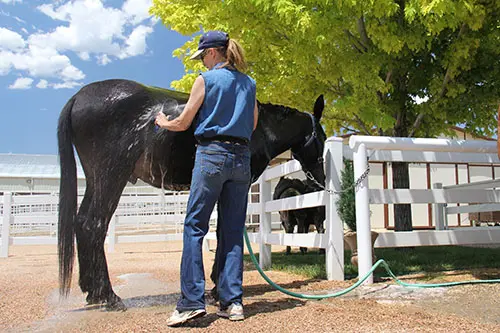
 Mules and donkeys like to be dusty, but they also like to be clean. Bathing every so often will make your Longears look and feel better. All equines enjoy having all that itchy sweat rinsed off after a good workout. I don’t recommend bathing too often with soap because an equine’s skin is sensitive. Soap can irritate it as well as strip away the essential oils. Most of the time, a good rinse, while scraping the excess water off with a shedding blade, will maintain a clean, healthy coat. Of course it’s essential to have a spotless animal if you’re off to a show or parade.
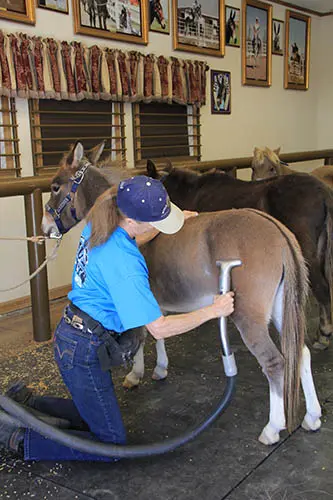
Once your mule has been bathed and is spotlessly clean before the show, all you need to do to prepare him for your class is a quick once-over with a vacuum. Vacuum training is like anything else—take your time, be polite in your approach and make sure your mule understands that this strange, noisy monster is not going to hurt him. Soon he will learn to enjoy being groomed by the vacuum. The vacuum will also promote better circulation to the muscle tissue.
BODY CLIPPING
If you plan to show your mule, you might consider body clipping. If you clip in mid-April or May, you will expedite shedding and the hair that grows in will be more manageable than the heavy winter hair. Equines that are not going to be shown should be left with their natural hair coat, as it insulates them from both cold and heat, and protects them from invasive insects. Mules and donkeys shed more slowly than horses and are not usually fully shed out until late summer.
 There’s a bonus to clipping a show mule or donkey—their hair won’t grow back as quickly as that of a horse. Just remember that clipped animals should be stabled and blanketed during cold weather. If you do blanket your mule, you must be ready to add or remove blankets and hoods as the weather changes each day. To keep the coat from growing back too quickly, it helps to have them under 16 hours of light (summertime light duration).
To body clip your mule, begin with a quick bath. Your clippers will last longer if your mule is clean. When he’s dry, use your rubber currycomb to bring any dirt and dead hair to the surface. Follow with a good brushing. If it’s too cold for a bath, use a vacuum to get him clean.
Begin clipping the legs and head, because these are usually the hardest areas to do. If he’s a little difficult, don’t hesitate to use the restraints you learned about in DVD #2. Use a twisted lead rope hobble to restrain the front legs, a scotch hobble for the rear legs, or a face tie for the head, but be sure to use them as described and don’t be punitive in your approach. Start with small clippers on the coronet band and fetlock, working your way up each leg.
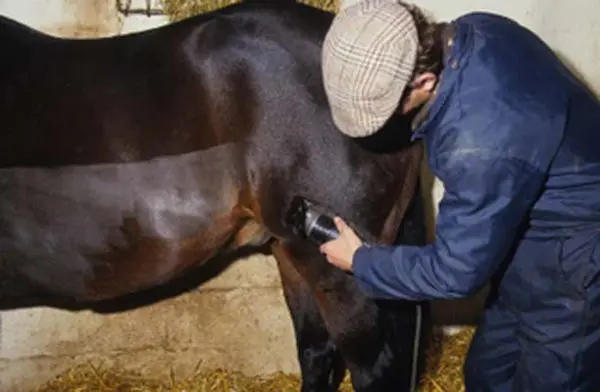 Do the body last with large animal clippers. Clip against the lay of the hair. Start at the rear and work your way forward, clipping first one side and then the other. Pay special attention to the flanks, the mane and the fuzzy areas under the belly and around the forearms and buttocks.
If your mule has a nice mane, leave it and clip a bridle path. The length of the mane and the bridle path will depend on trends in the event you are participating in. For example, in English riding, manes are kept shorter to make braiding easier, but if your event is reining, keep the mane as long as possible. I like to grow the manes as long as possible (they help to keep flies and insects at bay), give crew cuts through the bridle path to the males and leave a foretop and bridle path on the females.
If you’re packing, you might want to shave or trim the mane short for the sake of simplicity. Many people shave the foretop and bridle path with a #10 blade, and then trim the rest of the mane to half an inch. You may trim the outside edges and backs of the ears, but leave the inside hair to prevent irritation from flies and bugs.
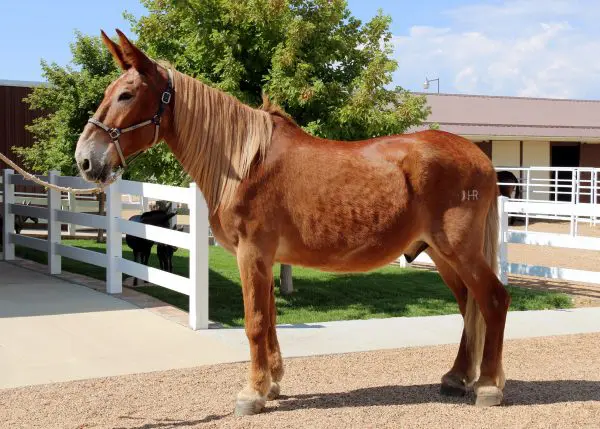 The tail is another area where there are many variations. I recommend applying Johnson’s Baby oil to the base during each grooming and letting the tail hair grow. This is a good idea if you compete in open events with horses. A second method is to shave the first two inches of the tail for a clean, well-groomed look (however, it does grow back even fuzzier!). A third variation is to “bell” the tail in three tiers. This looks best with a thick tail and is generally used for identification purposes by packers and the military, but is not recommended for normal grooming, as it is difficult to maintain.
Now you’re ready to trim the head. This will include trimming the bridle path, muzzle hairs, hair under the jaw, long hairs around the eyebrows and the backs and edges of the ears.
Lastly, remove chestnuts and ergots by soaking them with baby oil for about 30 minutes and peeling them off. If the ergots don’t peel off, you may cut them off with scissors or nippers.
Now you’ve got an equine that looks great! It will be easy to keep him looking good with a weekly trim that should include bridle path, ears, around the face and coronet bands.
BRAIDING FOR SHOW
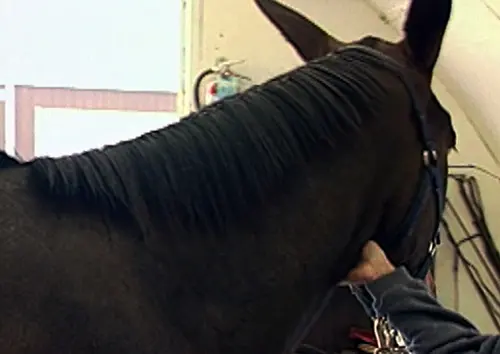 Depending on the event you plan to show in, treatment of the mane varies considerably. For Western pleasure, you may want to simply band the mane so it lies flat. The tiny rubber bands can be purchased in tack shops in colors to match your mule’s hair. Tradition dictates the braiding of the mane for hunters and English classes for a neat, clean appearance. A thick, heavy mane cannot be properly braided and must be thinned until all the hairs are about four to six inches long and lay flat on the neck. This is done by using a mane comb to pull out the long hairs from the underside of the mane. This can be a big job and it’s annoying to your equine, so limit mane pulling to a few minutes a day. Make sure the hair is the same length from poll to withers. Don’t even think about cutting it with scissors—it will just end up short but way too thick to braid.
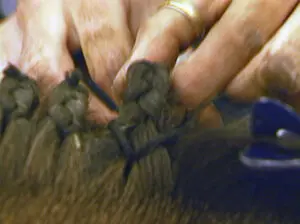 You can spritz a little water and hair spray to make the hair easier to handle. The quickest way to secure the braids is by using tiny rubber bands. It’s also very easy to do and it’s great for one-day shows or quick changes between classes.
Sewing with thread or weaving yarn looks very professional and is more permanent, but it’s also more time consuming.
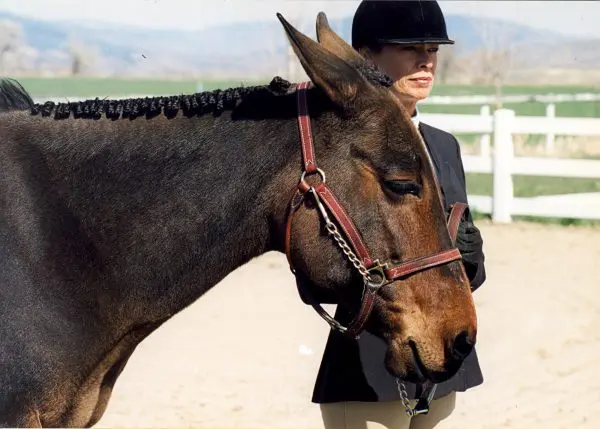 Once the braid is finished it should be folded once and fastened with either rubber bands or a piece of yarn or thread. It can also be rolled and tacked into place. How you finish your braid will depend upon the time you have and the look you want to achieve, as well as what looks good on your equine!
Braiding the tail begins with a clean, well-groomed tail. Even short hair can be braided if you use a lot of hair spray to make it sticky. Moisten all the hairs along the dock with a damp sponge and bring them forward. Take a section of hair from each side of the tail, as close to the top as possible, pulling the sections out from as far under as you can.
On a horse, you can pick up a third section from the middle of the tail, but on a mule’s thin tail, take the hair from the side. Cross it over one of the outer strands. Begin braiding with three strands down the center of the tail. With each twist of the braid, pick up a little more hair from either side or from the middle. Continue braiding until you reach the root of the tail, then don’t add any more hair, but braid until you reach the end.
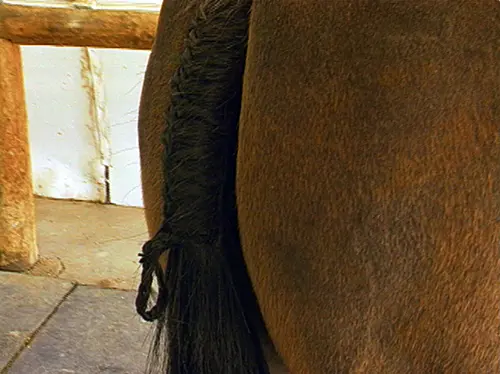 Fasten the end of the braid with a tiny rubber band or a piece of yarn. Now fold the braid once and pull the end up into the braided root, tying it at the base with yarn or thread.
In showmanship and halter classes, it goes without saying that your equine must be groomed to perfection. This means that, for months prior to the show, you’ve given your equine a good brushing or vacuuming at least once a week. Brushing stimulates the skin and brings out the natural oils that make the coat shine. No amount of “shine in a can” will replace the natural luster of an equine that’s been brushed regularly.
To learn more about Meredith Hodges and her comprehensive all-breed equine training program, visit LuckyThreeRanch.com, MEREDITH HODGES PUBLIC FIGURE Facebook page, or call 1-800-816-7566. Check out her children’s website at JasperTheMule.com. Also, find Meredith on Pinterest, Instagram, MeWe, YouTube and Twitter.
Covered in TRAINING MULES & DONKEY: A LOGICAL APPROACH TO TRAINING, TRAINING
WITHOUT RESISTANCE, EQUUS REVISITED and A GUIDE TO RAISING & SHOWING MULES at www.luckythreeranchstore.com.
© 2013, 2016, 2024 Lucky Three Ranch, Inc. All Rights Reserved.

MULE CROSSING: Keys To Successful Training, Part 1: Your Working Environment
By Meredith Hodges
The Work Station
It is important that your equine feels safe and comfortable in his surroundings. For this reason, you should use the same place each day to groom and prepare him for his lessons. In the beginning, use a small pen (approximately 400 to 500 square feet) that allows you access to your equine for imprinting, tying, leading and grooming, as described in DVDs #1 and #8 of my series, Training Mules & Donkeys (plus disc #9 when dealing with donkeys), and in Part 1 of Equus Revisited. All the while, you will also be teaching him good ground manners. Remember, routine fosters confidence and trust.
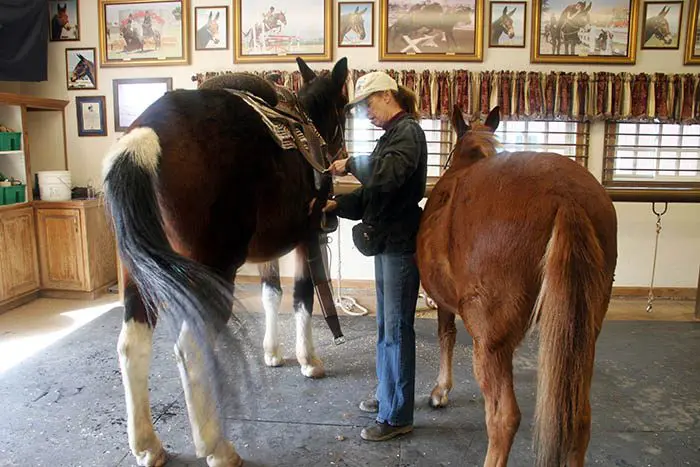 Once your equine has mastered tying and leading in the small pen, he can then move on to a designated work station where he will not only be groomed, but will also learn to accept tack in preparation for the round pen. This should be a place that has a good stout hitch rail and easy access to your tack and grooming equipment.
When working around your equine at the work station, pay special attention to his body language. If he becomes tense or skittish, acknowledge his concerns with a stroke on his neck, supportive words to him and a reward of crimped oats when he settles down. Always learn to wait for him to settle down before you proceed.
Don’t make too much out of unimportant details. For instance, if your equine is pawing the ground, don’t insist that he be still unless you need to approach him and do something specific with him. Many of your animal’s anxious behaviors get unintentionally rewarded by giving him too much attention, which can actually cause the behaviors to escalate. If you ignore pawing, cribbing, throwing of the head, pushing with the nose, stomping and other anxious behaviors, they will lessen over time, provided that you step in, ask him to stop and reward your animal, but only when he is being quiet.
Before you begin to groom your equine—whether you’re going to brush, vacuum or clip him—make sure you give him the time to figure out what you are going to do. He will exhibit his acceptance with a sigh, relaxation of his musclesor with a turn or dropping of the head. Once he has accepted the presence of the item to be used, such as a brush, vacuum or clippers, you can begin. Don’t forget to always start at the front and work your way back to the tail.
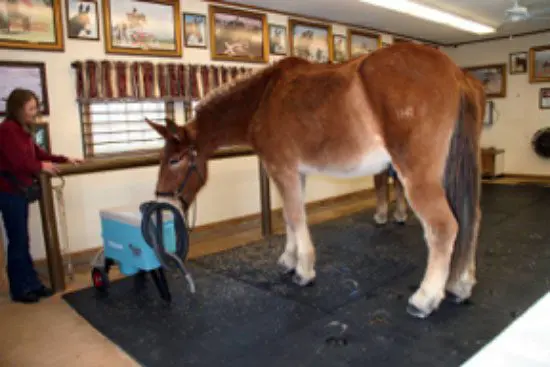 Keep an eye on the pressure you apply whenever using these various grooming tools. Different animals will have different sensitivity to these tools and will tolerate them better if they know you are not going to cause undue pressure or pain. Learn to brush the mane and tail starting at the bottom and working upward, and use a conditioner such as baby oil to keep from pulling or breaking the hair. (Baby oil will also keep other equines from chewing on the tail.) A shedding blade can be an uncomfortable grooming tool when used improperly. When using a shedding blade to remove mud around the head and ears and even on your animal’s body, be careful to minimize his discomfort by monitoring the pressure you apply to each area and working VERY slowly. When bathing him, be extra careful not to get water in his eyes or ears. These types of consideration for your equine’s comfort will help build his trust and confidence in you, and it will help make training easier and more enjoyable for both of you.
Tack and Equipment
In order to elicit the correct response from your equine, always make sure you are using the correct tack for whatever you are 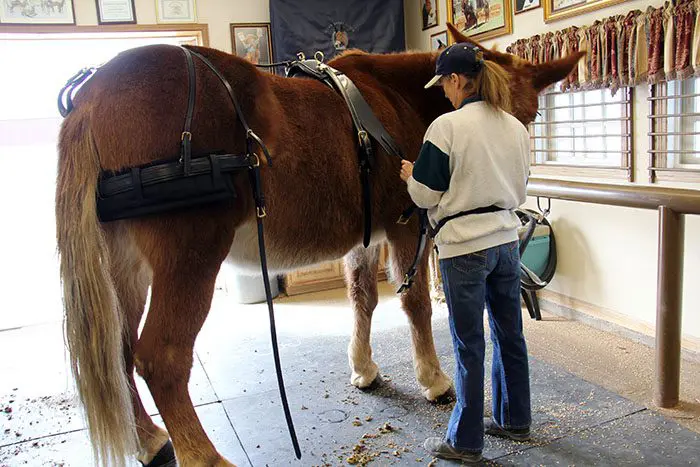 doing. If you are not sure about what tack to use when, go to the Lucky Three Ranch website for more detailed information, or ask the experts in your area. Make sure all tack and equipment fits your animal properly. If it doesn’t, it can cause adverse behaviors during training.
In the Round Pen
Once your equine is leading well in the small pen, he should be in consistently good posture with square halts, easily negotiating trail obstacles in the open and relatively relaxed while at the work station, he is ready to move to a confined area in your arena to work in the Hourglass Pattern in the “Elbow Pull” (see TRAINING/TRAINING TIPS on my website at www.luckythreeranch.com). When these exercises have been completed, he is ready to graduate to the Round Pen.
Once in the Round Pen, you will have an opportunity to assess your animal’s progress so you can begin work on balancing on the circle in good posture and conditioning the hard muscle masses in preparation for performance. The size of your Round Pen is important—45 feet in diameter is ideal. If it is any larger, as you will have difficulty reaching him with the lunging whip, which means you won’t be able to have enough control over him. If your Round Pen it is any smaller, it will interfere with your equine’s balance and ability to develop the right muscle groups. It should be made with relatively solid walls and be high enough so your animal cannot jump out. Your Round Pen can be made of a variety of different of materials, such as 2-inch by 12-inch boards and posts or stock panels. Never use electric fencing, pallets, tires or other non-solid materials. The ground surface should be a three- to four-inch–thick base of soft dirt or sand.
While working in the Round Pen, be aware of how your own body language and verbal commands elicit certain behaviors in your animal. If something isn’t working right, look to yourself and ask yourself what you might be doing to cause the adverse 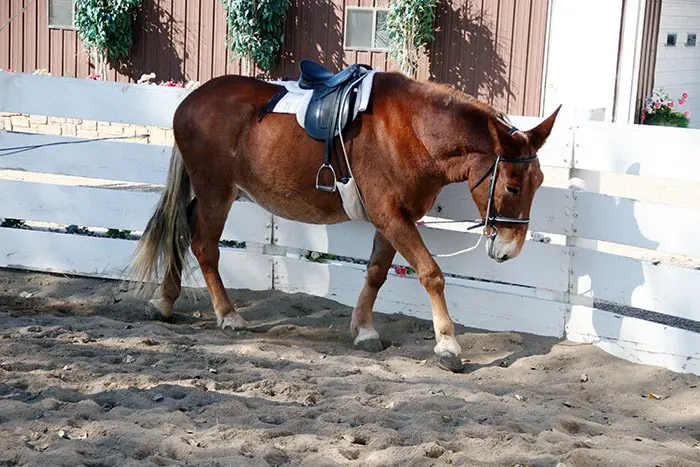 behavior you are seeing. Equines are very honest about their responses, and if they are not doing what you expect, it has to be in the way you are asking. Also, don’t hurry your equine. When asking for the walk, make sure that the walk is even in cadence, balanced and regular—not hurried. Only after your animal is correct in his execution of one gait, should you move on to the next gait. When first introduced to the Round Pen, it is not uncommon for an equine to begin work at the trot and then, as he becomes more comfortable with the new area, at the walk.
If you just let your equine go in an unrestricted frame, he can build muscle incorrectly, which will most likely cause problems later on. To be sure you are building muscle evenly throughout his body, in the correct posture and on both sides, use the “Elbow Pull” self-correcting restraint I devised, as described in DVD #2 of Training Mules & Donkeys. There is a lot of additional FREE information under TRAINING/TRAINING TIPS on my website at www.luckythreeranch.com.
As explained in DVD #1 of Training Mules & Donkeys, while you were doing passive exercises on the lead rope in the small pen, then in the Hourglass Pattern, you were also building the core muscle groups that are closest to the bone. Now that you are in the Round Pen, you will begin to build your equine’s bulk muscle in strategic areas that will strengthen him and make carrying a rider or pulling a cart a lot easier for him. It will also minimize the chance for soreness or injury, as well as resistant behaviors. Keep sessions short, 30-40 minutes, and only every other day at the most. When muscles are exercised, they need to be stressed to a point just before fatigue, and then rested afterwards for one day before repeating. This is the correct and safe way to build muscle. Any other approach will cause fatigue and actually start deteriorating muscle tissue. Remember to use relaxation techniques and warm-up and cooling down exercises with your equine before and after every workout.
In the Arena
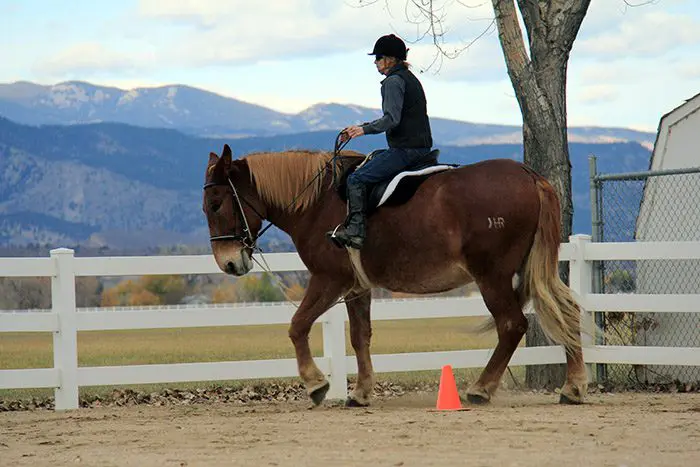 The arena is the place to really start focusing on forward motion and lateral exercises to further strengthen your equine, and it is the place to begin fine-tuning his balance, first during leading exercises, then Ground Driving and finally while he is carrying a rider. The Hourglass Pattern in the arena is also a good place for you to fine-tune your own riding skills, so that you learn to help your equine maintain good balance and cadence, on straight lines and while bending through the corners. In order for your equine to correctly go through the corners, you will be asking him to bend the muscles through his ribcage so he can remain upright and balanced. Equines are not motorcycles and should not lean around the corners. The power should always come from the hindquarters to keep the front end light, supple and responsive to cues. If his front end is heavy and sluggish, your equine is not adequately stepping underneath with his hind legs and will thus, lose forward impulsion and power and will not properly condition his muscles.
Open Areas
Open areas are good for stretching and relaxing at all three gaits. They can be used for negotiation of obstacles and to execute large flowing patterns. You can also practice stretching exercises, as described in DVD #5 of Training Mules & Donkeys. Then proceed to working on more collection on the short sides of the arena, and go back to stretching exercises again before you quit the lesson. The open areas allow for a wide variety of training exercises by giving you the space to use numerous patterns and obstacles. Try using cones to mark your patterns—this benefits both you and your animal by helping you both stay focused. An arena without cones is like a house without furniture.
As far as the open road and in traffic, these areas are for seasoned animals only, so please do not even consider using these areas to school your equine—the results could be disastrous! With the heavy traffic these days, it is really safest to avoid heavily traveled roads entirely. For a pleasurable experience, stick to areas where you and your equine can trail ride safely and comfortablly. The important thing to remember is to follow this logical and sequential approach as far as the location and exercise sequence in your training practices to keep things easy and enjoyable for you both.
To learn more about Meredith Hodges and her comprehensive all-breed equine training program, visit LuckyThreeRanch.com, MEREDITH HODGES PUBLIC FIGURE Facebook page, or call 1-800-816-7566. Check out her children’s website at JasperTheMule.com. Also, find Meredith on Pinterest, Instagram, MeWe, YouTube and Twitter.
Covered in TRAINING MULES & DONKEY: A LOGICAL APPROACH TO TRAINING, TRAINING WITHOUT RESISTANCE and EQUUS REVISITED at www.luckythreeranchstore.com.
© 2004, 2005, 2013, 2016, 2018, 2024 Lucky Three Ranch, Inc. All Rights Reserved.
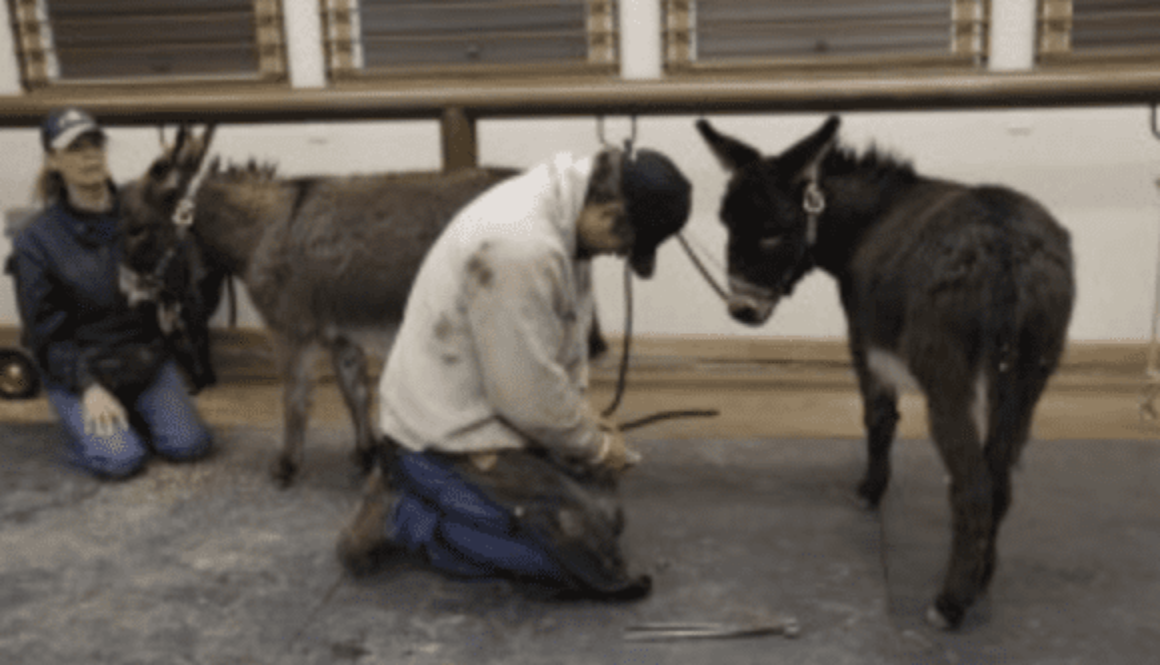
Another Augie and Spuds Adventure: Farrier & Grooming 04-23-13
“Hey, Augie…watcha doin’?!
“I’m practicing my halter stance…you know, four-square!”

“Good idea, Augie! I guess I’ll practice my halter stance right here!”
“And I will wait for my turn at the hitch rail…I wonder what’s up today.”
“Hey Augie, you’ve got some pretty dirty feet down there!”
“Cut with the wise cracks, Spuds!”
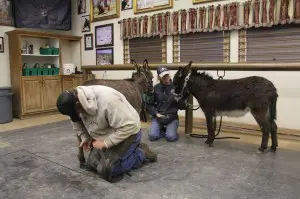
“I sure like it when they come down to our eye level, Augie.”
“Yeah, it’s not as scary as it is when all you see is their legs…whatcha doin’ back there, Dean?”
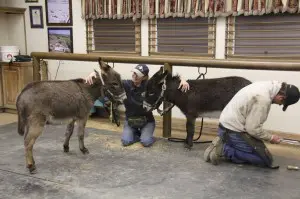
“Your turn, Spuds! This isn’t bad at all!”
“Yeah, it’s all peace, love and OATS!”
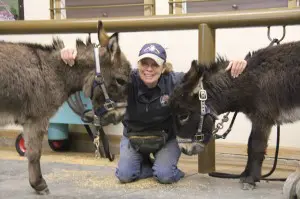
“It doesn’t get any better than this!”
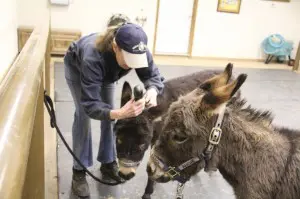
“Dang, I was working on a Mohawk…it’s the IN thing with donkeys, you know!”
“Just be happy with your crew cut, Spuds. Crew cuts are always IN!”
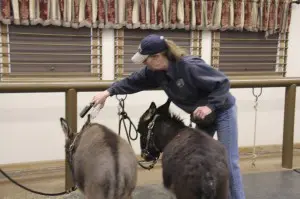
“Oooh, here comes the baby oil again!”
“Aah, nuts! Now I can’t chew on your mane and tail…baby oil tastes just awful!”
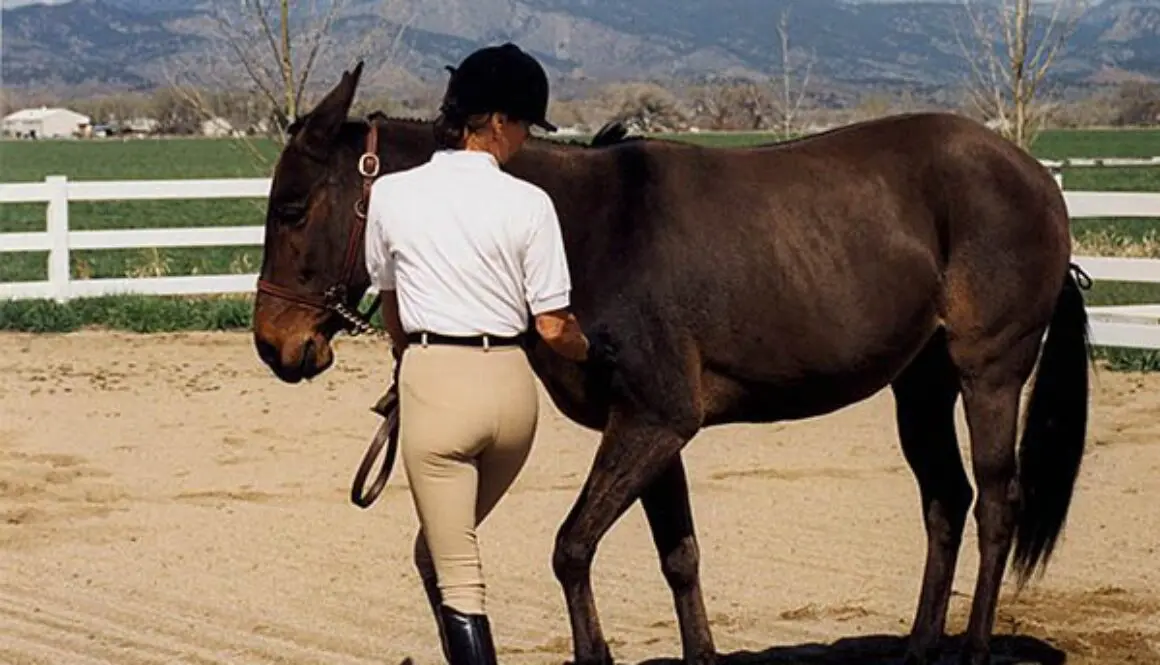
MULE CROSSING: Showing Equines
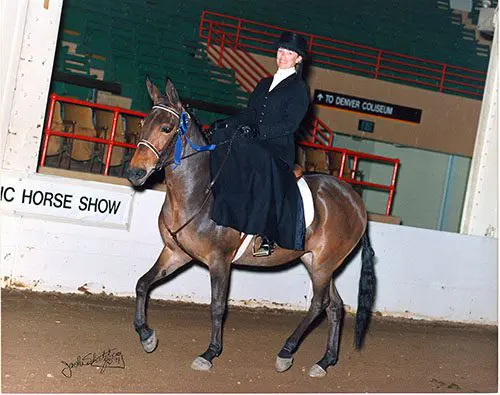 By Meredith Hodges
Many years ago mules and donkeys were numerous in America. Their strength and endurance made them ideal pack and work animals. Their contributions to the building of this great nation were unmatched, yet in 1966 their numbers had declined to the point of near extinction. With the coming of the Industrial Revolution, their services were no longer in demand. In 1987, the American Donkey & Mule Society celebrated its 20th Anniversary. The society was formed by Paul and Betsy Hutchins of Denton, Texas in 1967 in response to a need to appreciate the work of these fine, Longeared animals and to find new uses for them. Over the past 40 years, appreciation for these wonderful animals has gained momentum and with each new experiment, we find that these Longears are capable of a wide variety of uses in today’s world.
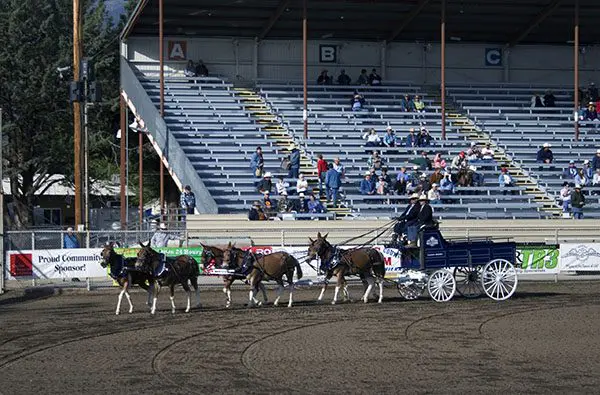 They are limited only by the imagination of The gift we have found with Longears is one that needs to be shared with others so that they might also experience the joy and pleasure these animals have to offer. In this hustle-and-bustle world, it is easy to take for granted the importance of love, sharing and simple pleasures derived from personal growth. Mule and donkey shows are a vehicle we can use to bring these things to light and revitalize the appreciation of Longears. The show ring is a place where mules and donkeys can exhibit the results of experiments with their owners and trainers, in exceptional horsemanship and performance, where challenges are met with both humor and enthusiasm. They can be pets, performers, pleasure mounts, or just plain hard workers.
However, many people are intimidated by the show ring for many reasons: a lack of show-quality animals and training time, a lack of available transportation, inopportune geographical locations and the fear of equine politics. We must remember that this intimidation was born of the horse show formats and the involvement of large amounts of money. There are literally millions of horses in this equine industry that are being shown all over the world. Out of necessity, the shows are divided and specialized according to ability and breeding.
This is the only fair way to progress and accommodate the growing numbers of horses and horse owners. In the midst of this overwhelming competitive spirit, we sometimes lose sight of the true benefits of showing. Showing can be an opportunity to test your equestrian skills and to share new ideas and concepts with others. It should be fun as well as enlightening.
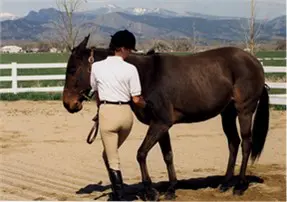 Because showing mules and donkeys is relatively new, there is much to be gained by participation. Those who feel that their animal is not of show quality can still attend shows and learn a lot about Showmanship, grooming and training skills. This development of new skills can make the difference between show quality or not, particularly in performance events. Newcomers to showing also give the audience something extra-special. The enthusiasm of the newcomer is often very contagious and the audience always finds Longears shows incredibly entertaining. They feel that this is something that they too could manage to do and enjoy. Those who feel they just cannot put in enough training time can still participate in a lot of the plain old fun classes that the show rosters include. There are enough mule and donkey clubs today that sponsor all kinds of shows and all one needs to do is contact any one of them to acquire the information that you need.
Probably the most intimidating fear of all is the fear of making some awful mistake in the show ring…in front of “God” and EVERYONE! I doubt that there is anyone showing who hasn’t experienced that awful mistake at least once in the course of learning. It’s all part of the process! “To err is human…” and err we do! I remember riding my mule in a Green Western Pleasure Class several years ago. When they asked us to trot in and line up, my mule tripped and fell flat on his face! Was my face red! Another time in a Trail Class at the World Mule Show, I picked up a plastic bag full of tin cans that rattled loudly and scared the tar out of my mule. He took off, lickety-split, out of the Trail Class and down the racetrack in front of more than 20,000 spectators! If I could have died at that moment, I would have, but I DID survive and the embarrassment of the moment subsided. The disaster of yesterday has become the source of a humorous story to tell others for years to come! So, let’s not allow too much seriousness and false pride to spoil an otherwise REALLY good time with friends! Learn from your mistakes, but don’t let them cripple you.
Time and money can be a hindrance to showing today. Economic issues are quite prevalent today, but as they say…”Where there’s a will, there’s a way!” With careful planning and the conscientious setting of priorities, one can determine the number of shows one can easily attend in a season. Those who sponsor and work on shows are sensitive to the needs of the exhibitors and are willing to help in every way they possibly can. Most donkey and mule shows are not all that expensive and can be managed quite easily.
At most of the larger one-day shows, those who wish to do so are allowed to tie to their trailers to save on stall fees. This is true in a lot of regions. Entering fewer classes will also save money and still provide you with the important learning and social benefits of showing. There are so many different sizes, colors and abilities in mules and donkeys today. Show committees encourage as many participants as possible in order to have the Longears breeds adequately represented. Schooling Horse Shows welcome the novelty of the Longears animals!
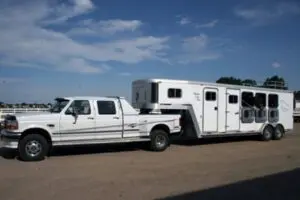 Geographical locations and transportation can also restrict showing opportunities. With a little help and a lot of ingenuity, these issues can be resolved. One just needs to decide which shows would benefit them the most and then plan accordingly. If the show is some distance away, families, or groups, can pool their efforts and cut expenses dramatically. The growth of the mule and donkey industry has increased the number of shows throughout the country. They are now more numerous in remote areas and easy to reach. If you live in a really remote area, you might want to start a Longears Group and host your own schooling shows, or you can always request permission to ride in the Open Classes at Horse Shows in your area. Either way, you are doing important work in the promotion of Longears!
Last, but certainly not least, a word about politics. In the mules and donkey industry, we are not campaigning, not competing ruthlessly against horses and ponies. We are simply promoting our beloved mules and donkeys and their incredibly versatile abilities and looking to improve our own Mulemanship ability. As individual riders and owners meet their challenges and succeed, we should all feel warmth and joy for their accomplishments. Those individuals and their Longears have worked long and hard. They stand as representatives and heroes for us all. We can all learn to be proud and supportive of the greater cause.
When in competition, compete against yourself and learn to derive joy and pleasure from your own improvements and the improvement of others. There is a lot that showing has to offer besides ribbons and trophies. Showing gives you the opportunity to test your skills and measure your success. It helps to assess different skills and make personal choices, expand your social interaction and share knowledge gained with those that have similar interests. Most of all, showing gives each of us the opportunity to exhibit good sportsmanship and do our part in support of our beloved Longears!
To learn more about Meredith Hodges and her comprehensive all-breed equine training program, visit LuckyThreeRanch.com or call 1-800-816-7566. Check out her children’s website at JasperTheMule.com. Also, find Meredith on Facebook, YouTube, Pinterest, Instagram, MeWe and Twitter.
Covered in TRAINING MULES & DONKEY: A LOGICAL APPROACH TO TRAINING, TRAINING WITHOUT RESISTANCE and EQUUS REVISITED at www.luckythreeranchstore.com
© 1987, 2016, 2024 Lucky Three Ranch, Inc. All Rights Reserved.
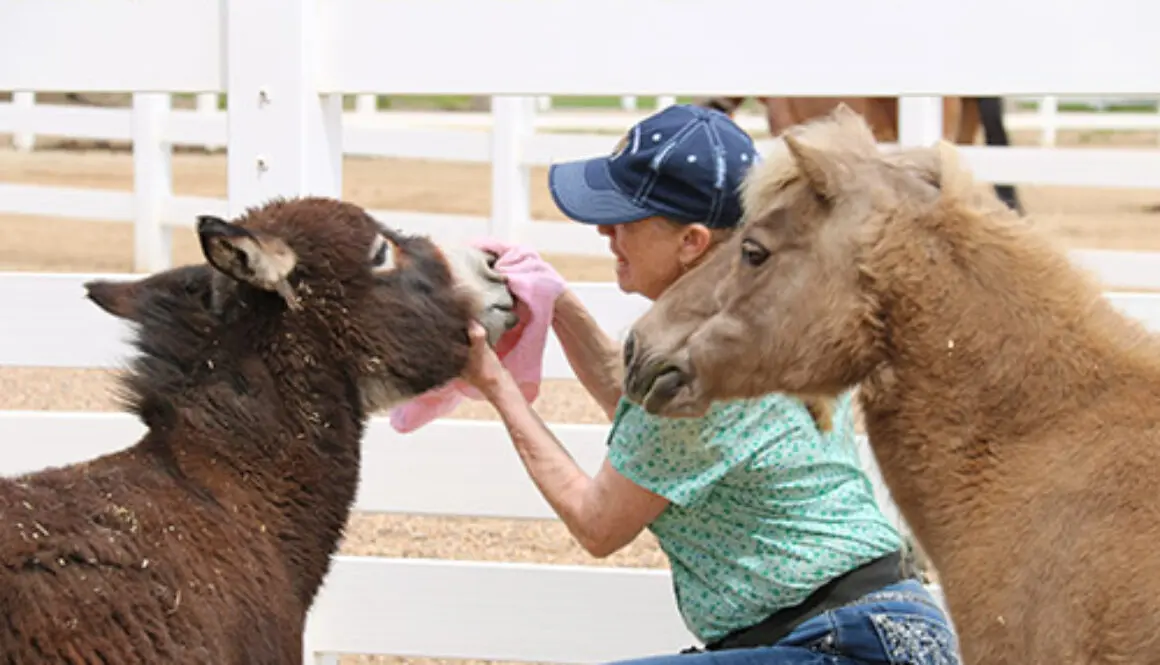
LTR MULES: Musing on Mini Grooming
6-22-22
Since I now have 16 equines, 3 donkeys, 12 mules and a miniature horse, it is not always convenient to bring them all up to the Tack Barn work station for grooming. I used to have 32 equines! As I get older, I find myself a lot busier (One would think it would be the other way around…LOL!). I am glad I have less animals to groom each week! My show days have long since passed, so I limit the training to those who need core strength tune-ups and simple pleasure rides around the ranch. Forunately, my routine way of management and training resulted in good behaviors and a willingness to comply with my wishes. Sometimes, to save time, I just fill a bucket with my grooming tools (Plastic human hairbrush, Johnson’s Baby oil, clippers, Cool Lube, scissors for ergots, Neosporin and Tri-Tech 14 fly spray) and groom them in turnout areas, or in the stalls and runs. I call them to the gate, give them a reward for coming and begin my routine grooming.
I start by clipping their bridle paths in the summer and fall. This keeps them from getting over-heated. I will let their bridle paths grow out in the winter and spring to keep the warmth within their bodies. Grooming gives them great pleasure when it is done correctly and politely!
They are always rewarded for cooperating during grooming, so they hang around and don’t wander off. I even reward the ones in the neighboring pens to reinforce “handing out.” I always clean ears, eyes and nostrils, and will do this daily with donkeys that typically have runny eyes. It isn’t their favorite, but they will tolerate it for the crimped oats reward! They all like to SUPERVISE the grooming of each other! They are pretty funny! It makes our time together very enjoyable!
I use my multi-bristled, plastic human hairbrush both to apply the lightly-sprinkled Johnson’s baby oil AND to go over their bodies as they are shedding. It gets all the way to the roots, flips out the dirt, and promotes a well-aerated, healthy hair coat. When the coats are short, I can use a dandy brush, or bring them up for vacuuming with yearly baths in July.
A common practice is to braid manes and tails to get them to grow longer. I have found that this will often cause the hair to break. Plus, it is difficult for the animals to swat flies with braided manes and tails. Quite simply put, it hurts! I use Johnson’s Baby oil during weekly grooming, sprinkled in the manes and tails. It does a good job of protecting the hair and doesn’t get as greasy as you might think. The day before a show, I bathe them with water only over the body and scrape off the dirt with a shedding blade. I only use Tres Semme shampoo and Aussie #X conditioner in the manes and tails. If I am going to show them, I let the manes and tails partially dry and braid them for overnight. When you take out the braids the next day, their manes and tails will be much fuller! Even the thinner and wilder manes on mules will respond positively to this treatment.
Lots of my animals are older and have issues with runny eyes. If I am not showing them, I will “cut their bangs” to keep the hair from irritating their eyes. Even when showing, I can trim the bangs so they aren’t cut straight across and look funny.
The minis are much calmer when I try to stay down at their level whenever possible. I gather the excess hair and remove it from the areas where I groom. If they decide to eat it, it could cause impactions. Better to be safe than sorry!
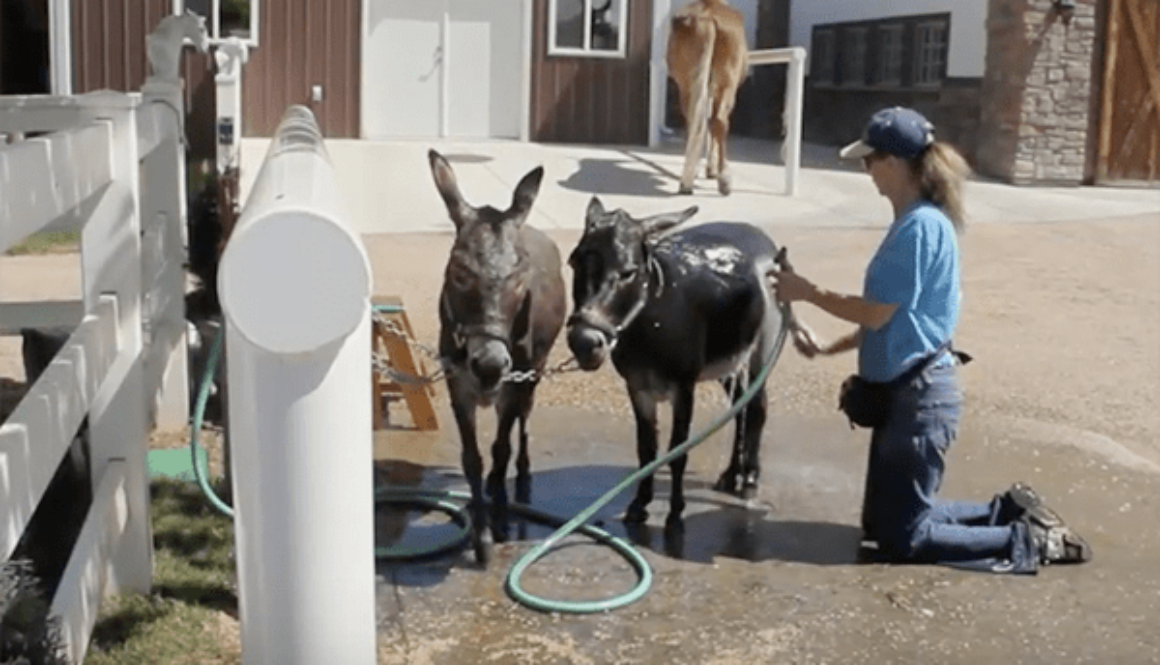
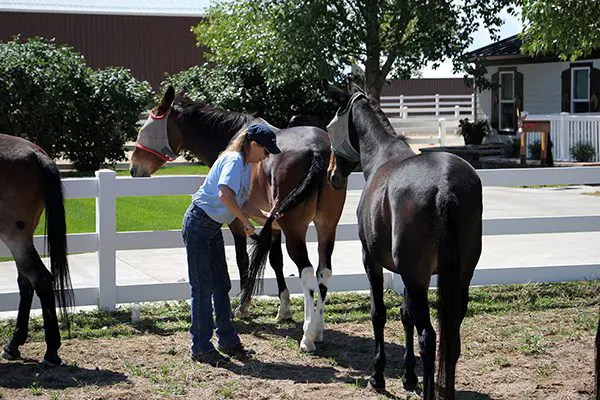
Although they are all fine with fly spray, this time, I am going to take pictures for this article so I am haltering them and tying to the fence. Then I will just go down the line and fly spray them all at once. They are very willing to stand the way I position them for the pictures. When I am done, I release them! Grooming is FUN!!!
To learn more about Meredith Hodges and her comprehensive all-breed equine training program, visit LuckyThreeRanch.com, MEREDITH HODGES PUBLIC FIGURE Facebook page, or call 1-800-816-7566. Check out her children’s website at JasperTheMule.com. Also, find Meredith on Pinterest, Instagram, MeWe, YouTube and Twitter.
Covered in TRAINING MULES & DONKEY: A LOGICAL APPROACH TO TRAINING, TRAINING WITHOUT RESISTANCE and A GUIDE TO RAISING & SHOWING MULES at www.luckythreeranchstore.com
© 2013, 2016, 2022 Lucky Three Ranch, Inc. All Rights Reserved.
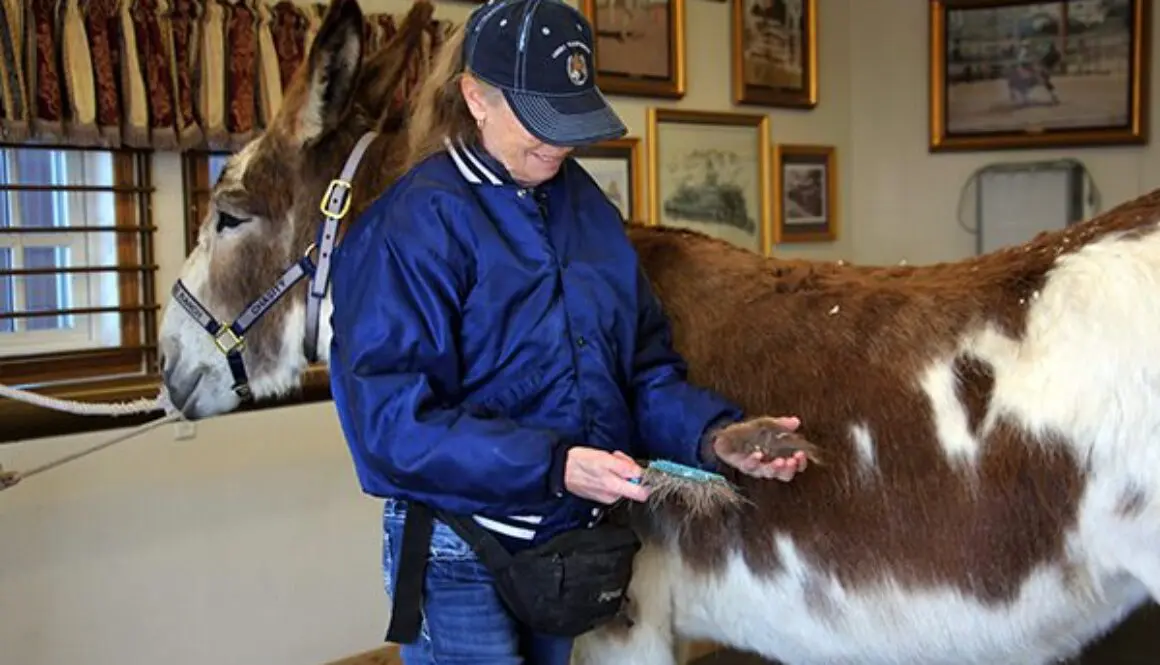
CHASITY’S CHALLENGES: Grooming Routine: 4-14-20
4-14-20
Grooming is an important activity in your equine’s life and it need not be a struggle if it is done regularly. Chasity was not real sure of us, or what to expect when she first arrived, but she is gaining confidence and calmness with each grooming session that precedes her workouts. Right off, she is rewarded for going to her designated work station. This familiarity sets the stage for the tasks to come.
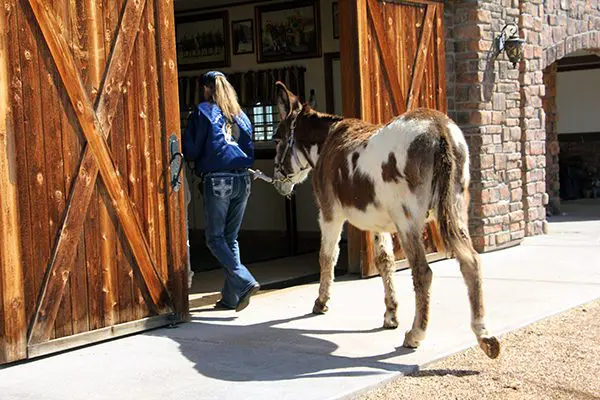
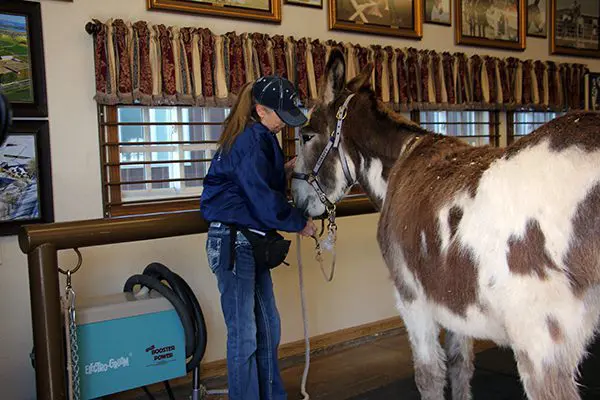
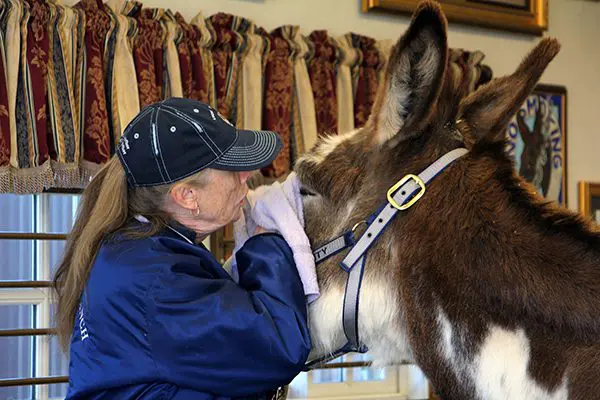
I begin with a wet towel to clean her eyes, then her nose and finally her ears. When cleaning the ears, I stroke upwards with the hair and try not to go against the way it grows. Most Longears enjoy having their ears rubbed anyway, but HOW you do it can make a huge difference in their willingness to comply.
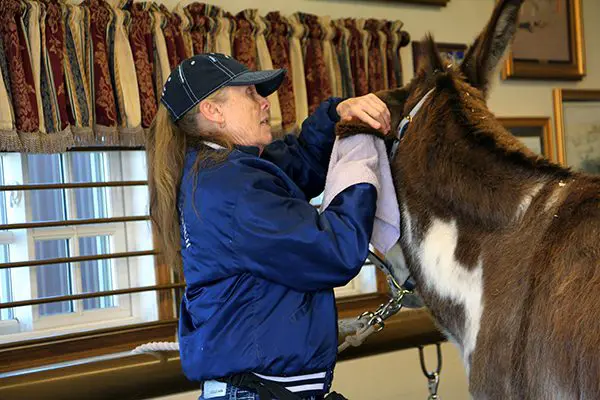
Then I begin on her forehead and along her neck with a human, multi-bristled plastic hairbrush. If she had mud on her, I would have scraped that off with the shedding blade first. The human hairbrush is much more effective in getting deep into thick donkey and mule hair and will “aerate” the coat nicely where the shedding blade will only skim the top and often break the hair.
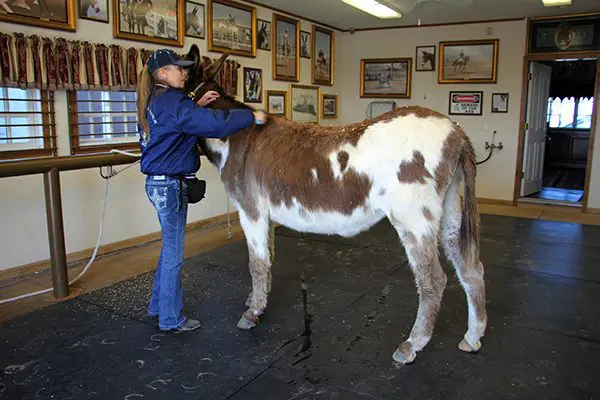
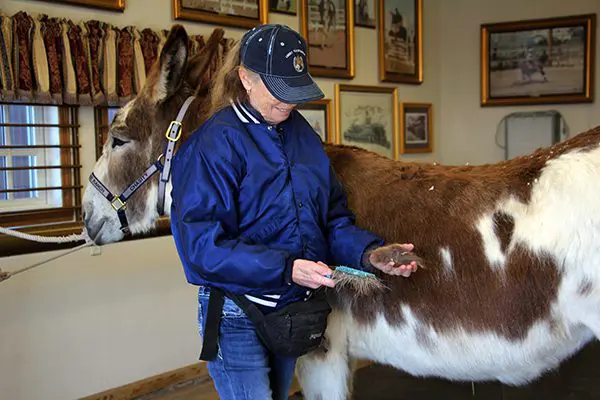
Chasity’s teats were as hard as a rock, but were draining a milky-looking substance. At first we thought she had just weaned a foal, but we found out later, that was not the case. At any rate, during grooming, I scraped the sticky drainage from her back legs. Then I discovered some crusty spots across her chest that resembled an old bot-hatching site that had not been addressed.
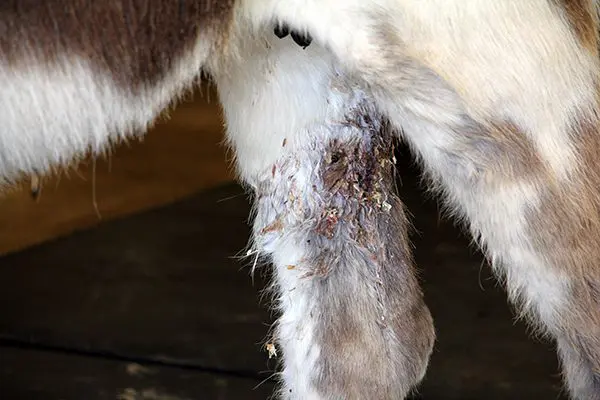
I used the shedding blade to scrape off the scabs and applied Neosporin to the area. Over several days now, the scabs are beginning to go away. Chasity enjoyed the scratching! They must have been itchy!
Chasity has an enlarged, crested neck and fatty deposits over her body that will need some attention. The crest has fallen over quite a bit, but I do think it is salvagable. It will just take the right kind of feed and exercise, and some time to correct.

On her withers, Chasity has some scarring where the saddles previously used on her were rubbing and turned the hair white. She is also sporting a bit of Lordosis (sway-backed) which should not be seen in an animal of her young age of 13 years. This will undoubtedly result in irregular movement when seeing how out of alignment her spine is with these issues. Equines are not designed to carry weight on top. Rather, their structure supports carrying their weight below the spine. This is why is is so important to pay attention to core exercises to strengthen the top line and abs to prepare to support the rider’s weight. Just because they are big animals doesn’t mean they can automatically carry our weight without undue stress on their bodies.
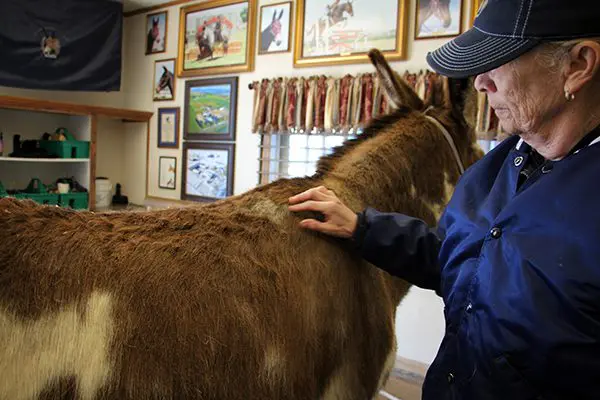
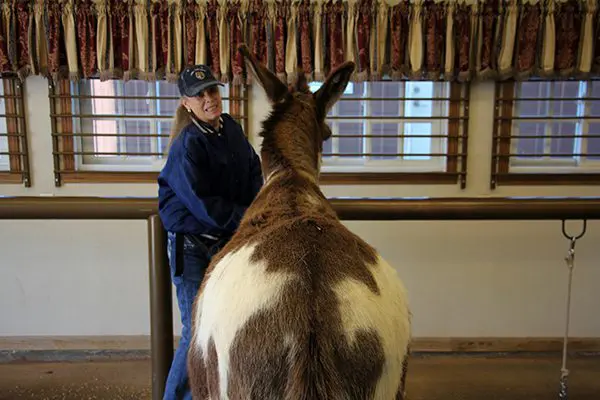
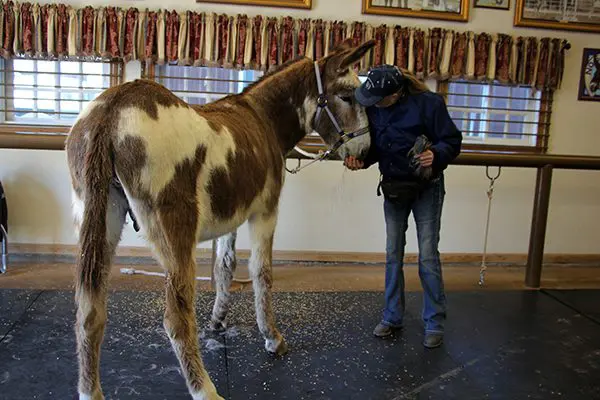
The crusty discharge on her legs is very sticky, so I sharpen my shedding blade before going after it. It is going to pull the hairs hard enough as it is. I want the shedding blade sharp so it will come off quickly and with as little pain as possible. Chasity appreciates my consideration for her!
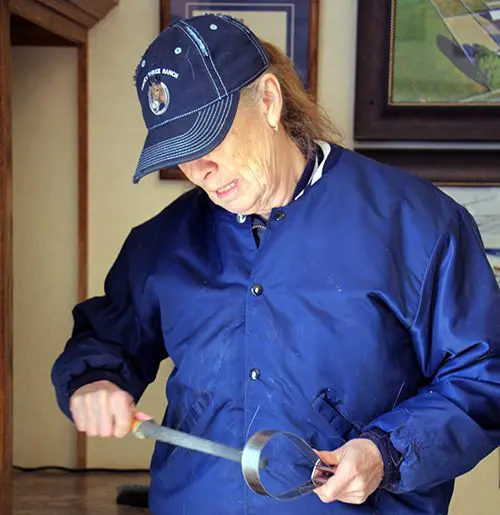
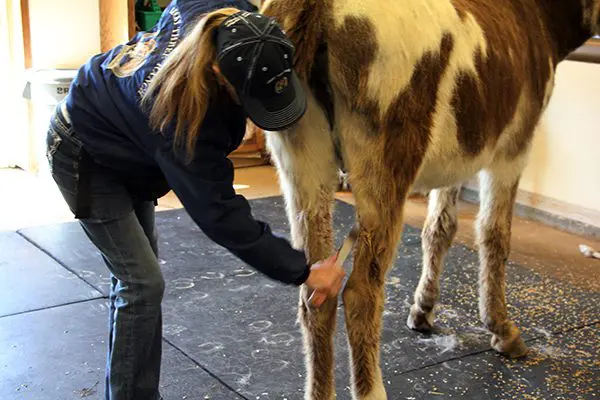
Last, but certainly not least, I sprinkle Johnson’s Baby oil in her mane and tail. This protects the hair from drying out during inclement weather, will promote growth and keep other animals from chewing on it. Then I square Chasity up one more time in preparation for either tacking up or for leaving the work station. Although this all seems simple enough, keeping this routine weekly will keep things from getting out of hand and grooming will remain easy each time. A reward of crimped oats from the fanny pack around my waist is always in order for standing quietly in good posture!
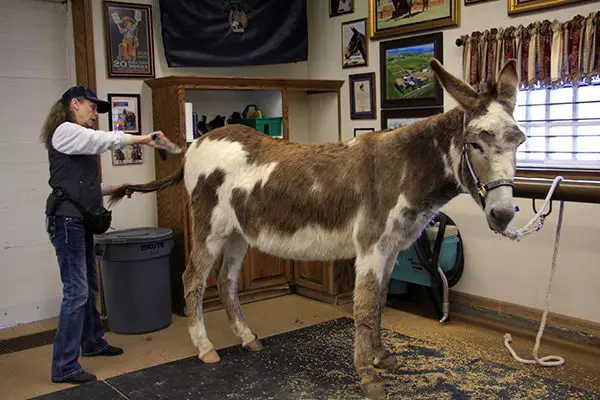

If you have multiple animals, just take your grooming tools in a bucket and your fanny pack full of oats with you to their stalls and do them there. If they are all in one pen in a herd situation, do not wear your fanny pack until they can all be rewarded at the same time, at the end of grooming. Body clipping is not a healthy solution and should only be done when showing. During shedding season, it is impossible to get it all done at once and still keep the hair coat healthy. It is easier if you do it weekly and take off the excess hair gradually. When grooming is done regularly and goes easily, it greatly reduces anxiety and bad behaviors.
LTR MULES: Efficient Grooming Practices 12-1-21
On November 22nd, of 2021, I posted, on my MEREDITH HODGES PUBLIC FIGURE Facebook page, information about how to maintain your tack and equipment, and how to keep a neat and tidy tack room. There were a lot of comments about it and many people indicated that they thought it would be easy if you had the staff that I have.
Just for the record, when it comes to my equines and their tack and equipment, I do most of the work myself. My TWO guys do clean the stalls and runs daily, and the larger dirt pens weekly when the animals are overnighted there, and they do feed in the mornings, midday and evenings. TWO of my girls take care of the inside and external cleaning of the multiple buildings that we have, and they condition the tack and equipment as needed, but mostly every three months because we clean things as we use them.
My THIRD girl assists me in the office checking the website and Social Media connections, making Social Media posts (with the exception of Facebook that I do myself), editing articles, advertising and the newsletter, fulfilling orders and MUCH more. TWO of the girls and I film and take photos of EVERYTHING we do so we have material for our posts, articles, video Training Tips and Documentaries. We put these together with our TWO remote videographers and we have ONE remote graphics artist that also assists with publications. Our JASPER MASCOT also doubles as a website tech person. So, we have a VERY SMALL staff to cover all the work that we do. We are prompt in doing what we do because we want to provide all of you the information that you need to have the same success with your equines that we have with ours. In this post, I will address how I efficiently keep all 17 of my equines clean and healthy.
I find that when you have a regular weekly grooming routine along with good environment cleaning practices, the animals do not seem to get as dirty as they would otherwise. Spring is obviously the most intensive time of the year because of mud and shedding, but during other times of the year, grooming can go quickly. During the summer months, they have short hair coats and will only need to have bridle paths trimmed, faces, ears and nostril cleaned, Johnson’s Baby oil in the manes and tails, Neosporin for any cuts and scratches, and a quick go-over with the Dandy brush. Since I keep them barefoot with regular trims every 6-8 weeks, they rarely need their feet cleaned. I carry the grooming tools in a bucket and visit them wherever they happen to be, either in their stalls or in turnout. Because they are all taught the same manners, they come to me and line up for their turn wherever they are.
We have had good weather this fall, but with the lack of moisture, they are all pretty dusty. Since we are using my Tack Barn as an art studio and getting the BELLE, JASPER, MOXIE & KYLIE bronzes ready to be cast for their placement in our newest project, the OLDE WESTERN TOWN OF ASSPEN here at the ranch, I opted to vacuum everyone in the alleyway of the barn.
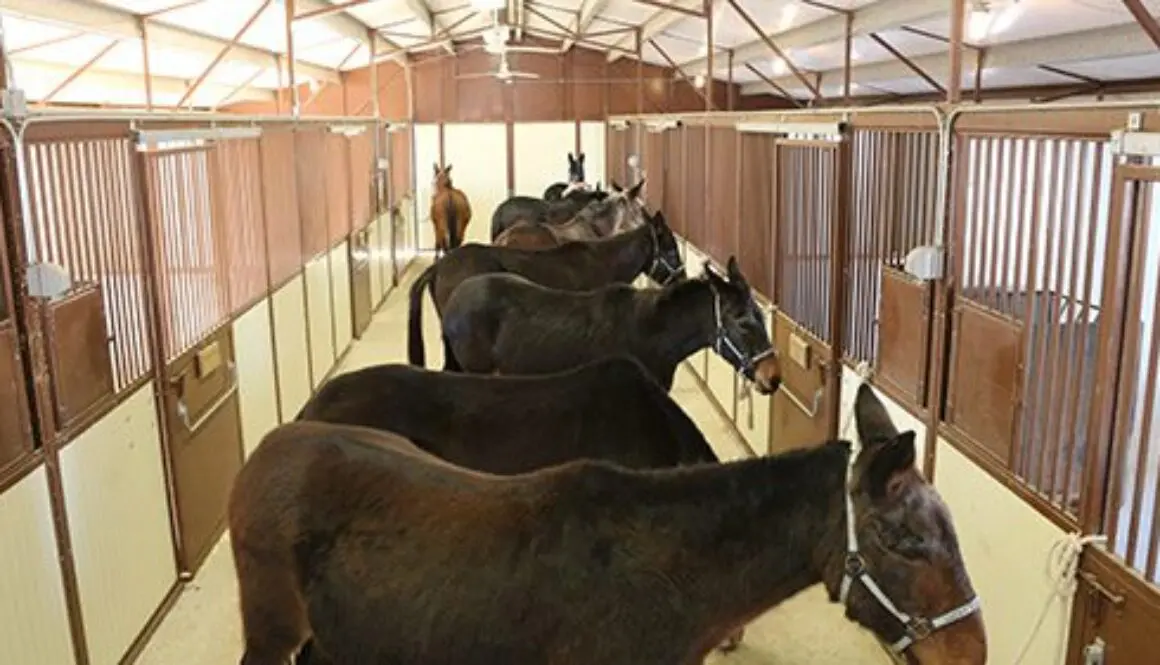
The first thing I did was to have them exit their stalls and be tied in the alleyway. I brought in Augie, Spuds and Billy from their barn and added them to the eight mules from the South Barn. As I retrieve them, I ALWAYS open the door, ask them to come to me, reward them and then put on their halter. They learn to stand quietly and will not exit the stall until I give them permission to do so.
So I can be hands-free with the halter, I will often allow them to eat their reward directly from the fanny pack of crimped oats that I ALWAYS wear around my waist. If they get pushy, I will say, “NO!” and put my hand up like a stop sign and ask them to back off. If that doesn’t work, a quick slap to the side of their mouth after they have been asked does work. Consistency in MY behavior is key!
They have all been introduced to the vacuum cleaner and stand quietly while I go from one to the next. If they start picking at each other, I just holler the name of the perpetrator and say “NO!” VERY LOUDLY! They always stop because they know the next thing is a pop on the rump from me!
I am always aware of each animal, but I do not “move over” for them. I ask them to “move over” for ME. Then they are rewarded with crimped oats. Once they learn, for instance, that I need to return the vacuum to its spot, and that they will all get rewarded for standing quietly, they give me my space as I work around them, even during rolling up the extension cords!
Since I have so many animals, I do have to refill the fanny pack often, so I keep a full bucket available in a convenient spot for refills. Once they are all vacuumed, I ten move down the line and wipe everyone’s faces. They get their eyes, ears and noses cleaned thoroughly. They quickly learn to accept the process and then I reward them once they are all done. When I do them individually before riding, I will reward each immediately after each task. When they are all together, they will behave better when they have to wait to be rewarded when they are ALL done with each task. Then I go down the line and sprinkle Johnson’s baby oil in all their manes and tails and reward their good behavior when that is all done.
My 28 year old mule, Merlin, poked his eye on a tree branch when he was a yearling. I opted not to have his eye removed, so we have been treating it for 27 years. We keep him in a fly mask all the time to keep the dirt and debris from irritating it. Twice a day face wiping keeps it sanitary and it is easy enough to do at feeding time. We just carry a wet rag with us when we see him.
When they are all done, I lead them back to their stall, send them in while I stay at the door and ask them to turn back to me for their reward. As they chew their reward, I remove the halter and bid them a fond farewell!
With the 11 mules and mini donkeys finished in the South Barn, I next go to the North Barn to repeat the process with the remaining six animals, two Large Standard Donkeys (Wrangler & Chasity), a miniature mule (Francis), a miniature horse (Mirage) and two saddle mules (Jubilee & Brandy).
Again, I ask them to come to ME, give them their reward and then halter them as the chew. They are all happy to stand still until I tell them they can walk out the door.
I repeat the whole process with the vacuum cleaner and again, they have all been trained to accept it, so they stand quietly and happily. I do believe that they really DO enjoy being cleaned…even if they do go back and roll almost immediately…LOL!
Then comes the face-wiping followed by the Johnson’s Baby oil in the manes and tails. I do not cut their bridle paths in the winter. It gets very cold here and I don’t want them to lose heat from their bodies.
Then it is time for them to be returned to their stalls. I have two rescues (re-trains) in this group and they watch intently as the old troopers enter their stalls and behave impeccably!
When Chasity was returned to her stall, I asked her to walk through the narrow space between my truck and the wall of the barn. My assistant was filming from the bed of the truck and as I said earlier, we do not move over for them! Chasity walked quietly through the narrow space, did not rush or push me, but followed obediently. She was sent into her stall, turned around and got her reward. Then, it was Wrangler’s turn.
Francis is a mini mule that I got 10 years ago and to this day, she is still suspicious of humans, but is learning to trust. She can be fully groomed in her stall with no halter, but she can become quite a handful when outside the stall. Her natural reaction is to bolt and run any time she get the chance. When I return her to her stall, I set her up for success by looping the end of her lead rope around the stall bar so if she does bolt, she won’t be able to pull the lead rope from my hand and will be forced to turn around and face me. She didn’t even try to bolt this time, kept the rope loose and returned to me for her reward. Then I went and got Mirage, our 26-year-old miniature horse, and returned him to his stall. The grooming of all 17 animals only took me 2 hours! Organized practices and teaching good manners makes all the difference!

LTR Training Tip #124: Practical & Therapeutic Grooming
Grooming is an important facet of your equine’s management. How you take care of his hair coat will greatly affect his health. How often you groom and what tools you use can positively affect your equine’s behavior and comfort.
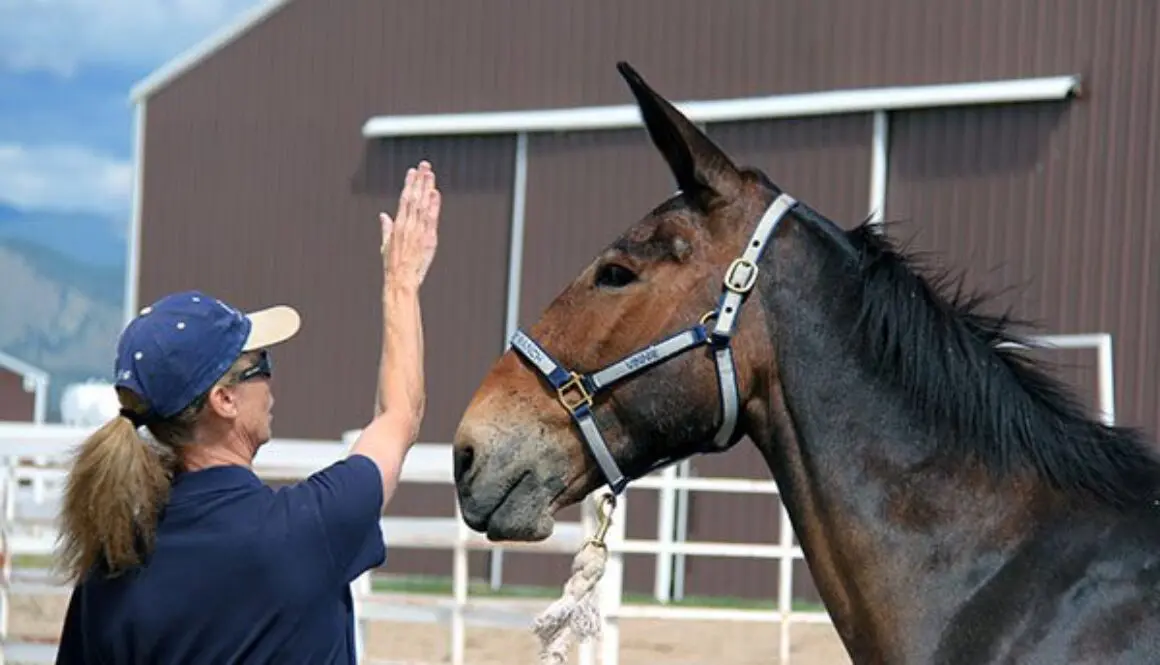
MULE CROSSING: Understanding Behavior Modification
By Meredith Hodges
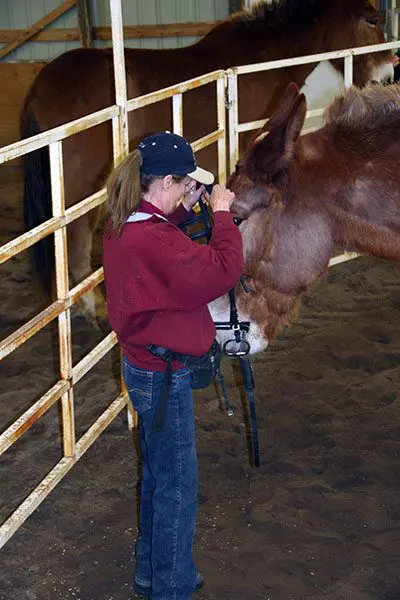 When people think of Behavior Modification, most people think of the basest idea of rewarding good behaviors with treats which is commonly called positive reinforcement. A common misconception is that if positive behaviors are rewarded, then negative behaviors should not occur, but in reality, they do. Negative behaviors need to be negatively reinforced, or discouraged, but the negative reinforcement should be punitive, but not abusive. Learning how to employ Behavior Modification can be easy and fun.
Scientifically speaking, Behavior Modification is a direct and literal translation of stimulus and response. Given a certain stimulus, a living being will respond in a predictable manner. This is the essence of communication. Communication is comprised of a lot of elements that all play an important part in the receiver’s ability to understand. When trying to communicate, one needs to realize many different perceptions can arise from the receiver’s ability to comprehend. They might perceive from a purely technical level, a scientific level, an emotional level, a physical level, or any combination of a multitude of perceptions depending upon their life experience. It is the same for all living creatures. Finding the right stimulus for each individual and implementing it properly is the key to good communication and a satisfying response.
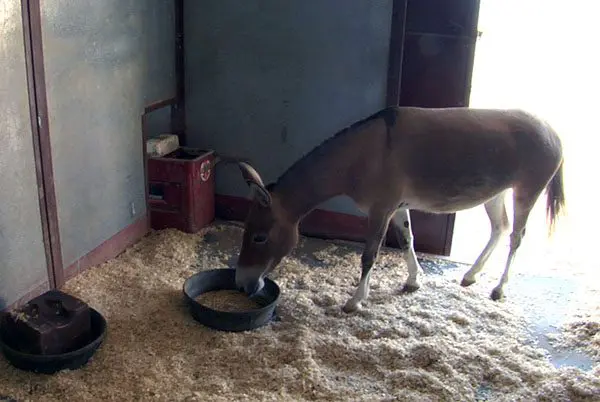 When using Behavior Modification, one needs to take into account all the things that can make that individual comfortable and happy. In the case of equines, we need to take into account the feeding and nutritional programs we use. Certain feeds can actually cause problems like nervousness, anxiety and hypertension that can result in an inability to be calm and receptive to incoming information. From this evolves negative behaviors that block the learning process.
In addition to feeds and nutrition, we need to take into account the anatomical ramifications of the way we are physically conditioning the animal. The healthiest way to condition an animal is slowly, and in an order that builds muscles layer by layer, beginning with the core muscles and elements that support the skeleton. When you take the time and effort to approach training in a logical and sequential way, it promotes healthy organ function and a happy mental attitude. When doing this, one should allow the equine to perform freely and without constraint. When they feel good physically, they are more than halfway to a good mental attitude. A program of physical exercise that is taxing and stressful may produce the appearance of the right results, but there may be deeper problems that can surface at a later date.
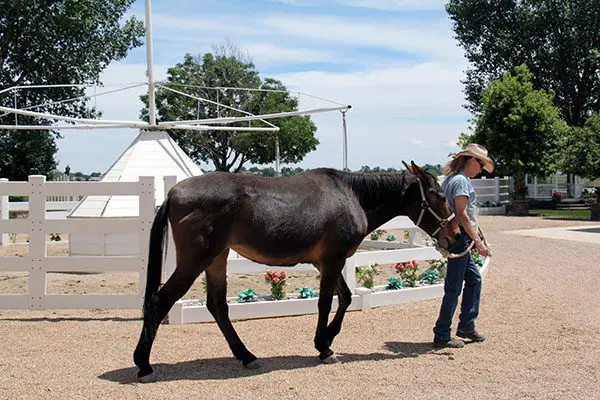 It is easy for natural athletes, but as I said before, we are dealing with individuals and each one is unique. Not all individuals are physically able to carry their bodies in good equine posture, and perform athletic movements correctly without some guidance. When they do not carry their bodies in good equine posture, certain muscle groups are not conditioned symmetrically throughout the body. This will cause compensation from other muscle groups that will eventually become over-used, stressed and they will give way to soreness, lameness, or worse. The uncomfortable individual will begin to exhibit negative behaviors as a result.
Herein lays the value of using certain kinds of restraints, such as the “Elbow Pull” that we begin using in DVD #2 of my Training Mules & Donkeys series. This particular restraint is used to keep the equine in good posture while exercising, so that all the muscle groups are worked symmetrically throughout the body. Of course, it is the trainer’s responsibility to make sure that they are worked evenly on both sides of the body. The restraint only addresses the posture and not the directional movement of the muscles. The “Elbow Pull” is not in the hands of the trainer, but rather it is a self-correcting device for the equine to control. It only prevents him from raising his head so high that he inverts his neck and back. If allowed to continually raise his head this high, over time he would develop a U-neck and/or Lordosis (Swayback). Since good posture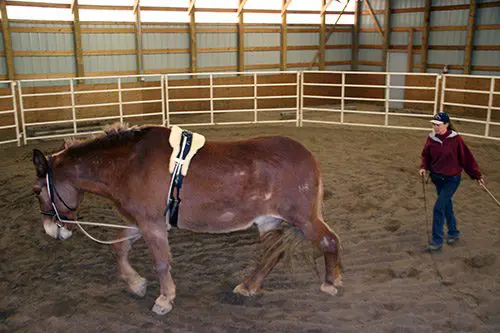 is something that must be taught, it prevents this bad posture, but allows the equine completely free movement in every other direction. Good posture is difficult to hold when you are not used to it and this aid gives him support at the poll to encourage him to round his back and neck, and relax the poll. He can lean on the “Elbow Pull” at the poll when he has difficulty holding his own good posture and the device will be snug at the poll, the bit rings, behind the forearms and over the back. When he holds his own good posture, it is completely loose. The equine is the one who controls his own good posture. An equine that does not have natural acceptable posture will soon give to the aid because he will feel more comfortable than he has ever been in his incorrect posture. Those who have naturally acceptable posture will succumb to the device faster. No equine is really in their ideal posture to start. Restraints play an important role in the hands of competent trainers, but they should only be used to suggest certain behaviors, and then they should be phased out over time. They should not be used to force the equine to do anything.
There are certain individuals who are not all coordinated and have difficulty attaining balance in good equine posture. For this reason, it is important to start slow and gradually ask for more speed, and more difficult movements, only as they are easily performed. First, the equine’s balance needs to be attained at the slower gaits with very simple movements in order for the coordination to become repetitive, habitual and comfortable. This not only pertains to the equine being trained, but to the trainer as well.
Verbal communication is not exclusively for the equine to learn commands. It has a two-fold purpose. For the equine, it is a way for the animal to understand what the trainer is asking when the body language is unclear. For the trainer, it is a reminder to 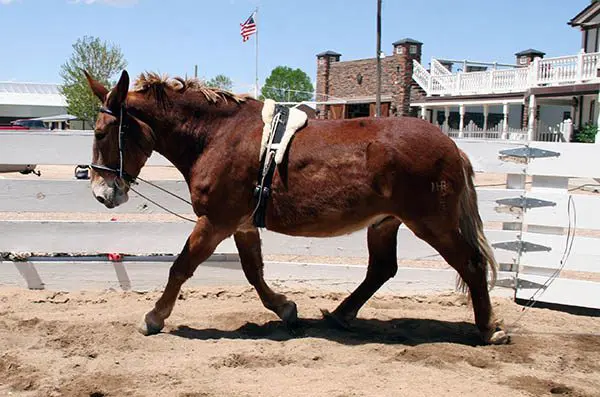 synchronize his own body language with what he is asking from the equine so his signals are clear. This is especially important for novice animals and trainers.
In Behavior Modification, we use the animal’s natural instincts, tendencies and movement to assimilate the things we wish them to do so they can be rewarded. The reward needs to be something for which the equine will continually work for over long periods of time. It needs to be something that will never bore him and something that does not cause adverse or negative behaviors. In the case of equines, this is crimped oats! Equines that are over-indulged, or bribed, will not respond appropriately and may become pushy.
Horses have a very strong flight reflex and donkeys are prone to the freeze reflex. Mules can have a combination of both. All three have a strong sense of self-preservation that triggers their behaviors. If you want to have an equine that enjoys his work, it is important to bolster his confidence and trust in your. This requires setting up the training environment in a safe and non-threatening manner. For instance, if you begin training a foal, or have a new equine, it would be practical to approach the animal at a time when the flight reflex is at its lowest…feeding time!
Of course, this is only practical when it comes to imprinting, haltering and simple tasks like brushing and picking up the feet. This also sets the stage for reward system training. When he has finished his oats mix, he will be happy to know there is an easy way to get more. He will appreciate, perform and bond with the person who gives the reward.
Chasing the equine is never an option. He will only learn that he can sucker you into a game of chase…and you will lose! When this reward system of training is applied correctly, you should NEVER need to chase him. He will always look forward to being with you.
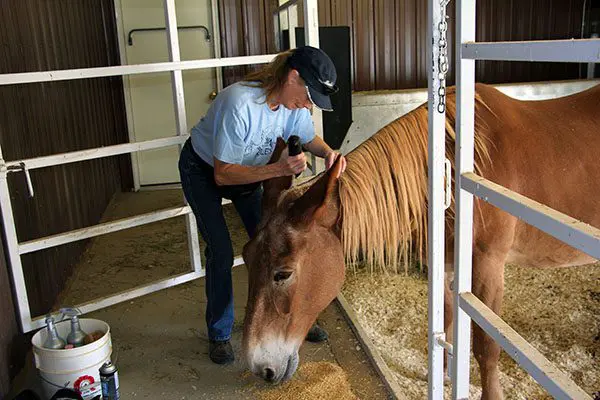 During this time, your equine’s ground manners will begin to develop. If you are consistent with what and how you ask, when the rewards are prompt and appropriately given, you should experience minimal adverse behaviors.
As he gains confidence, it’s the equine’s natural instinct to become playful. In this controlled environment, you are able to set limits to these negative behaviors in the form of non-abusive punishment. The most common expression of playfulness is to turn, buck and kick at the trainer. If a foal does this, you would simply give him a smart slap to the rump, step back and firmly say, “No!” He might be startled, but he would turn and look at you, displaying curiosity. When he does, you would say, “Good Boy (or Good Girl) and then offer an oats reward, and give it to him when he approaches again. We want to encourage this curiosity, but stop the bad behavior.
If an adult equine turns his haunches to you and threatens to kick, you would firmly and loudly say, “NO!” Use a whip as an extension of your arm and strike him smartly on the fetlocks, only once for each kick. Pause afterwards to give him a chance to turn his head to you. Then you can offer the reward the same way you would with the foal.
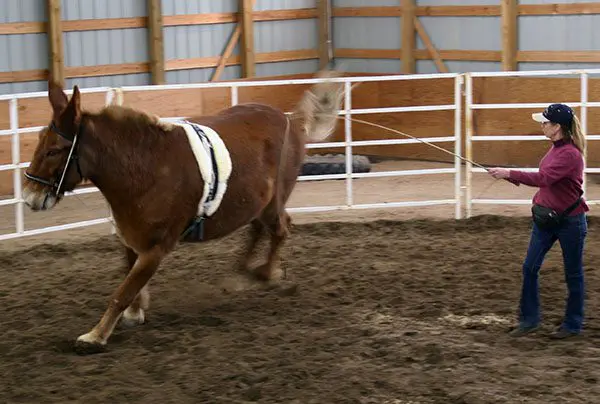 The strike on the fetlocks will not hurt him. It will only startle him and get his attention. Your voice will also startle him when you say, “NO!” and will cause him to turn his head to you and THAT can be rewarded. Biting is handled the same way with a firm slap of your palm on the side of his mouth, a loud “NO!” and then put up your hand like a stop sign in front of his face. He will raise and turn his head to flee at which time you simply step forward and offer the oats reward with an open hand for giving you your space. The next time he becomes aggressive (and he will!), you will only need to raise your hand like a stop sign and he should step back to receive his reward. The first-time slap applied smartly was simply to clarify the boundary to his behavior. So, if you do not want to slap him again, you have to make a firm impression on him the first time! It is well worth the few minutes of training that it takes in the beginning to ensure that your animal does not become dangerous later. This may literally make the difference between life and death.
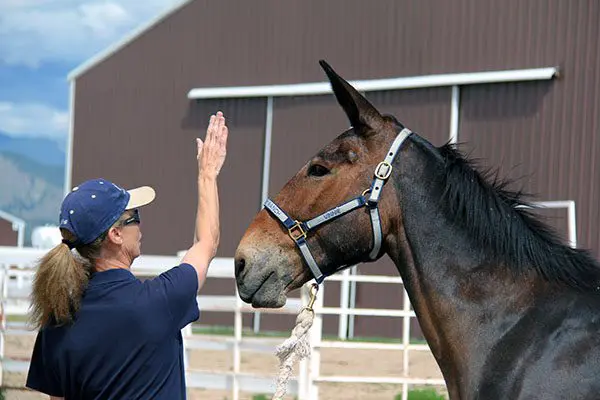 The result of this early limiting of the negative behaviors (of biting and kicking), will pave the way for you to set boundaries to any other questionable behaviors that might arise in the future. All it should take is the raising of your hand and a firm “NO!” It teaches the equine to think before he acts. It might mean the difference between a real bite, or nip, and a soft nudge, or a kick, and a soft shove with a hind foot when he experiences discomfort. Early negotiation of obstacles on the lead rope will also help to engage his curiosity, help to solidify his responses for rewards, passively build and condition the muscles closet to the bone, and will encourage trust in his trainer. Now we can safely proceed to a more open area to play and learn with our equine.
In the Round Pen, we will begin to use the flight reflex a platform for reward. The equine is already comfortable with you and knows you mean him no harm. In the Round Pen, he may be averse to circling, and may want to just stand still.
If he does, raise the whip and strike the ground behind him, or even his rump. If he still won’t move, back up, lower your body and shuffle your feet on the ground as you approach his rear again…he should take off. If he is the type to take off on his own, just stand in the middle and wait until he slows down and stops. When he does, say, “Whoa” and offer the reward.
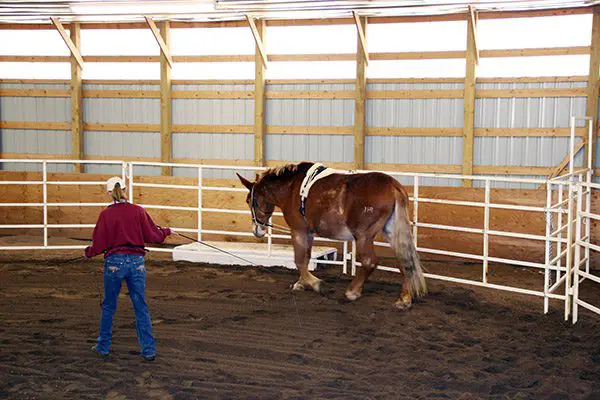 The same goes for the equine that had problems getting started. Send him back to the rail again and build the number of expected rotations slowly and over time. Be consistent with your rewards for the “Whoa.” Learning the consistent, “Whoa” will give you a safe zone from which to work and play. This will translate to trust and confidence, and will temper the flight reflex to a controllable level. It can make the difference between the freeze and flight reflex if the equine is spooked under saddle.
The equine that is brought along with this kind of training will pause and give his attention to the rider before reacting. Any bucking and kicking while circling in the Round Pen should be ignored, and the reward should be postponed until he regains composure and has done what is expected. Bucking and kicking should be allowed during lunging because many times it is merely a moment of confusion, or the need for a physical adjustment (in the spine?), on the part of the equine at this stage of training and not really an aggressive move against the trainer. It is rarely an exhibition of meanness unless provoked by the trainer. Once the equine gets this sorted out, he will always want to be with you, and use his good manners, because it is the best place to be!
Whether they realize it or not, most trainers already use some form of Behavior Modification in their training program. There is so much to learn about communication to truly achieve balance and harmony, that one trainer could not possibly know it all. For this reason, it is important to appreciate the work of others who are giving of their knowledge to share, and assess for yourself the techniques that they offer that might fit 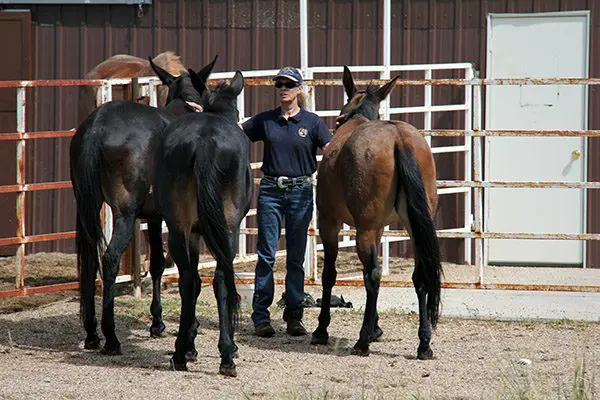 into your program. As they say, “You can always learn something from everyone!” It is our job to sort through what only works for the short term, and what really works for long term success. Don’t be afraid to make mistakes. It’s just one more way to learn. The more we think we know, the more we learn that there is so much more to learn!
Behavior Modification is an ongoing, careful balance of communication between living creatures. It works when both parties opt to listen and learn from each other. At each stage, there are tasks to perform that need to be balanced and refined by both the trainer and the trainee. Behavior Modification is not controlling. Rather, it’s a guidance system by which positive behaviors are rewarded and thus, more likely to be repeated and become habitual. The parties involved are both rewarded each time they are together. They learn more about each other in an enjoyable and appreciative manner.
Over time, with practice and this kind of understanding, comes harmony and mutually satisfying performance. In the beginning, it may seem overly simple, but as you practice and learn more, your proficiency will increase gradually over time, and the results you will witness are truly amazing! This is why Behavior Modification, when applied correctly is the method of choice in the training and treatment of zoo animals and aquatic mammals.
To learn more about Meredith Hodges and her comprehensive all-breed equine training program, visit LuckyThreeRanch.com or call 1-800-816-7566. Check out her children’s website at JasperTheMule.com. Also, find Meredith on Facebook, YouTube, Pinterest, Instagram, MeWe and Twitter.
Covered in TRAINING MULES & DONKEY: A LOGICAL APPROACH TO TRAINING, TRAINING WITHOUT RESISTANCE and EQUUS REVISITED at www.luckythreeranchstore.com
© 2005, 2016, 2024 Lucky Three Ranch, Inc. All Rights Reserved.
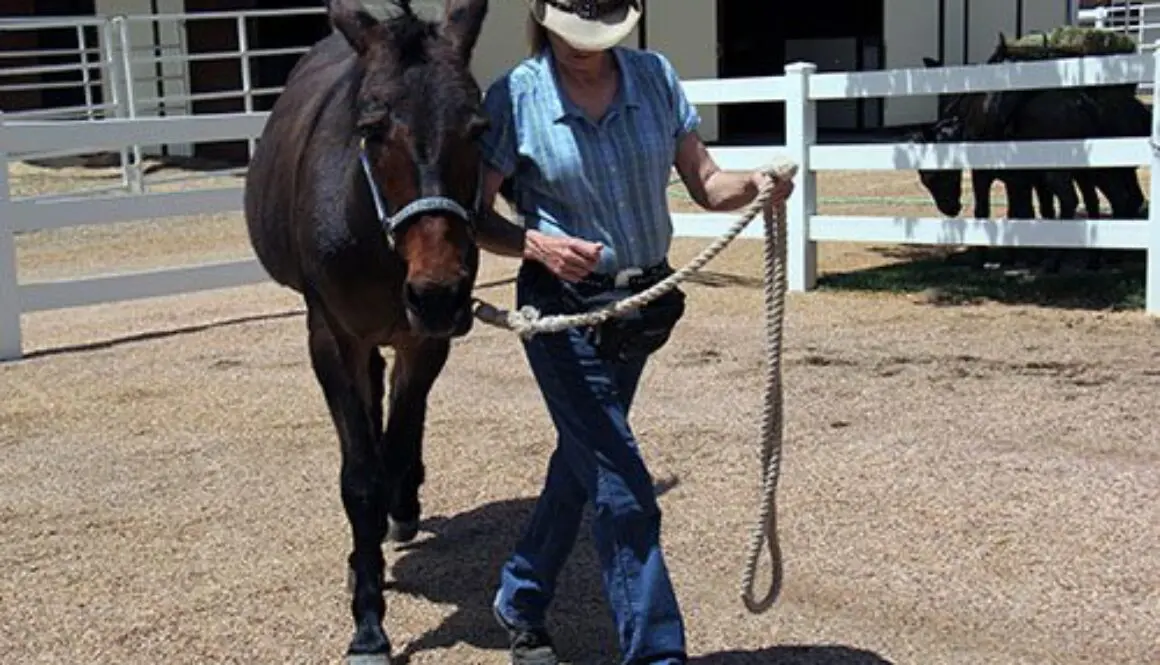
MULE CROSSING: LTR Training Mules & Donkeys: General Information
By Meredith Hodges
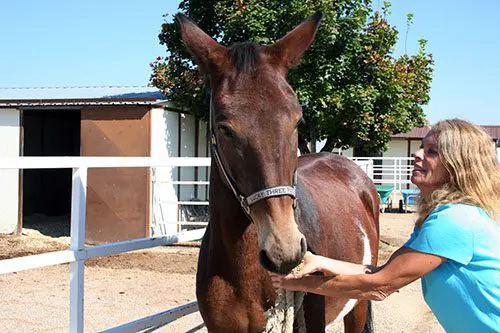 Mules and donkeys are very gregarious and affectionate animals and have a need to really bond with their owners. It is important to know the steps involved in this bonding process to get the best from your mule or donkey, and even horses. Routine management and our training process called Behavior Modification (Reward System Training) will make your time together safe and enjoyable.
When mules and donkeys are treated with patience and kindness, they can be as capable as horses in all kinds of equine activities. The fun you can have with your mule, or donkey, is only limited by your own imagination and your approach to training. Mules can do…and donkeys, too!
Since mules and donkeys bond to the person who trains them, we encourage owners to do the training themselves with the help of our resistance free video training series that provides a solid base for any equine activity.
This series will help you get the best from your equine whether he is large or small, a donkey, mule, or even a horse. It is designed like grade school is for children.
Although we begin our DVD series with Foal Training, no matter how old, you should always begin training with imprinting and move forward from there with attention to feed as well. This will insure a positive introduction and will help to build a good relationship with your equine. Our methods are meant to be done in a sequence and taking shortcuts or changing our method in some way will not yield the same results. After many years of training for other people, I have found that equines, especially mules and donkeys, bond to the person who trains them. When they go away to other people, they do not get the benefit of this bonding and can become resistant over time when they return home. After all, you wouldn’t ask someone else to go out and make a friend for you, would you? This is the primary reason I put my entire training program in books and videos, in a natural order like grade school is for children, for people to use as a resistance-free correspondence training course instead of doing clinics and seminars. People are encouraged to use the series and to contact me via mail, email or telephone for answers to any questions. This way your questions can be answered promptly.
No matter how old or how well trained the equine, they still need time doing the simplest of things to get to know you before they will learn to trust and have confidence in you. The exercises that you do should build the body slowly, sequentially and in good equine posture. No human or equine is born in good posture. It is something that needs to be taught and practiced repetitively if it is to become a natural way of moving the body. When the body is in good posture, all internal organs can function properly and the skeletal frame will be supported correctly. Just as our children need routine, ongoing learning and the right kind of exercise while they are growing up, so do equines. They need boundaries for their behavior clearly outlined to minimize anxious behaviors and inappropriate behavior, and the exercises that you do together need to build their strength and coordination in good equine posture. The time spent together during leading training and going forward builds a good solid relationship with your equine and fosters his confidence and trust in you because you actually help him to feel physically better. A carefully planned routine and an appropriate feeding program is critical to healthy development.
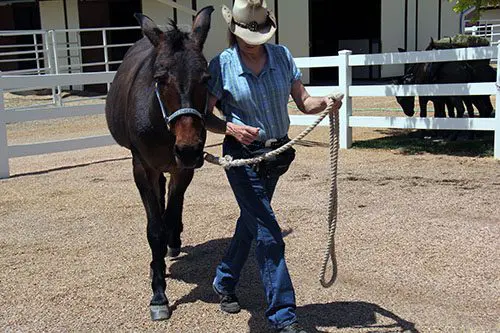 Most equines never experience core muscle strength and this becomes even more important as they age. We do leading training for a full year to not only get them to learn to lead and to develop a good relationship with them, but also to develop good posture and core muscle strength in preparation to carry a rider.
Leading lessons for postural strength and balance need only be done for 15-20 minutes once a week to be certain that they aren’t fighting balance problems later when you mount and ride. Even an older equine with previous training would still need this for optimum performance and longevity. During the time you do the leading training strengthening exercises, you should NOT ride the animal as this will inhibit the success of the preliminary exercises. If you ride while you do these exercises, it will not result in the same proper muscle conditioning, habitual behavior and new way of moving. The lessons need to be routine and done in good posture to acquire the correct results. Hold the lead rope in your LEFT hand, keep his head at your shoulder, match your steps with his front legs, point in the direction of travel with your right hand and look where you are going while you track straight lines, gradual arcs and square him up with equal weight over all four feet EVERY TIME you stop. We are building NEW habits in their way of moving and the only way that can change is through routine, consistency in the routine and correctness in the execution of the exercises. Since this also requires that you be in good posture as well, you will also reap the benefits from this regimen. Along with feeding correctly (as described below), these exercises will help equines to drop fat rolls and to begin to take on a more correct shape and become strong in good posture.
 Today’s general horse training techniques do not generally work well with mules and donkeys. Most horse training techniques used today speed up the training process so people can ride or drive sooner and it makes the trainers’ techniques more attractive, but most of these techniques do not adequately prepare the equine physically in good posture for the added stress of a rider on his back. Mules and donkeys have a very strong sense of self preservation and need work that builds their bodies properly so they will feel good in their new and correct posture, or you won’t get the kind of results you might expect. Forming a good relationship with your equine begins with a consistent maintenance routine and appropriate groundwork. Most equines don’t usually get the well-structured and extended groundwork training on the lead rope that paves the way to good balance, core muscle conditioning and a willing attitude. This is essential if he is truly expected to be physically and mentally prepared for future equine activities. With donkeys and mules, this is critically important.
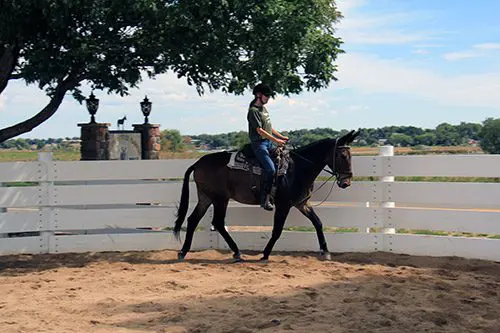 The equine should be at least four years of age when the rider is finally introduced to insure that there is no undue stress on his body at the earlier stages of development. Equines generally run through the bit and exhibit other bad behaviors because they become anxious, lose their balance and don’t really have complete physical control of their bodies. They are unable to physically comply with your wishes without losing their balance, which makes them nervous and causes resistance. Changing bits or rushing through groundwork training so you can ride or drive sooner NEVER really works. Training is more than just teaching the equine to do “movements.” You should be creating an environment for success and conditioning his muscles to do movements easily and with minimal stress. This produces an equine with a happy and healthy working attitude. In order to get your mule to be soft and submissive in the snaffle bit, you need to be prepared to spend six months on flatwork leading training (also known as Showmanship training for strength in good posture) and another six months leading through obstacles (turning fear into curiosity and then adding coordination to his strength and balance) before moving to the round pen work in DVD #2. Longears and horses do much better in a number of ways when you are patient enough to do this: a calmer attitude because they know what to expect, development of symmetrical muscle strength in good equine posture, a better response to verbal commands, better balance, better coordination and the ability to perform correctly.
The information about equine management and training materials that we offer are listed below.
Training Mules and Donkeys: A Logical Approach to Longears is the first book to be published, has a more abbreviated view of the overall training process and general information about the psychology of mules and donkeys.
The book, Donkey Training is basically the same as DVD’s #9 and #10 without the benefit of the moving pictures (and has bonus information that the DVDs do not have) and illustrates the things that are different about training donkeys as opposed to horses and mules. Donkeys often do things in a different order and sometimes, they don’t need to learn to lunge at all until much later in their training…after they are already going well under saddle, or in harness. This DVD is designed to be used in conjunction with DVD #1 through DVD #8 when training donkeys.
The book, A Guide to Raising & Showing Mules has a lot of valuable general information that complements the resistance free DVD training series with more about breeding, mare and foal care, and general mulemanship and maintenance issues. It is the perfect complement to the video series and a must-have for beginners and 4-H projects.
In DVD #1: Foal Training, you will not only be imprinting your animal and training for the simple tasks such as tying and leading, but you will also learn how to be prompt and appropriate with your rewards. The exercises will start your equine on a program that will begin to strengthen his muscles and promote coordination. Imprinting is not just something you do with a foal and then it’s done. Imprinting is the way you touch and handle your animal every time you are with him throughout his entire life. As you learn how he likes to be touched, you can use this to help him to stay calm and accepting. How you touch him will determine whether, or not, he develops confidence and trust in you! When your equine is approached with patience and kindness, and is rewarded for standing quietly, it will be easier to handle him for such things as deworming and doctoring and he will be more willing to stand still to be mounted. The leading exercises in this DVD will start your equine on a program that will begin to strengthen his muscles and promote balance and coordination.
In DVD #2: Preparing for Performance: Groundwork, you will begin your lunging and ground driving lessons. The exercises will increase in their demand and begin to develop more bulk muscle in preparation for work in harness and riding. Equines will be introduced to the snaffle bit and other tack in this DVD. We use English bridles with a noseband and drop noseband over a mild snaffle bit right from the beginning, so they never even try to get their tongue over the bit. This teaches them to accept the bit easily and to form the good habit of taking contact with the bit instead of avoiding it and allowing bad habits to start. It is easier to prevent a bad habit than it is to try to break it later.
You will see how putting the animal in the correct frame (or posture) from the beginning in the round pen with what we call the “elbow pull” enables him to build his muscles correctly and symmetrically throughout his body You will learn how your body language affects his movement in the round pen and on the drivelines. Your equine may begin to be aggressive for his reward and you will learn how to set limits to these aggressive behaviors to set the stage for a polite and well-mannered equine. If biting, or kicking, has been a problem in DVD #1, you will learn how to correct these behaviors in DVD #2.
DVD #3: Preparing for Performance: Driving, provides all the information you need to safely train your equine to drive. It covers carts and carriages, hitching training, Reinsmanship, Pleasure Driving, Obstacle Driving, working in harness, lateral exercises, obstacles, driven dressage and driving rules. You can begin this DVD after you have completed the foundation work in DVD’s #1 and #2.
DVD #4: Basic Foundation for Saddle. If you don’t wish to drive, you can go straight to DVD #4 and begin your equine’s riding training in a natural and non-stressful manner that eliminates adverse behaviors such as bucking or running off. We address both the needs of the rider and the equine as a team focusing on the right approach, good balance and coordination of both equine and rider. You can begin this DVD after you have completed DVD’s #1 and #2.
When you finally mount your equine and start riding, the only thing left for him to do is to get used to your shifting weight on his back and the new leg cues he will feel on his sides. Because he has learned to carry his own body in good, strong equine posture and has already learned what rein cues mean through ground driving, he will be better able to do all the different moves that you ask of him under saddle without being generally overwhelmed by too many things happening all at once. As you progress under saddle, you will be better able to perfect your own riding skills and your equine will become lighter in the bridle and more responsive to your cues. You both will not have to deal with the weakness, awkwardness, confusion and disobedience that originate from a lack of preparation for the tasks.
In DVD #5: Intermediate Saddle Training, we help the rider fine tune his own skills and begin to cultivate a harmonious rapport between equine and owner with fun, safe and simple exercises that will enhance your riding experience whether it is for show, or pleasure. You can begin this DVD after you have completed DVD’s #1 and #2 and #4.
DVD #6: Advanced Saddle Training will begin to prepare the rider for specific disciplines and help them to make choices about what they might enjoy more. It demonstrates how the simple elements of Dressage are the basis for all equine disciplines including Gymkhana, Reining, Cutting, English and Western pleasure, Trail, or even simply weekend trail riding. This kind of training is not just for show, but to keep both of you safe and happy during your time together. You can begin this DVD after you have completed DVD’s #1 and #2, #4 and #5.
DVD #7: Jumping gives the owner the opportunity to learn the fundamentals of jumping and condition their equine in a safe and methodical manner and… how to ride, build and evaluate jump courses. It covers exercises to prepare your equine to carry him safely over any obstacle, multi-level terrain or jumps. You can begin this DVD after you have completed DVD’s #1 and #2, #4, #5 and #6.
DVD #8: Management, Fitting & Grooming. Of course, your equine needs to be fed and maintained properly to get the best response from him during training and this is done in DVD #8. We also offer grooming tips and more advanced lessons in showmanship at the end of this video.
DVD’s #9 and #10 cover techniques that are specific to donkeys and these two DVDs are designed to be used in conjunction with the other video tapes.
DVD #9: Keys to Training the Donkey: Introduction and Basic Training covers groundwork technique that is specific to donkeys, how to train jacks to breed mares for mule production and how to measure your animal for athletic potential and should be used in conjunction with DVDs #1 and #2.
DVD #10: Keys to Training the Donkey: Saddle Training & Jumping covers saddle training and jumping and should be used in conjunction with DVD’s #4 through #7. You can also purchase our book, Donkey Training which is the same as DVD’s #9 and #10, but sometimes having the moving pictures can be more helpful than still shots. Also, if you want to teach your donkey to drive, you would also need DVD’s #1, #2, and #3.
Training Without Resistance (DVD’s #1 – #7) and Equine Management & Donkey Training(DVD’s #8 – #10) are exactly the same as the electronic workbooks that accompany the DVDs. These two manuals are also helpful to those who cannot afford the DVD series or for those who would like a professionally published workbook. They are both translated into French, German and Spanish, so our non-English speaking friends can read along with the DVD series in their own language.
Equus Revisited: A Complete Approach to Athletic Conditioning. This comprehensive 4-part DVD and companion manual explains WHY it is so important to spend plenty of time on groundwork and development of the core strength of your equine. It covers multiple aspects of your equine’s care in great detail with a team of experts. It has a lot of special features about various subjects and in-depth explanations about the anatomy and physiology of the equine.
Why So Many Different Books and Videos?
I do offer Packages because each of the materials covers the elements of management and training from a different perspective with a different focus:
Training Mules and Donkeys: A Logical Approach to Longears book is an overview or summary of the entire training program
Donkey Training book is mostly about what things are done differently with donkeys than with horses and mules during the training process at each stage
A Guide to Raising & Showing Mules book includes management (housing, fences, disease, teeth, hooves, etc.), breeding and showing information with some regard to training
10-DVD Training Mules and Donkeys DVD series is a collection of the exercises that you DO in what order with each DVD representing roughly 1 year of training (except for 8, 9 and 10…see explanations in detail above)
Training Without Resistance manual is a collection of DVD’s #1 through #7 with extra detailed information in print and available in French, German and Spanish translations.
Equine Management & Donkey Training manual is a collection of DVD’s #8 through #10 with extra detailed information in print and available in French, German and Spanish translations.
Equus Revisited manual/DVD combo addresses WHY you are doing all the things that you do in the books and videos. If you had to pick just one book, I would suggest the Equus Revisited manual AND the companion DVD.
However, buying the Horse/Mule Complete Package (at a discount rather than buying products individually) would give you all you need because basically the Donkey Training book (that is left out) is exactly the same as DVD #9 and #10 and the Equine Management and Donkey Training manual only the manual has extra information that the book does not have.
 For more information and purchase of our products, you can call 1-800-816-7566 or visit our website at www.LuckyThreeRanch.com. Our website is also translated into French and Spanish for foreign convenience. Under “Training,” be sure to read archived articles posted in the “Mule Crossing” section, peruse commonly asked questions in “Ask Meredith,” get more details in our “Training Tips” and watch our new shows and past RFD-TV shows with Video on Demand. If you don’t have a computer, you can go to a library and use their computer, or ask a friend to help you out. Take time to peruse our Classified Ads section (this is a free service and an open forum, so we caution buyers to beware and check carefully). Under Resources, we post contact information for mule and donkey clubs and rescue organizations, keep you up to date about Equine Welfare in the news and heavily support Therapeutic Riding. Click our Homepage links for YouTube, Facebook and Twitter. And, don’t forget to check out our children’s website at www.JasperTheMule.com. Join the American Donkey & Mule Society (www.lovelongears.com, adms@lovelongears.com) to receive their bimonthly magazine with even more valuable information for a mere $27/yr. Learn together, enjoy the time with your equine and excel together!
To learn more about Meredith Hodges and her comprehensive all-breed equine training program, visit LuckyThreeRanch.com, MEREDITH HODGES PUBLIC FIGURE Facebook page, or call 1-800-816-7566. Check out her children’s website at JasperTheMule.com. Also, find Meredith on Pinterest, Instagram, MeWe, YouTube and Twitter.
Covered in TRAINING MULES & DONKEY: A LOGICAL APPROACH TO TRAINING, TRAINING WITHOUT RESISTANCE and EQUUS REVISITED at www.luckythreeranchstore.com.
© 1998, 2016, 2024 Lucky Three Ranch, Inc. All Rights Reserved.
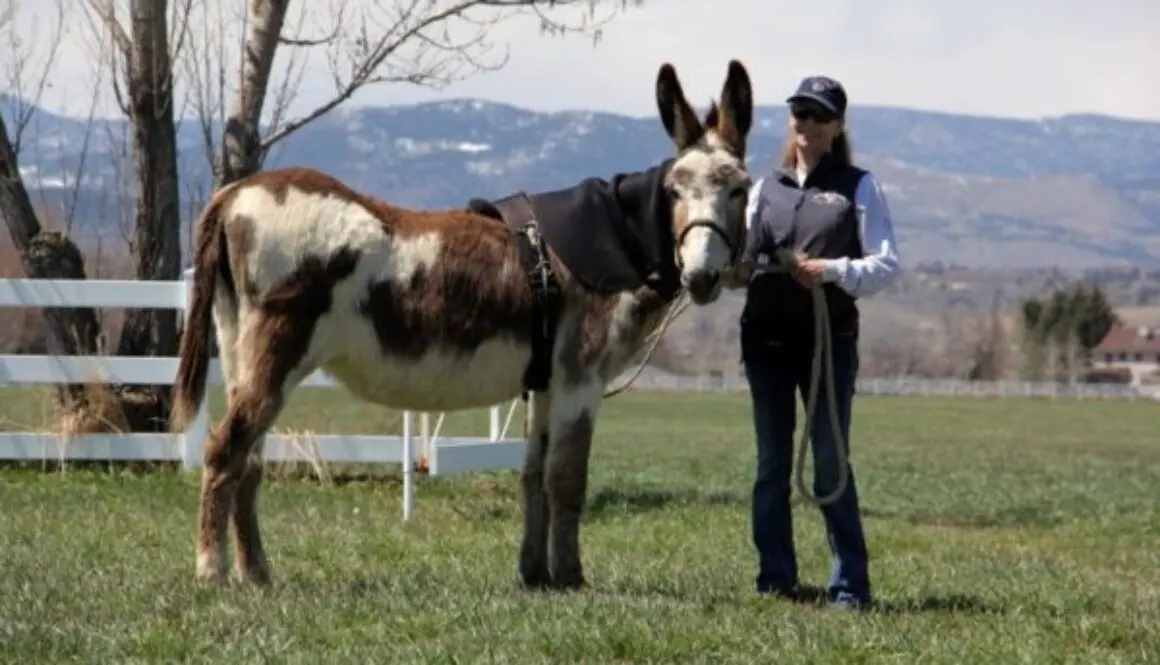
CHASITY’S CHALLENGES: Chasity’s Spring Walk: 4-21-20
It was a gorgeous spring day and I was so pleased when Chasity came right to the door to meet me again as she had been doing consistently after only two lessons in her initial training. As I cleaned her nostrils and smelled the clean spring air, I thought it might be nice to forego the indoor arena lessons and go out and enjoy this lovely spring weather. Sometimes just doing things a little differently with the same basic lessons can give you both a new perspective on training and make it a lot more fun!
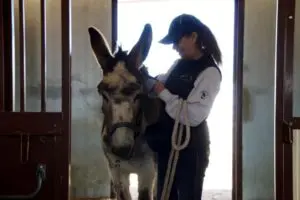
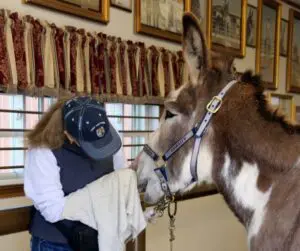
It is shedding season and the multi-bristled human hairbrush was doing its job of removing the excess hair and aerating her coat. Then, I added a sprinkle of Johnson’s baby oil to her mane and tail while she stood stock still! She was definitely learning to enjoy our time together and her friends in the barn were forgotten for the moment.
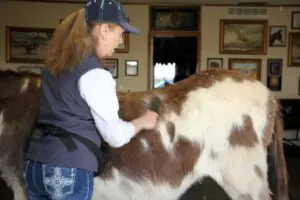
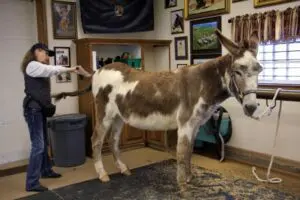
As I got her tacked up in her gear, I chatted with Chasity and told her I thought we would go for a walk outside today. She thought it would be a great idea! I noticed that her cresty neck was decreasing in size…very slowly. I put on her surcingle and only took it up a bit so it wouldn’t be too tight at the start.
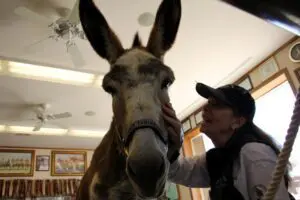
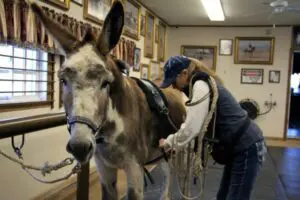
I put on the bridle carefully over her ears, adjusted the “Elbow Pull” and put on her neck sweat. She even helped a bit by lowering her head. Then I did a last check on the girth of the surcingle.
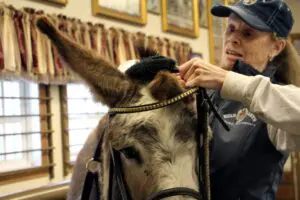
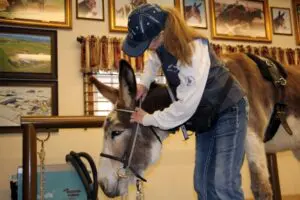
I quickly washed her brushes and we were on our way down the road! Chasity was very excited!

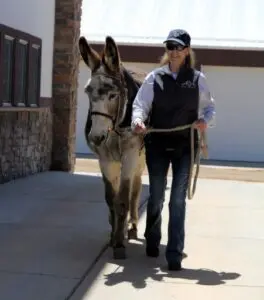
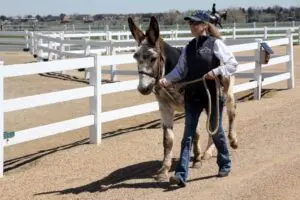
Our first encounter was the Lucky Three Ciji Side Saddle Champion statue. And then the Lucky Three Mae Bea C.T. Combined Training Champion statue. Chasity was fearless and very curious about them!
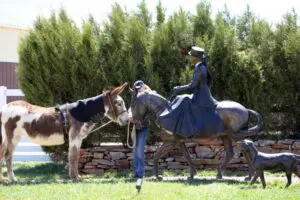
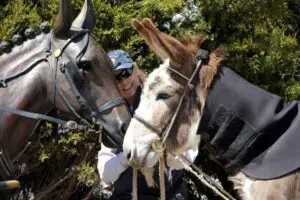
She met the fountain statue, “Dreaming of Friends” and another “Lucky Three Ciji” statue.
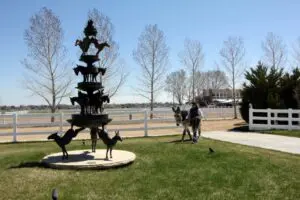
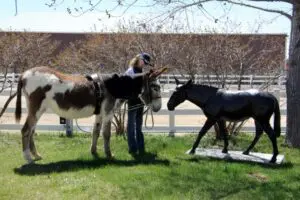
She wasn’t sure about “Lasagna” lying at the base of the cottonwood tree, but she loved the OLD WESTERN TOWN that was in construction!
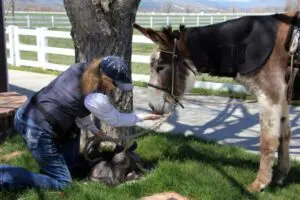
During the course of the walk, we made gradual turns, straight lines and squared up at the halt at several intervals to continue her lessons in core strength and good posture. I noticed a lot of improvement in her back and her abs! She told me she thought the MULE CROSSING sign should say DONKEY CROSSING, but she posed nicely anyway!
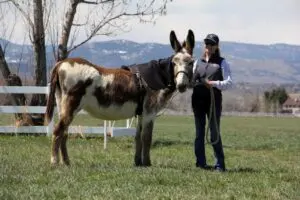
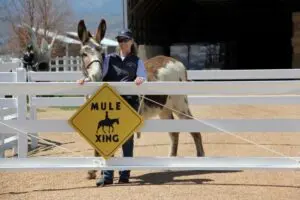
When we got back to the work station, we did a couple of stretching exercises for her neck in one direction only, since doing them the other way would only exacerbate the present condition. When we get more of the fat off her crest, the stretches will have value in both directions.
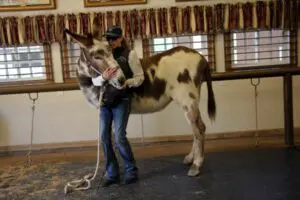
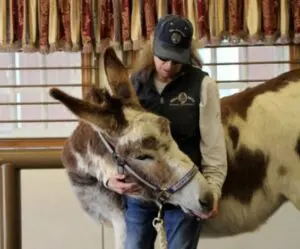
When we were finished, we went back to her stall. She was “sent” into the stall, turned around to face me to get her halter removed and received her just reward! It was a great day!
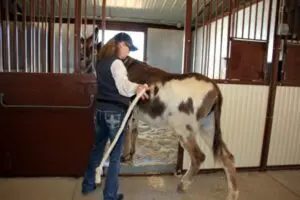
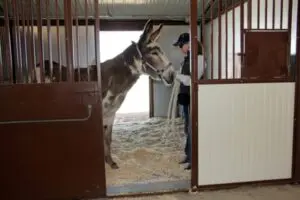
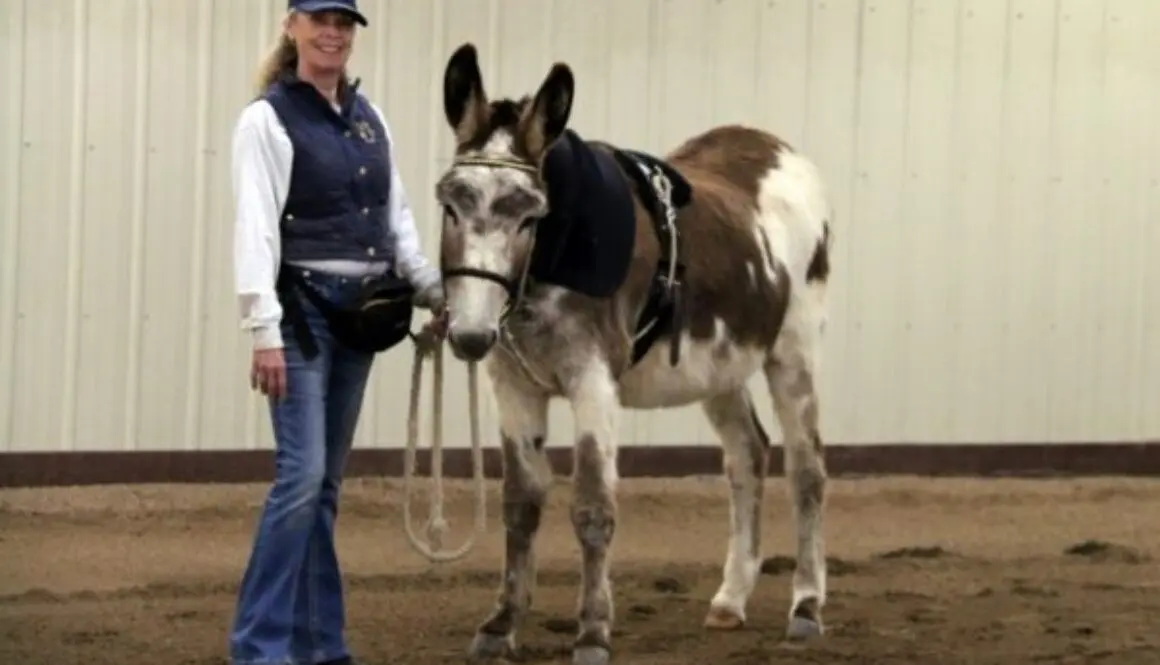
CHASITY’S CHALLENGES: Chasity’s Week Two Workout: 4/6,8,10/20
4-6-20: Today, Chasity did much better after two days of rest over the weekend. Her hair coat is much softer and her color is becoming more brilliant. She was moving around quite a bit while being groomed and had to be corrected. After being corrected and rewarded, she stood still.
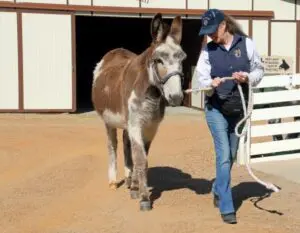
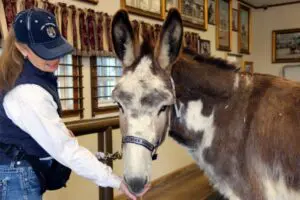
4-8-20: Today she was much better during grooming after being corrected the last time, although she was still a bit impatient. She wanted to continue forward before she finished chewing during her lesson in the Hourglass Pattern. I expect that will change in time.
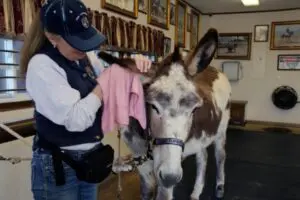
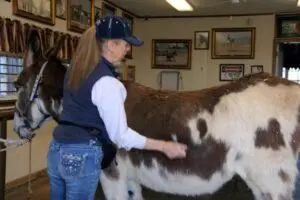
She stood still while I wiped the dried milk-like drainage from her teats and scraped off her legs.
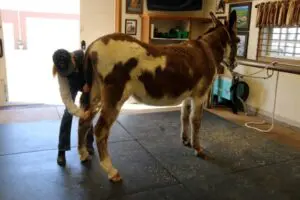
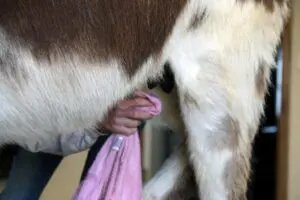
I also found dried bug bites of some sort on her chest that I thought could be old scars from hatched bots. I scraped them off with the shedding blade and treated them with Neosporin. It worked well.
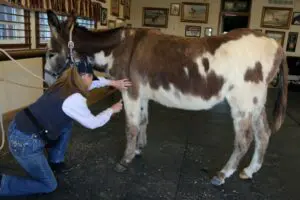
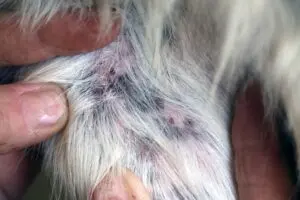
It has only been a week of lessons, but we have made some progress with her neck. It is difficult to tell much from looking at the left side of her body. But now, when you look at her neck from the right side, you can see her mane sticking up across the top. We could not see it at all before.
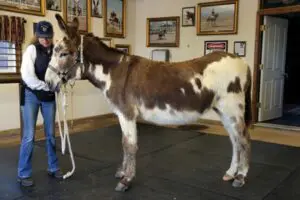
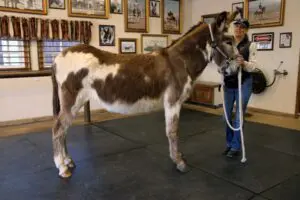
The neck sweat Velcro is overlapping a bit more and I am able to tighten the adjustment on the “Elbow Pull” since she is now more flexible in her neck.
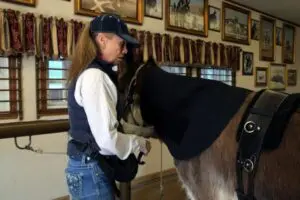
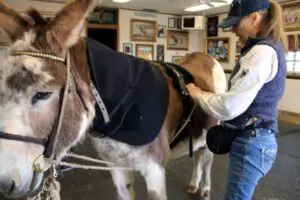
Her back is beginning to look better even from the start of the lesson. Although she still leans on it, she is randomly submitting to the “Elbow Pull” and matching my steps more easily.
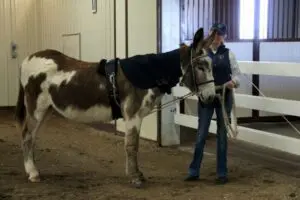
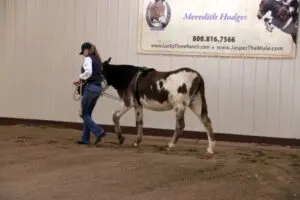
Chasity continues to improve. She is happy to stand quietly, is more balanced over the ground rails and squares up much more easily with only slight indications from the lead rope.
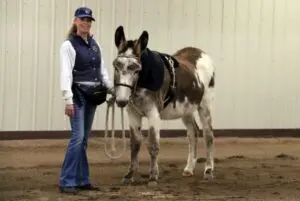
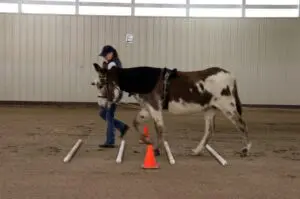
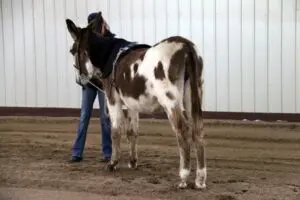
4-10-20: With each new lesson, Chasity continues to improve. It is only necessary to do the Hourglass Pattern once in one direction and then cross the diagonal and do it in the other direction, at least once per week and no more often than once every other day. She is now learning to bend through her rib cage while remaining erect around the turns in both directions.
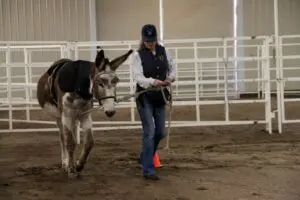
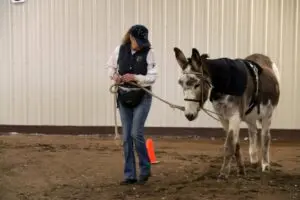
Again, she is balanced over the ground rails, squares up nicely and maintains her good posture. She resumes the pattern and goes over the ground rails again for a balanced finish! There was no need for pulling on the lead rope at all, just slight indications!
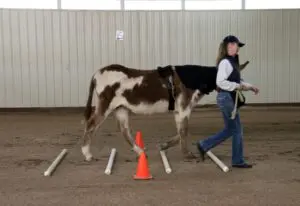

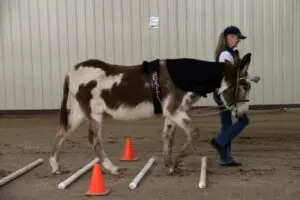
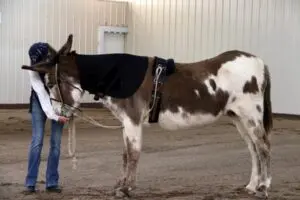
Chasity’s overall balance and core strength is progressing faster than I would have thought. This is the reason I tell people that these lessons on the flat ground will need to be done for 3-6 months to gain ultimate postural balance and core strength before moving on to obstacles for the addition of coordination. Some equines do progress faster than others. Chasity appears to be one of the faster ones!
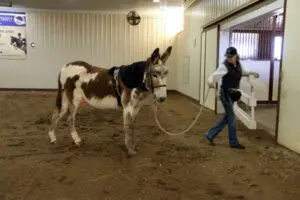
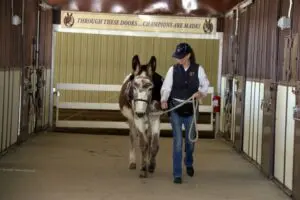
LTR Presents: Spuds & Augie in “Spa Days”
Our miniature donkeys, Spuds & Augie, have a day in the “spa”. Watch the adorable music video compilation of their grooming sessions.
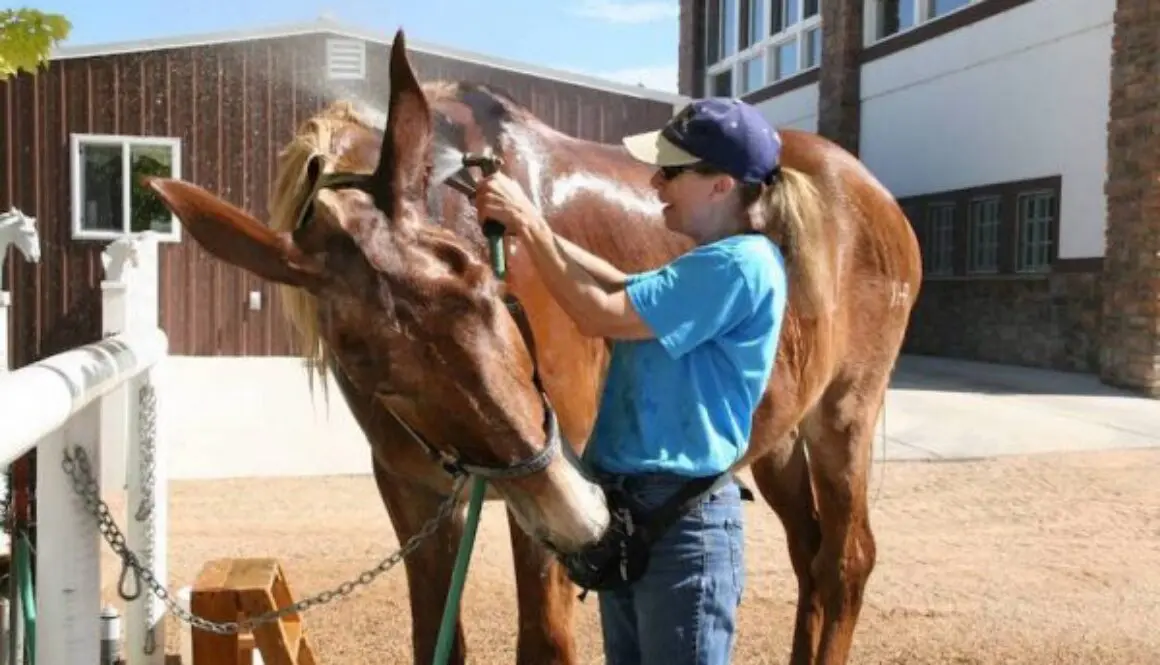
What’s New with Roll? Bath Time
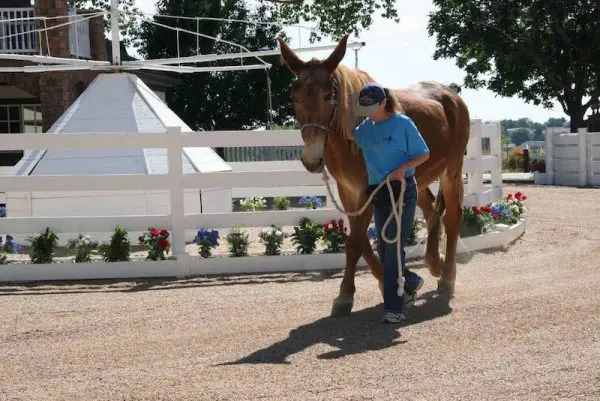 Today was the perfect day for a summer bath. Roll is feeling well and his left hind foot has nearly grown out from his bout with White Line Disease. During the duration his White Line Disease that began in January, he has not spent one lame day.
Every time I clip Roll’s bridle path, it is an exercise in frustration, but he exhibits great patience with me as I stretch the skin and clip over the deep scars between his ears. Someone must have taken the idea about “hitting a mule with a two-by-four” quite literally.
The mule that used to hide behind his partner Rock, trusts me completely and even enjoys the cool water on his face on a hot day!
He knows his good behavior will always elicit an appropriate reward!
Roll likes his Wonder Blue Shampoo and doesn’t even mind a bucket of soapy water in the rear! He knows it makes his tail REALLY PRETTY and remarkably swishable!
Ours is a relationship of many negotiations. One of our regular deals is “He eats oats from the fanny pack and I spray!”
In the summer, one needs to be aware of the eggs that the flies lay in specific spots on each of the mules. They LOVE Roll’s lower legs! A Shedding blade and a Bot Block are about the only things that will remove the sticky eggs.
Using a regular hairbrush, I use Wonder Blue Shampoo to bring out the buttery whiteness in Roll’s mane and tail. In this photo, you can see how well the left hind has healed so far.
Cleanliness is next to Godliness as my grandmother used to say! Thank you, My Friend, for a lovely day together!
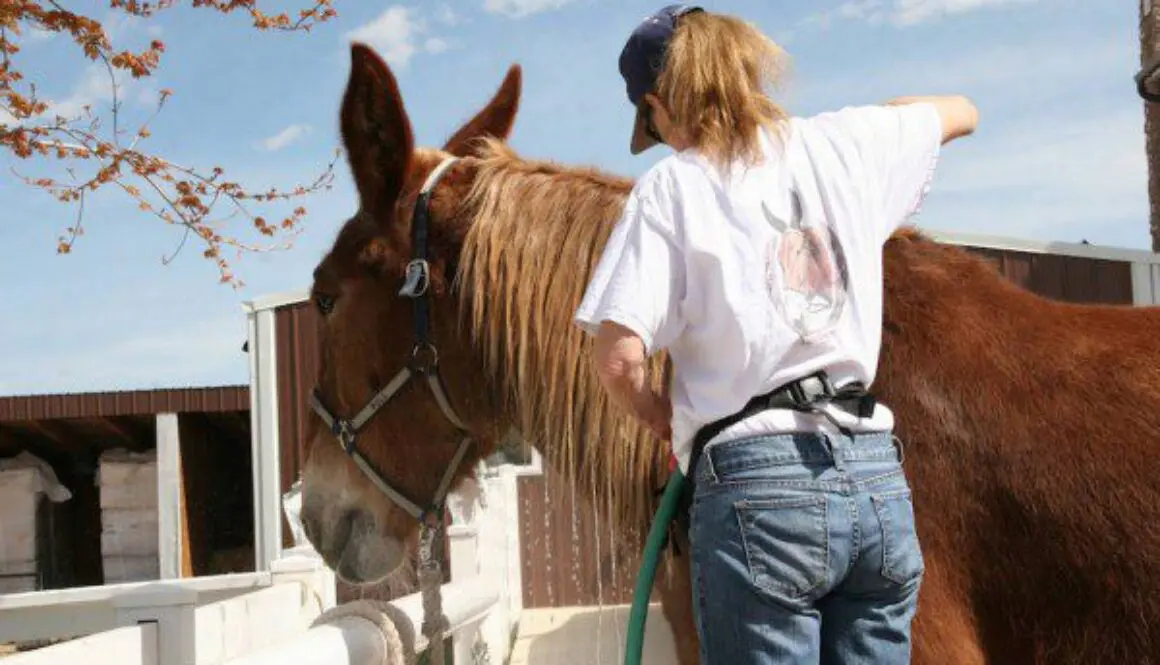
What’s New with Roll? Wash Mane-Tail & Farrier
It was a beautiful spring day today, so I took advantage of the warm weather and washed the dirt and baby oil out of Roll’s mane and tail before our farrier, Dean Geesen began to work on him.
Then I went over his body with a regular hairbrush that pulls most of the loose underneath hair out. The hairbrush works better than any other shedding tool because it does not cut or damage the hair. We only use the shedding blades when the equines have mud on them and to scrape off excess water. He seemed to enjoy getting his mane and tail cleaned and his coat “aerated!” He sure looked amazing when I was done!
Then Dean took off the boot on his left hind so we could see how the White Line Disease was doing. He has grown substantially more hoof and is staying balanced on it with our efforts on his behalf. Dean noticed that Roll is now putting pressure on his heel and a bit of pressure on the medial side of the hoof and on the toe.
The boot, although taken off twice a day and dried out, appeared to be holding in more moisture than it was before, so Dean suggested that we let him go without the boot and see how he does. We thought he might stay drier now that the weather has been sunnier and drier overall. We are still getting intermittent rainstorms, but Roll prefers to stand inside his stall in the sawdust, so it may be that he can go without his boot…at least for a while.
We did see a drop of blood on his sole and his sole was responsive to the hoof tester, so that confirmed for us that there is still circulation in the hoof…a really good thing! We were wondering about that.
We did have to put the boot on his left hind while Dean worked on his right hind because now that he was “feeling” the sole, it was too much for him to bear all his weight on that hoof alone. We took off the boot afterwards, before we put him away.
Dean had reset the right hind foot with the borium shoe to keep him from slipping and putting undue weight on his bad foot. That also seems to be working very well to keep his weight evenly distributed over all four feet.
Brandy and Jubilee were curious about what was going on with Roll and the farrier as they passed by on the way to their lessons.
All in all, staying flexible and attentive to his needs and all your prayers are helping Roll to get through all this quite nicely. I can only hope this good fortune continues for Roll’s sake!!


