

mule training

MULE CROSSING: Fine-Tuning the Rider
TRAINING MULES & DONKEYS
CHAPTER 27
Fine-Tuning the Rider
By Meredith Hodges
No training series would be complete without examining the principles and philosophy behind the training program. My philosophy is based on the principle that I am not, in fact, “training” donkeys and mules. Rather, I am cultivating relationships with them by assigning meaning to my body language that they can understand while I learn what they are trying to indicate to me with their body language.
In the same way that my own level of understanding changes and grows over time, I believe that my animals’ understanding grows, too. In the beginning, the emotional needs of a young mule are different from those of an older animal. The young mule needs to overcome many instincts that would protect him in the wild, but are inappropriate in a domestic situation. In a domestic situation, the focus must be on developing friendship and confidence in the young mule, while establishing my own  dominance in a non-threatening manner. This is accomplished through the use of a great deal of positive reinforcement early on, including gentle touches, a reassuring voice and lots of rewards for good behavior. Expressions of disapproval should be kept to a minimum and the negative reinforcement for bad behavior should be clear, concise and limited.
As your young mule grows and matures, he will realize that you do not wish to harm him. Next, he will develop a rather pushy attitude in an attempt to assert his own dominance (much like teenagers do with their parents), because he is now confident that this behavior is acceptable. When this occurs, reevaluate your reward system and save excessive praise for the new exercises as he learns them. Allow the learned behavior to be treated as the norm, and praise it more passively, yet still in an appreciative manner. This is the concept, from an emotional standpoint, of the delicate balance of give and take in a relationship. As in any good relationship, you must remain polite and considerate of your mule or donkey. After all, “You can catch more flies with sugar than you can with vinegar.”
Many details of both mule and trainer must also be considered from a physical standpoint. In the beginning, unless you are a professional trainer with years of proper schooling, you are not likely to be the most balanced and coordinated of riders, and you may lack absolute control over your body language. By the same token, the untrained mule will be lacking in the muscular coordination and strength it takes to respond to your request to perform certain movements. For these reasons, you must modify your approaches to fit each new situation, and then modify again to perfect it, keeping in mind that your main goal is to establish a good relationship with your mule and not just to train him. It is up to you, the trainer, to decide the cause of any resistance from your mule, and to modify techniques that will temper that resistance, whether it is mental or physical.
Here is an example: I had a three-year-old mule that was learning to lunge without the benefit of the round pen. The problem was that he refused to go around me more than a couple of times without running off. I first needed to assess the situation by brainstorming all the probable reasons why he might keep doing such an annoying thing. Is he frightened? Is he bored? Is he  mischievous? Has he been calm and accepting of most things until now? And, most important, is my own body language causing this to occur? Once I was willing to spend more time with regard to balance on the lead rope exercises and proceeded to the round pen to learn to balance on the circle, I soon discovered that developing good balance and posture was critical to a mule’s training. The reason my mule was pulling on the lunge line so hard was because he just could not balance his own body on a circle. Once I reviewed the leading exercises with him—keeping balance, posture and coordination in mind—and then went to the round pen to learn to balance on the circle, I noticed there was a lot less resistance to everything he was doing. I introduced the lunge line in the round pen and taught him how to circle with slack in the line. After that, lunging in the open arena on the lunge line was much easier and he did maintain the slack in the line while circling me.
Like humans, all animals are unique, and, like humans, each learns in his own way. Learn to be fair and flexible in your approach to problems. It is best to have a definite program that evolves in a logical and sequential manner that addresses your mule’s needs physically, mentally and emotionally. Be firm in your own convictions, but be sensitive to situations that can change, and be willing to make those changes as the occasion arises. This is what learning is all about for both you and your mule.
Just as mental changes occur, so do physical changes. As your mule’s muscles develop and coordination improves, you will need to do less and less to cause certain movements. For example, in the case of the leg-yield, you may have to turn your mule’s head a little too far in the opposite direction to get him to step sideways and forward. You will need to guide him more strongly with the reins and kick harder. As he becomes stronger and more coordinated, and begins to understand your aids, you can then start to straighten his body more toward the correct bend and stay quieter with your aids. Granted, you began by doing things the “wrong” way by over-bending your mule and by over-using your aids, yet you put your mule “on the road” to the right way. You assimilated an action in response to your leg that can now be perfected over time. In essence, you have simply told your mule, “First you must learn to move away from my leg, and then you can learn to do it gracefully.”
The same concept works in the case of the trainer or the rider. Sometimes you must do things that are not quite right in the  beginning to get your own body to assimilate correctness. In the beginning, a rider cannot “feel” the hind legs coming under his seat, so he needs to learn by watching the front legs moving forward along with his hands. With practice, the rider will develop the “feel” and will no longer need to watch the front legs moving forward. Remember, we all perceive things a little differently, and our perception depends on how we are introduced to something and on whether or not we can understand or perform a task.
It is nearly impossible for the inexperienced horseman to perceive and control unused seat bones as a viable means of controlling the mule. Reins and legs are much more prevalent. In order to help such a rider perceive their seat bones more clearly, it sometimes helps to start by involving the whole lower body. Earlier in this book, I suggested that, to begin facilitating this action, you pedal forward in conjunction with the front legs. Connecting this action with the front legs of the mule allows you to “see” something concrete with which you can coordinate, plus the pedaling encourages necessary independent movement in the seat bones from side to side and forward. When you begin to “feel” this sensation, you can begin to understand that when the foreleg comes back, the corresponding hind leg is coming forward under your seat bone. When you understand this, both mentally and physically, you can begin to pedal backward, which will cause you to be in even closer in synchronization with your mule’s body. As your leg muscles become more stable, actual movement in your own body becomes less, more emphasis is directed toward your center of gravity and more responsibility is placed on your seat bones. Using this approach, your muscles are put into active use and coordinated with your mule’s body through gymnastic exercises, which will eventually lead to correct position and effective cueing.
 Achieving balance and harmony with your mule requires more than just balancing and conditioning your mule’s body. As you begin to finish-train your mule, you should shift your awareness more toward your own body. Your mule should already be moving forward fairly steadily and in a longer frame, and basically be obedient to your aids. The objective of finish-training is to build the muscles in your own body, which will cause your aids to become more effective and clearly defined. This involves shedding old habits and building new ones, which takes a lot of time and should not be approached with any impatience. Remember: there are no shortcuts. In order to stabilize your hands and upper body, you need to establish a firm base in your seat and legs. Ideally, you should be able to drop a plumb line from your ear to your shoulder, down through your hips, through your heels and to the ground. To maintain this plumb line, work to make your joints and muscles in your body more supple and flexible by using them correctly. Always look where you are going to keep your head in line with the rest of your body.
As you ride your mule through the walking exercise, try to stay soft, relaxed and forward in your inner thighs and seat bones. Get the sensation that your legs are cut off at the knees, and let your seat bones walk along with your mule, lightly and in rhythm with him behind his front legs. If he slows down, just bend your knees and bump him alternately with your legs below the knees, while you keep your seat and upper legs stable and moving forward. When collecting the walk on the short side, just bend both knees at the same time, bumping your mule simultaneously on both sides, while you squeeze the reins at the same time. Your legs should always have contact with your mule’s body in a light “hugging” fashion and real pressure should only come during the cues.
In order to help you stay over the middle of your mule’s back on the large circle, keep your eyes up and looking straight ahead. Shift your weight slightly to the outside stirrup, and feel it pull your inside leg snugly against your mule. Be sure that your outside leg stays in close to your mule’s barrel as you do this. On straight lines, keep your legs even, but on the arc, and look a little to the outside of the circle. This will bring your inside seat bone slightly forward, allowing your legs to be in the correct position for the circle. Note: This technique is particularly helpful during canter transitions.
Most people feel that they do not balance on the reins as much as they actually do. If you balance on the reins at all, your mule will be unable to achieve proper hindquarter engagement and ultimate balance. To help shift the weight from the hands and  upper body to the seat and legs, you can do a simple exercise: Put your mule on the rail at an active working walk. On the long side, drop your reins on his neck and feel your lower body connect with his body as you move along. You will need to tip your pelvis forward and stretch your abdominal muscles with each step in order to maintain your shoulder to hip plumb line. If your lower leg remains in the correct position, your thigh muscles will be stretched on the front of your leg from your hip to your knee. There is also a slight side-to-side motion as your mule moves forward that will cause your seat bones to move independently and alternately forward. There is no doubt that you can probably do this fairly easily right from the start, but to maintain this rhythm and body position without thinking about it takes time and repetition.
When you are fairly comfortable at the walk, you can add some variation at the trot. Begin at the posting trot on the rail. When your mule is going around in a fairly steady fashion, drop your reins on his neck and continue to post. As you post down the long side, keep your upper body erect and your pelvis rocking forward from your knee. Your knee should be bent so that your legs are positioned on the barrel of your mule. Raise your arms out in front of you, parallel to your shoulders. If your mule drifts away from the rail, you need to post with a little more weight in your outside stirrup. As you go around corners, be sure to turn your eyes a little to the outside of the circle to help maintain your position. As you approach the short side of the arena, bring your arms back, straight out from your shoulders, and keep your upper body erect. As you go through the corners, just rotate your arms and upper body slightly toward the outside of your circle. When you come to the next long side, once again bring your arms in front of and parallel to your shoulders, and repeat the exercise.
Notice the different pressure on your seat bones as you change your arm position. When your arms are forward it will somewhat lighten your seat, while having your arms to the side will tend to exert a little more pressure. Consequently, you can send your mule more forward with your seat as you go down the long sides. On the short sides, you can shorten that stride with a little added pressure from the seat bones. When you wish to halt, put your arms behind you at the small of your back to support an erect upper body, and let your weight drop down through your seat bones and legs to total relaxation and an entire halting of movement. Remember to use your verbal commands—especially in the beginning—to clarify your aids to your mule. If your mule doesn’t stop, just reach down and give a gentle tug on the reins until he stops. Before long, he will begin to make the connection between your seat and your command to “Whoa,” and your seat will take precedence over your reins.
 When you and your mule have become adept at the walk and the trot, add the canter. At the canter, however, keep your arms out to the side and rotate them in small backward circles in rhythm with the canter. Be sure to sit back and allow only your pelvis, your seat and your thighs to stretch forward with the canter stride. Keep your upper body erect and your lower leg stable from the knee down. Once your mule has learned to differentiate seat and leg aids in each gait and through the transitions on the large circle, you can begin to work on directional changes through the cones.
As you practice these exercises, you will soon discover how even the slightest shift of balance can affect your mule’s performance. By riding without your reins and making the necessary adjustments in your body, you will begin to condition your own muscles to work in harmony with those of your mule. As your muscles get stronger and more responsive, you will cultivate more harmony and balance with your mule. As you learn to ride more “by the seat of your pants,” you will encounter less resistance in your mule, because most resistance is initiated by “bad hands” due to an unstable seat. As you learn to vary the pressure in your seat accordingly, you will also encounter less resistance in your mule through his back. Having a secure seat will help to stabilize your hands and make rein cues much more clear to your mule. The stability in your lower leg will also give him a clearer path to follow between your aids.
To learn more about Meredith Hodges and her comprehensive all-breed equine training program, visit LuckyThreeRanch.com, MEREDITH HODGES PUBLIC FIGURE Facebook page, or call 1-800-816-7566. Check out her children’s website at JasperTheMule.com. Also, find Meredith on Pinterest, Instagram, MeWe, YouTube and Twitter.
Covered in TRAINING MULES & DONKEY: A LOGICAL APPROACH TO TRAINING, TRAINING WITHOUT RESISTANCE, EQUUS REVISITED and A GUIDE TO RAISING & SHOWING MULES at www.luckythreeranchstore.com.
© 2024 Lucky Three Ranch, Inc. All rights reserved.

MULE CROSSING: So You Think You Want a Mule?
By Meredith Hodges
It was bad enough before computers and cell phones when people thought they wanted a horse and could realistically have one. They thought if they had a little patch of grass and a fence around it, it would be enough to keep a horse. They never thought about shelter, feed (they could just eat the grass!), vet and farrier care, and about a dozen other things that it takes to maintain an equine.
Those who indulged themselves and bought a horse under those conditions soon found out that keeping an equine was a bit more than they bargained for! If they got the equine for FREE, that was even better…NOT! If they got them cheap, it was GREAT…NOT! If they got them cheap from the Kill Pens and rescued them, Oh, how compassionate they thought they were being! If they didn’t have a small patch of grass, but really wanted a horse, a Boarding Stable was the perfect option provided that the price was right! They would have the privilege of riding with their friends! Boarding Stables with limited exposure to their owners is not good for mules or donkeys, and are even worse for Boarding Stable employees that need to deal with them on a daily basis. Monitoring their feed in a healthy way at a Boarding Stable is next to impossible because they want to feed ALL the equines the same way, no matter what you write for them on a stable sign.

 Cindy and I talked about the “Good Old Days” when we used to live on a ranch, had horses and could be gone all day riding with our friends! Today, our lives are so easy and require no experience to have the knowledge that you can now hold in your hand! The value of EXPERIENCE is diminished until you get hurt! There were so many things that we learned by having the full responsibility of cleaning pens, feeding, grooming, tacking up our own horses and then riding in so many different situations. One really LEARNED how to make decisions and analyze the knowledge that we gleaned. We soon learned the approaches and things that we could do SAFELY, and that kept our experiences happy and joyful! We KNEW it would cost a minimum of $5000.00/year to maintain and train our equines! Our relationships with our equines were good and they were able to teach us WELL!
When one grows up with all things done FOR them, one loses the benefits of all those lessons that Cindy and I were able to learn. Our lives were truly filed with the love and joy we got from being with our equines, and even more, the challenges that were put before us to be BETTER. That enhanced everything we did with our animals! It made us more curious and willing to ask questions of all kinds of people that knew more than we did…and we learned so much MORE! We learned about who to trust and who we should consider suspect. We heard all about the Horse Traders and discovered the differences between them, and the differences between honest people that were also selling equines.

If you do get an animal that you are not compatible with and you want to sell him to someone else, be careful about how you do that. It is good to advertise, but know what you are talking about. If you get in a situation where you can not longer afford to take care of the animal(s) you have, be careful what you do, or it can break your heart! The first thing to do is to ask around with people you know and see if anyone can take your animal. If not, then advertise in equine publications, or on the internet, and see if there is any interest there.
 If the last resort is putting them in an auction…BEWARE! You might get stopped with your truck and trailer in the parking lot and a dealer that offers to take them off your hands right there! If you are tight for cash and looking for a convenient fix to your problem, you might think this is a great deal, but this is what KILLER BUYERS do!!!
When you are looking for an equine, don’t be afraid to talk to a lot of people, starting with people that you know are good horsemen. If they don’t have anything for sale, ask for credible references. You can usually find a lot of knowledgeable people at shows, fairs and exhibitions, but beware of what they tell you and remember that they want to SELL the animal and they know nothing about your riding ability and in most cases, they don’t care.
We learned to watch the animals at the auctions and the way they were being presented. Don’t be afraid to ask WHY they are being sold! Were they truly calm and well-trained, or were they drugged and would be quite different when they were taken home? It wasn’t hard after a while, to tell the difference among who the really good trainers were and those who “faked it” for a sale. It was even important to know the difference among trainers in case you would need help after purchasing your equine. Is the seller a true MULE PERSON?
It is important to know what kind of person YOU are (and be honest…quick temper?) before you decide what kind of equine you want to have. Research all it takes to maintain the different kinds of equines (small, large, active, docile, etc.) and whether their conformation is going to be sound enough for what you want to do with them. Ask a professional if your assumptions (and that IS what they are when you are ignorant about equines…assumptions!) are correct and sound, and will they work the way you would like them to work. Is this going to be the horse, or mule, for YOU!
The nice thing about buying a mule is that THEY will decide whether or not they like YOU! If they are not attracted to you…forget that mule! If you do find a mule that seems to be attracted to you and comes right up to you…he might be THE ONE! Then it is time to get a vet to help with a pre-purchase exam to make sure he is sound. Lots can be hidden with drugs, so take your time with this and give any drugs time to wear off. Have your vet and farrier do exams on the hooves to make sure the equine has not been “nerved.” When an equine has been “nerved,” their unsoundness can be hidden for months and years.

When you do think you have found that ideal mule, don’t be averse to asking the seller for a trial period, usually for a month to make sure things were not overlooked. This should be clearly stated in a contract between the buyer and the seller with stipulations about how things will be handled with the animal to keep him safe. You must assure the buyer that your facility would not be injurious to the animal and that he will be properly maintained. It is helpful to include acceptable surprise visits by the seller if he has any concerns at all.
If you hire a trainer and show your mule, be sure to have a clear contract with that trainer about expectations. Be sure to have a legal Power of Attorney drawn up in case of accidents that will clearly state how the animal is to be handled should something happen to you. The trainer should always be paid up in full and the animal should never be used for collateral for non-payment. As a rule, I only allow supervised youth riders on my mules for specific youth classes at shows. It is not a good idea to let anyone else ride your mule. I find that their relationships are VERY specific to the people they love! HAPPY TRAILS!
If you would like to have more information about buying and selling equines, I suggest you purchase Cindy Roberts’ book, HOW TO BUY A MULE & NOT GET SCREWED. It is an excellent resource for this kind of information. And, if you want to know as much as you can about Longears, take a look at all the books and videos that I have available both in the STORE and the FREE information under TRAINING on my website at www.luckythreeranch.com
To learn more about Meredith Hodges and her comprehensive all-breed equine training program, visit LuckyThreeRanch.com, MEREDITH HODGES PUBLIC FIGURE Facebook page, or call 1-800-816-7566. Check out her children’s website at JasperTheMule.com. Also, find Meredith on Pinterest, Instagram, MeWe, YouTube and Twitter.
Covered in TRAINING MULES & DONKEY: A LOGICAL APPROACH TO TRAINING, TRAINING WITHOUT RESISTANCE, EQUINE MANAGEMENT & DONKEY TRAINING, EQUUS REVISITED and A GUIDE TO RAISING & SHOWING MULES at www.luckythreeranchstore.com.
© 2024 Lucky Three Ranch, Inc. All Rights Reserved.

MULE CROSSING: Benefits of Postural Core Strength Training
By Meredith Hodges
Most equines can be taught to carry a rider in a relatively short time. However, just because they are compliant doesn’t mean their body is adequately prepared for what they will be asked to do and that they are truly mentally engaged in your partnership. We can affect our equine’s manners and teach them to do certain movements and in most cases, we will get the response that we want…at least for the moment. Most of us grow up thinking that getting the animal to accept a rider is a reasonable goal and we are thrilled when they quickly comply. When I was first training equines, I even thought that to spare them the weight of the rider when they were younger and that it would be more beneficial to drive them first as this seemed less stressful for them. Of course, I was then unaware of the multitude of tiny details that were escaping my attention due to my limited education. I had a lot to learn.
 Because my equines reacted so well during training, I had no reason to believe that there was anything wrong with my approach until I began showing them. I started to experience resistant behaviors in my animals that I promptly attributed to simple disobedience. I had no reason to believe that I wasn’t being kind and patient until I met my dressage instructor, Melinda Weatherford. I soon learned that complaining about Sundowner’s negative response to his dressage lessons and blaming HIM was not going to yield any shortcuts to our success. The day she showed up with a big button on her lapel that said, “No Whining” was the end of my complaining and impatience, and the beginning of my becoming truly focused on the tasks at hand. I learned that riding through (and often repeating) mistakes did not pose any real solutions to our problems. I attended numerous clinics from all sorts of notable professionals and we improved slowly, but a lot of the problems were still present. Sundowner would still bolt and run when things got a bit awkward, but he eventually stopped bolting once I changed my attitude and approach, and when he was secure in his core strength in good equine posture.
I thought about what my grandmother had told me years ago about being polite and considerate with everything I did. Good manners were everything to her and I thought I was using good manners. I soon found that good manners were not the only important element of communication. Empathy was another important consideration…to put oneself in the other “person’s” shoes, and that could be attributed to animals as well. So, I began to ask myself how it would feel to me if I was approached and treated the way I was treating my equines. My first epiphany was during grooming. It occurred to me that grooming tools, like a shedding blade, might not feel very  good unless I was careful about the way I used it. Body clipping was much more tolerable for them if I did the hard-to-get places first and saved the general body for last. Standing for long periods of time certainly did not yield a calm, compliant attitude when the more tedious places were left until last. After standing for an hour or more, the animal got antsy when I was trying to do more detailed work around the legs, head, flanks and ears after the body; so I changed the order. Generally speaking, I slowed my pace and eliminated any abrupt movements on my part to give the equine adequate time to assess what I would do next and approached each task very CAREFULLY. The results were amazing! I could now groom, clip bridle paths and fly spray everyone with no halters, even in their turnout areas as a herd. They were all beginning to really trust me.
There was still one more thing my grandmother had said that echoed in my brain, “You are going to be a sorry old woman if you do not learn to stand up straight and move in good posture!” Good posture is not something that we are born with. It is something that must be learned and practiced repetitiously so that it becomes habitual for it to really contribute to your overall health. Good posture begins at the core, “the innermost, essential part of anything.” In a human being, it lies behind the belly button amongst the vital organs and surrounded by the skeletal frame. In a biped, upon signals from the brain, energy impulses run from the core and up from the waist, and simultaneously down through the lower body and  legs. The core of an equine is at the center of balance in the torso. Similar to bipeds, they need the energy to run freely along the hindquarters and down through the hind legs to create a solid foundation from which to allow the energy in front to rise into suspension to get the most efficient movement. When their weight is shifted too much onto the front end, their ability to carry a rider efficiently and correctly is compromised. To achieve correct energy flow and efficient movement, the animal’s internal supportive structures need to be conditioned in a symmetrical way around the skeletal frame. People can do this by learning to walk with a book on their head and with Pilates exercises, but how can we affect this same kind of conditioning in a quadruped?
The first issue I noticed was with leading our animals. When we lead our animals with the lead rope in the right hand, we drop our shoulder and are no longer in good posture. When we walk, our hand moves ever so slightly from left to right as we walk; we inadvertently move the equine’s head back and forth. They balance with their head and neck. Thus, we are forcing them off balance with every step that we take. Since movement builds muscle, they are being asymmetrically conditioned internally and externally with every step we take together. In order to correct this, we must allow the animal to be totally in control of his own body as we walk together. We are cultivating proprioception or “body awareness.”
During the time you do the core strength leading exercises, you should NOT ride the animal as this will inhibit the success of these preliminary exercises. It will not result in the same symmetrical muscle conditioning, habitual behavior and new way of moving. For the best results, lessons need to be routine and done in good posture from the time you take your equine from the pen until the time you put him away. Hold the lead rope in your LEFT hand, keeping slack in the lead rope. Keep his head at your shoulder, match your steps with his front legs, point in the direction of travel with your right hand and look where you are going. Carry his reward of oats in a fanny pack around your waist; he’s not likely to bolt if he knows his reward is right there in the fanny pack.
Plan to move in straight lines and do gradual turns that encourage him to stay erect and bend through his rib cage, keeping an even distribution of weight through all four feet. Square him up with equal weight over all four feet EVERY TIME you stop and reward him with oats from your fanny pack. Then wait patiently for him to finish chewing. We are building NEW habits in the equine’s way of moving and the only way that can change is through routine, consistency in  the routine and correctness in the execution of the exercises. Since this requires that you be in good posture as well, you will also reap the benefits from this regimen. Along with feeding correctly (explained on my website at www.luckythreeranch.com), these exercises will help equines to drop fat rolls and begin to develop the top line and abdominal strength in good posture. The spine will then be adequately supported to easily accept a rider. He will be better able to stand still as you pull on the saddle horn to mount.
When the body is in good posture, all internal organs can function properly and the skeletal frame will be supported correctly throughout his entire body. This will greatly minimize joint problems, arthritis and other anomalies that come from asymmetrical development and compromises in the body. Just as our children need routine, ongoing learning and the right kind of exercise while they are growing up, so do equines. They need boundaries for their behavior clearly outlined to minimize anxious behaviors and inappropriate behavior. The exercises that you do together need to build strength and coordination in good equine posture. The time spent together during leading training and going forward, slowly builds a good solid relationship with your equine and fosters his confidence and trust in you. He will know it is you who actually helps him to feel physically much better than he ever has.
Core muscle strength and balance must be done through correct leading exercises on flat ground. Coordination can be added to his overall carriage with the addition of negotiating obstacles on the lead rope done the same way. Once familiar with the obstacles, you will need to break them down into very small segments where the equine is asked to randomly halt squarely every couple of steps through the obstacle. You can tell when you have successfully achieved core strength in good balance, when your equine will perform accurately with the lead rope slung over his neck. He will stay at your shoulder, respond to hand signals and body language only and does what is expected perfectly. A carefully planned routine coupled with an appropriate feeding program is critical to your equine’s healthy development.
 The task at the leading stage is not only to teach them to follow, but to have your equine follow with his head at your shoulder as you define straight lines and gradual arcs that will condition his body symmetrically on all sides of the skeletal frame. This planned course of action also begins to develop a secure bond between you. Mirror the steps of his front legs as you go through the all movements keeping your own body erect and in good posture. Always look in the direction of travel and ask him to square up with equal weight over all four feet every time he stops and reward him. This kind of leading training develops strength and balance in the equine body at the deepest level so strengthened muscles will hold the bones, tendons, ligaments and even cartilage in correct alignment. Equines that are not in correct equine posture will have issues involving organs, joints, hooves and soft tissue trauma. This is why it is so important to spend plenty of time perfecting your techniques every time you lead your equine.
The equine then needs to build muscle so he can sustain his balance on the circle without the rider before he will be able to balance with a rider. An equine that has not had time in the round pen to establish strength, coordination and balance on the circle, with the help of our postural restraint called the “Elbow Pull,” will have difficulty as he will be pulled off balance with even the slightest pressure. He will most likely raise his head, hollow his back and lean like a motorcycle into the turns. When first introduced to the “Elbow Pull,” his first lesson in the round pen should only be done at the walk to teach him to give to its pressure, arch his back and stretch his spine while tightening his abs. If you ask for trot and he resists against the “Elbow Pull,” just go back to the walk until he can consistently sustain this good posture while the “Elbow Pull” stays loose. He can gain speed and difficulty as his proficiency increases.
 Loss of balance will cause stress, and even panic that can result in him pulling the lead rope, lunge line or reins under saddle right out of your hands and running off. This is not disobedience, just fear from a loss of balance and it should not be punished, just ignored and then calmly go back to work. The animal that has had core strength built through leading exercises, lunging on the circle and ground driving in the “Elbow Pull” before riding, will not exhibit these seemingly disobedient behaviors. Lunging will begin to develop hard muscle over the core muscles and internal supportive structures you have spent so many months strengthening during leading training exercises. It will further enhance your equine’s ability to perform and stay balanced in action, and play patterns in turnout will begin to change dramatically as this becomes his habitual way of going. Be sure to be consistent with verbal commands during all these beginning stages as they set the stage for better communication and exceptional performance later. Although you need to spend more time in his beginning training than you might want to, this will also add to your equine’s longevity and use-life by as much as 5-10 years. The equine athlete that has a foundation of core strength in good equine posture, whether used for pleasure or show, will be a much more capable and safe performer than one that has not, and he will always be grateful to YOU for his comfort.
To learn more about Meredith Hodges and her comprehensive all-breed equine training program, visit LuckyThreeRanch.com, MEREDITH HODGES PUBLIC FIGURE Facebook page, or call 1-800-816-7566. Check out her children’s website at JasperTheMule.com. Also, find Meredith on Pinterest, Instagram, MeWe, YouTube and Twitter.
Covered in TRAINING MULES & DONKEY: A LOGICAL APPROACH TO TRAINING, TRAINING WITHOUT RESISTANCE and EQUUS REVISITED at www.luckythreeranchstore.com
© 2018, 2024 Lucky Three Ranch, Inc. All Rights Reserved.


MULE CROSSING: Assessing Your Equine
By Meredith Hodges
 Just like humans, all equines have different personalities. They’re not cookie cutters and should not all be treated the same way, so observe your equine whenever possible and see what he naturally likes to do, and then adjust your training program accordingly. Although each animal must go through the same kind of basic training to make sure he is building good core muscle strength in balance and good posture, he will have his own way of learning, so your presentation of the tasks may differ from one animal to the next. When you have multiple animals, treat each one of them like he’s your favorite.
Before you invest a lot of time and effort deciding whether to continue training your equine or that he will be happier as part of the stud barn, take the time to evaluate his athletic potential. The principles discussed in this article—which are applicable to donkeys, mules or horses—were developed by my mentor, the renowned resistance-freehorse trainer, Richard Shrake.
 First, let’s look at conformation. It goes without saying that your equine should appear wellbalanced and in good proportion, with flat knees and smooth joints. He should be free of unsoundness. There are published standards on most breeds, or you can pick up a good 4-H manual or a judging manual to give you an idea of what the ideal is for each breed with regard to conformation
Next, we’ll look at body measurements that are used to gauge your equine’s athletic ability. These measurements will help you assess the kinds of activities for which your animal is best suited, so you can plan whether or not to take his training beyond the basics.
 Begin with a six-foot piece of baling twine or string. The first measurement is from the poll to the middle of the withers. Then measure from the middle of the withers to the loin at the base of the rump. If these measurements are the same, you have a balanced animal that will be able to perform with more ease. If the neck is slightly longer, he will still be athletic because the head and neck are used for balance. But if the neck measurement is shorter, it will be difficult for your equine to balance through certain movements and transitions during all activities.
Next, measure your equine around the throatlatch. Then measure around the collar from the withers to the chest at the point of shoulder and back to the withers. This measurement should be twice that of the throatlatch, which indicates that your equine will be better able to flex at the poll,making him easier to collect and bring into the correct framefor optimum performance.
 Now measure the top of the neck from poll to withers and the bottom of the neck from throatlatch to chest. The top line should be 1.5times that of the bottom, enabling your animal to perform nice, soft movements during all activities. A “u-necked”animal cannot bend properly and will never be able to achieve good collection in balance and good posture. His neck and back will be hollow, making it difficult for him to efficiently carry a rider, which can result in future soundness problems.
 Next, measure the equine’s legs from the elbow to the coronet band, and then from the stifle to the coronet band. Both measurements will be the same in an evenly
balanced animal. This means he will be a good pleasure prospect, with smooth movements at the walk and trot. If he’s a bit longer in front, he will be a good prospect for Reining, jumping or Dressage because his trot and canter will be smooth,with greater impulsion from the hindquarters with an uphill balance. An animal that is higher in the rear will find it difficult to balance, so he’s probably not going to be a good athletic prospectbecause the weight will be unevenly dumped on his front quarters.
 Ideally, your prospect should also be graced with 45-degreeangles at shoulder and hip,and with the same angle at his pasterns. This ideal angle will result in softer gaits and transitions, whereas a straighter hip and shoulder will result in abrupt transitions and a rougher ride. The higher the angle (90+ degrees), the longer the stride will be; and the shorter the angle (90- degrees), the shorter and quicker the stride.
 Now let’s see how your prospect moves. Stick a piece of masking tape at the point of his hip as a visual reference point. Ask someone to assist you by trotting your equine on a lead as you watch the way he moves. Does his hock reach underneath and pass in front of the tape? If it does, his hindquarters will support strenuous athletic movements, his transitions will be more fluid and smoother, and his head and neck will stay level. If his hock does not reach underneath him sufficiently, he will be out of balance and must raise his head and neck through transitions.
Finally, ask the person assisting you to lead your equine while you watch him walk through smooth sand. Does his hind hoof fall into the track made by his front  hoof? If he is exact, he is graced with the smooth, fluid way of going of a world-class pleasure animal. If he over-reaches the track, he has wonderful hindquarter engagement and you may have a candidate for Reining,Dressageor jumping. If he under-reaches the track, he is out of balance, causing him to raise his headand neck. He will have difficultythrough transitions and movements, which will undoubtedly make him unsuitable for advanced athletic activities.
These measurements can be quite helpful in determining your animal’s athletic future, and they can be trusted because the laws of physics are at work. But there is more to being a great athlete than just conformation. You must also assess at the personality of each individual animal. Again—these principles apply to mules, donkeys and horses.
First, let’s look at your animal’s trainability. One of the benefits of owning a registered animal is that you will have plenty of background information regarding his gene pool. Some lines are famous for being smart, athletic and good-natured. Some are known as being high-strung and nervous, perhaps making them inappropriate for certain riders. Plan to do your research before you look at a prospective animal being sold by a private owner or at an auction.
 There are some practical tests you can do to help you assess an animal’s trainability. First, ask the person assisting you to hold your equine’s lead rope while you pick up a handful of sand, and then trickle the sand through your fingers near your animal’s head. Does he turn and look at you? If so, this is a good indication that he is interested in what you’re doing, which usually means he will be more trainable than an animal that ignores you.
The next test is to run your finger lightly from your equine’s girth, across the barrel to the flank. Do this on both sides. Does he tolerate this with little movement, or does he twitch and even flinch? This test will give you an idea of how he will react to your legs when you are riding. (The animal that is less touchy will be the one who learns your cues most efficiently, whereas the one that flinches is more likely to overreact.)
 Now stand at your animal’s shoulder and gently put your hand over his nose, and then ask him—with a gentle squeeze and release action from your fingers—to bend his head and neck toward you. Do this on both sides. Does he bring his nose around easily or do you feel resistance? If he gives easily, it is a good indication that he is submissive and will be willing to learn more quickly.
The final check is a simple test to assess your equine’s reaction under pressure. Ask the person assisting you to hold the lead rope while you make an abrupt move, such as jumping and flapping your arms. What is your equine’s reaction? If he tries to run off, he’s probably not the best candidate for equine sports such as Side Saddle or driving, which require a steady animal. On the other hand, if he stops to look at you and tries to figure out what you’re doing, he may be a really great candidate for advanced training.
 When you go through the basic exercises on the lead line and in the drivelines, there may be times when you experience resistance from your equine. Think of your animal’s resistance as a red flag that could be telling you that you either need to reassess your approach and consider a different path to the same end, or that you may simply need to break a current action down into smaller and more understandable steps. Don’t get caught up in the blame game (“It’s his fault, not mine.”) and lose your temper just because things aren’t going the way you expected. If, instead, you adopt the attitude that your equine is trying to communicate with you and that, when you meet with resistance, it is your responsibility to change what you are doing, you can avoid a lot of frustration during training and things will go more smoothly between the two of you.
And remember, just because a certain approach worked with one equine doesn’t mean it will work the same way with a different equine, so treat each animal as an individual and stay on your toes. Equines are as diverse in their personalities as humans and each individual may have a different way of learning from one to the other. Look at training as the cultivation of the relationship you want to have with each individual animal and adjust your own actions accordingly.
 Keep in mind that, regardless of conformation and trainability, when you do the right kinds of exercises toward good posture and balance in their correct order—and with adequate time spent at each stage—and adjust your approach to the training of each individual, the result will be that your equine will feel much more comfortable. He will recognize your efforts on his behalf and, as he progresses, training will come more easily for both of you.
To learn more about Meredith Hodges and her comprehensive all-breed equine training program, visit LuckyThreeRanch.com, MEREDITH HODGES PUBLIC FIGURE Facebook page, or call 1-800-816-7566. Check out her children’s website at JasperTheMule.com. Also, find Meredith on Pinterest, Instagram, MeWe, YouTube and Twitter.
Covered in TRAINING MULES & DONKEY: A LOGICAL APPROACH TO TRAINING, TRAINING WITHOUT RESISTANCE, EQUUS REVISITED and A GUIDE TO RAISING & SHOWING MULES at www.luckythreeranchstore.com.
© 2014, 2016, 2024 Lucky Three Ranch, Inc. All Rights Reserved.

MULE CROSSING: Using Dressage Training with Mules
By Meredith Hodges
 Why does Dressage training lend itself so well to training mules? In order to answer this question, we need to have a clear understanding of what Dressage really means and how it pertains to the mule’s mental and physical development in relationship to our own expectations. When most of us think of Dressage, we picture in our minds those elegant Lipizzaner stallions of the Spanish Riding School in Vienna, Austria.
It’s easy to perceive Dressage as a more advanced form of Horsemanship, unless we realize that, in reality, it is the result of many years of intense training. It is also easy to believe that this is not the activity in which most of us see ourselves competing. Dressage requires much more well-developed skills from the rider, and the High School (known in Dressage by the French words Haute Ecole) movements exhibited are not generally used in the practical use of our animals. People may perceive these goals to be unattainable for the common horseman, and discard Dressage training for more commercial techniques that seem to give simpler and more immediate results in our English, Western and gaming mules. Surprisingly, a better understanding of the beginning levels of Dressage reveals that it is actually a preferred way to train, especially considering the mental and physical nature of mules.
At first glance, the Training Level patterns of Dressage may seem too simple to the average rider. (A Reining pattern is much more inviting because it is more stimulating and exciting.) However, Reining can be quite stressful—both mentally and physically—on a young mule unless he is brought along slowly and carefully. Because the mule is so strong and capable of running through any type of bridle arrangement, it’s best to avoid any confrontation that can cause resistance as much as possible.
 I have found that my mules will exhibit resistant behavior when they are confused or frightened, but never out of “stubbornness.” Often, we take it for granted that, since a young mule can walk, trot, canter, back up, etc. by himself, he should be able to do all these things with us astride. What many people don’t realize is that mules are born with as diverse postures as humans, and there are few mules that will exhibit good equine posture without being constantly reminded. People compensate continually for deficiencies in their own body structure, and posture will vary from person to person and situation to situation. For example, a straight-backed chair will cause most of us to sit up straight, which is healthy for the spine and neck. On the other hand, the sinking comfort of a plush couch will produce a collapsed posture, which can eventually produce sore back and neck muscles. In a similar way, a mule will have to sacrifice his good posture to accommodate an unbalanced and inexperienced rider.
In the simplicity of the Training Level patterns, you will be able to address the issue of good posture. This is when you can begin to condition the necessary muscles for maintaining good posture. In the Training Level Dressage patterns, a judge will always look for “a willing, obedient mount that moves forward freely, responds to the rider’s aids and accepts the bit.” Your mule will be encouraged to maintain the best possible equine posture for his individual stage of development while you practice the same. The simple patterns will enable you to minimize any loss of balance by either of you. As his muscles are strengthened and conditioned, your mule will be better able to carry his own body as well as yours. Only then should you begin to ask for more engagement in the hindquarters, which will eventually lead make more collection possible.
 By taking the time to condition and strengthen their muscles, we allow our mules to engage in physical exercise that is not taxing and painful, thus, keeping their mental attitude fresh and happy. By conditioning your mule in a carefully sequenced pattern of exercises, you will more often avoid the possibility of throwing him off balance and into the confusion and fear that will lead to resistance and disobedience. With your own posture in mind, you can develop the rider and mule as one unit. The process is slow but thorough, and mutually satisfying.
The Dressage saddle allows you the stability of a saddle, yet gives you the closest possible contact with your mule’s body (other than bareback), making your leg and seat aids clearer and more perceptible to your mule. With more clearly defined cues, the mule is better able to discern your wishes without fear or resistance. Western saddles are used more universally for training, but I believe that a lot of this is to accommodate riders with limited ability.
 Equipment use plays an important part in the breaking saddle used, but many trainers today will agree that the less complicated equipment is used in the beginning, the better. The Western saddle may certainly be used for breaking but, from the mule’s standpoint, the Western saddle is heavier and there is quite a lot of leather between you and your mule, which can cause a certain amount of interference in communication. If the mule cannot “feel” his rider well, often times a leg or rein aid can come as a surprise and produce a response that is predisposed to resistance. For this reason, I prefer to start training in an all-purpose—or Dressage—saddle. However, I would recommend training in a Western saddle for the less-experienced rider, or if you are training a more easily excitable animal.
In Training Level Dressage, movements are limited to straight lines, simple transitions (i.e., walk to trot, trot to canter, canter to trot, trot to walk, and trot to walk to halt), and large 20-meter circles. This allows you to spend time working on rhythm, regularity and cadence in all three gaits, overall obedience to the aids, steadiness and learning to bend his body from head to tail through corners, while maintaining an upright posture. All this allows your mule the time to properly condition his muscles and to learn to stay between the aids in a comfortable and relaxing manner. He will also learn to move freely and easily forward, while the rider has time to develop his own muscles and perfect his own technique. Using this technique keeps stress at a minimum.
 As in any exercise program, it is not advisable to drill and repeat every day. With a mule, as with any athlete, muscles need to be exercised and then allowed rest for a day or two between workouts to avoid serious injury. In between Dressage days, you can take your mule for a simple trail ride or just let him rest. The time-off and a variety of activities will keep him fresh and attentive. Three times a week is usually sufficient, with Dressage training for his proper development and conditioning, two days of simple hacking or trail riding and two days of rest. This also takes the pressure off of you. If you’re not into riding on a particular day, you won’t feel like you have to because your mule will retain his learning without the added stress of drilling day after day. Try to think of your mule’s training in terms of yourself: Would you care to be drilled to exhaustion day after day? How would you feel mentally and physically if you were? Dressage—whether it is basic or the most advanced—is a French word for training. It is thoughtful, considerate and kind, and will produce a mule that is mentally and physically capable of doing anything you might like to do with a relaxed and willing attitude. It may take a little longer, but the result speaks for itself.
To learn more about Meredith Hodges and her comprehensive all-breed equine training program, visit LuckyThreeRanch.com, MEREDITH HODGES PUBLIC FIGURE Facebook page, or call 1-800-816-7566. Check out her children’s website at JasperTheMule.com. Also, find Meredith on Pinterest, Instagram, MeWe, YouTube and Twitter.
Covered in TRAINING MULES & DONKEY: A LOGICAL APPROACH TO TRAINING, TRAINING WITHOUT RESISTANCE, EQUUS REVISITED and A GUIDE TO RAISING & SHOWING MULES at www.luckythreeranchstore.com.
© 2011, 2016, 2024 Lucky Three Ranch, Inc. All rights reserved.


MULE CROSSING: Riding Side Saddle
 By Meredith Hodges
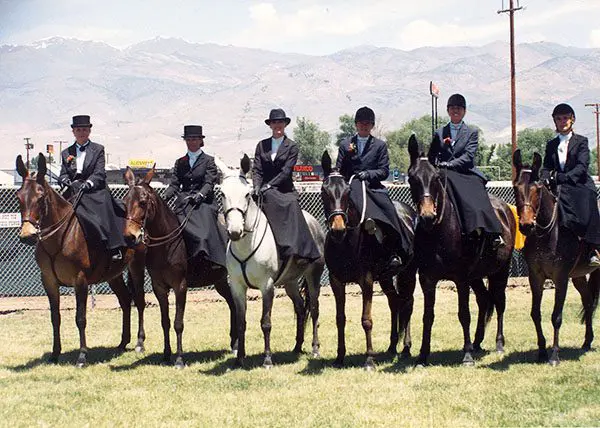
Today, the concept of elegance has been greatly compromised by the fast pace of our open-minded society. Few of us have neither the time nor the inclination to do what is necessary to cultivate this concept as a major part of our lives. Women today have far too many jobs and responsibilities with which to cope without worrying about being elegantunless she lives in a densely populated urban area. There are just not a lot of places where a woman can practice being elegant. One of the places she can, however, is in the growing number of Side Saddle classes offered at many of the different Breed Shows across the country. The equestrian art of Side Saddle is currently being revitalized among the different breeds and one of the most enthusiastic groups is our own Longears lovers! But elegance is not necessarily the only reason our Longears Ladies are riding aside. The lady equestrians of today like to get a more well-rounded education in the art of Horsemanship riding astride, and the perfection of their balanced seat when riding aside only enhances their existing abilities.
 Mules can be lovely, obedient and secure Side Saddle mounts when they are brought along correctly as has been exhibited nationally by Crystal Elzer and her mule, Final Legacy. I also fondly remember Ann Hathaway and her Dressage mule, Baby Huey, exhibiting Side Saddle in the Bishop Mule Days parade years ago. I judged the A.D.M.S. Nationals in Austin, Minnesota, and again, I witnessed a sprinkle of elegant Side Saddle riders on mules. In the state of Colorado, there was a surge of Longears Side Saddle riders beginning in 1983. The Side Saddle class for mules at the National Western Stock Show in Denver, Colorado previously had no less than 10 entries in the Side Saddle Class since its beginning in 1983 when an entire mule division was brought back after a long absence from the show.
 Generally speaking, people are quite impressed with the ladies who ride aside, and a common question often arises, “You sure look elegant, but how on earth can you stay on that way?!”
Actually, riding aside is much more secure than riding astridebecause of the grip you can achieve with your legs around the pommel and leaping horn of the Side Saddle. This was demonstrated clearly at a Side Saddle clinic given by Patti Chadwick at the Bitterroot Mule Company in Bennett, Colorado on March 23rd of 1993. Six beginning Side Saddle riders of various equitation skills proved to be quite secure in their seats and no one had any real problems to speak of that day! All levels of riders were jumping cavalletti by the end of the clinic! So you see, it isn’t as insecure as one might be inclined to believe. And with an instructor like Patti Chadwick, it was a snap! The name of the game is “balance,” and whether riding aside on a horse, mule, pony or donkey, it is always a rewarding challenge to finally be able to master this art.
 My daughter, Dena and I truly enjoyed riding aside both in shows and in parades. Dena was thrilled to be able to finally best seasoned Side Saddle rider, Crystal Elzer in the Bishop Mule Days Side Saddle class. Crystal was a practiced Side Saddle competitor from California at Bishop Mule Days that had bested her for the previous three years.
Side saddles come in three distinct categories: English, Western, and Period side saddles. The English side saddle is probably the best one in which to learn, since the seat is better balanced over your animal. The Period side saddles are the worst, since most are built and balanced incorrectly for our contemporary riders and equines. The older side saddles were built to fit the smaller framed riders and larger animals of yesterday and just don’t fit the conformation of the animals and the size of the ladies of today. Although most side saddles today are bought used, there are saddle companies that are making them again due to increased demand. If you buy a side saddle, make sure it fits your equine as well as yourself to assure the best ride.
Fitting the side saddle to your body is relatively simple. While seated on a chair, measure along the bottom of your thigh from the back of your bent knee to just beyond your hips under your tailbone. The saddle is measured from pommel to cantle and should exceed your leg measurement by no less than two inches. You can ride in a side saddle that is a little too large, but not on one that is too small! Consider the width of your saddle to avoid excessive overhang on each side.
 The training of your equine for Side Saddle should be accomplished fairly easily if your animal has a good foundation to start, and those trained in Dressage will convert the most easily. The absence of the leg on the right side gives problems most often during the left lead canter and during the leg yield left. Though many ladies will use a whip as a substitute for the right leg, it is not necessary. The animal at the higher levels of training (1st Level Dressage and above) have learned to follow your seat, and will do quite nicely staying under your seat as you move through the patterns. If your animal needs additional support, it can come through supportive indications through the reins. To achieve the left and right lead canter, for example, a slight push with your seat and a squeeze/release on the indicating directional rein will tell your animal the correct lead to take. It’s that simple!
 There are quite a few existing Side Saddle organizations today that are available to those of you who might be interested in taking lessons and participating in shows and award programs. You can check your local area for one near you or you can contact the International Side Saddle Organization, 75 Lamington Rd., Branchburg, New Jersey, 08876-3314, (706) 871-ISSO (4776), info@sidesaddle.com. The United States Equestrian Federation can also help you to find qualified instructors in your area. They can be contacted at U.S.E.F., 4047 Iron Works Parkway, Lexington, Kentucky, 40511, (859) 258-2472, FAX (859) 231-6662.
 If you think you might be interested in learning to ride aside, contact one of these organizations to find out what people you should contact in your area to help you and others that share your interest. The feeling of elegance and accomplishment is unmatched. Our world could use a little more whimsy and romance to help the modern woman to enjoy her dignity and elegance in this fast-paced world. Hats off to the lovely ladies who ride aside!
To learn more about Meredith Hodges and her comprehensive all-breed equine training program, visit LuckyThreeRanch.com, MEREDITH HODGES PUBLIC FIGURE Facebook page, or call 1-800-816-7566. Check out her children’s website at JasperTheMule.com. Also, find Meredith on Pinterest, Instagram, MeWe, YouTube and Twitter.
Covered in TRAINING MULES & DONKEY: A LOGICAL APPROACH TO TRAINING, TRAINING WITHOUT RESISTANCE and EQUUS REVISITED at www.luckythreeranchstore.com.
© 2013, 2016, 2024 Lucky Three Ranch, Inc. All Rights Reserved.


MULE CROSSING: Benefits of Professional Training
By Meredith Hodges
 Until a decade ago, mules were used predominantly to perform work, primarily packing and plowing. How they performed this work was really of minimal concern provided that the jobs were accomplished. Today there is an expressed interest for well-mannered saddle mules like never before. The smooth travel and natural comfort of a mule ride coupled with their surefootedness and resistance to disease has inspired horsemen to change their mounts to mules or at the very least, add one to their herd. As more people express the need for well-mannered saddle mules, the need for better training practices becomes apparent. Granted, there are those who will always be content to just get on once a week and go for a ride. If the mule tolerates this, he is automatically accepted in the equestrian world and is considered trained. However, equines that possess this accepting nature are rare. Most mules and even horses will only respond when the correct approach is used. Most people are exposed to limited knowledge about equine management and training and will need the guidance of a trainer or instructor for safety’s sake. My friends Alan and Sally McClean of Golden, Colorado, decided to find out if benefits could be reaped from professional training.
 In the spring of 1985, Alan and Sally came to consult with me about training their two fine saddle mules, “Bucky” and “Walter.” Sally had her leg in a cast. When I inquired about her accident, she told me that Bucky had fallen with her astride, pinning her leg underneath him. She told me that he had always been rather clumsy and tripped often, but she wasn’t sure if this could be corrected. Bucky had also been shown in Western Pleasure at the National Western Stock Show, where he refused to take his left lead. Walter’s problems were also seemingly minimal. He tended to be nervous about things in general after being on the racetrack for three years and refused to take his right lead. Neither mule was what you might call ill-mannered. It was apparent that they both needed help. The mules were clearly out of balance with little or no core strength to maintain any kind of real balance. The rider on board simply exacerbated the problem. These problems were making Alan and Sally a little apprehensive about using them very often and thus, decreased the amount of pleasure they could derive from their mules.
 As problems such as these arise, we find that training is indeed much more than simply being able to ride your mule or any equine. The right kind of training enhances communication between equine and owner in addition to correcting questionable manners and behavior. The routine practice in training allows the animal to know what to expect of their owners, and what their owners can expect from them. Their manners and behaviors will be shaped accordingly, and stress and confusion will be kept to a minimum. The mule that is calm and easy to handle is truly a joy and a pleasure to his owner.
There are many mules that are calm and easy to handle. Each animal has his own particular set of idiosyncrasies that are unique to his situation. Some are more spoiled than others, but nevertheless generally cooperative. But what of those times of difficulty? What about taking only one lead, or tripping or falling? These are things a professional can help to correct. These are also things that should be corrected both for your sake and for the sake of your equine. His general health and your total enjoyment and safety are at stake!
Not unlike humans, mules must be taught how to carry themselves to make maximum use of their bodies. Overall muscle and skeletal conditioning is necessary for maximum performance that results in a sound body and a sound mind. The equine that has difficulty in picking his leads correctly is generally an animal that is not conditioned properly in good equine posture and balance. The muscles in his body are stronger on one side than they are on the other side which makes it painful and difficult for him to perform on his weak side. This only adds frustration to the whole situation when he cannot do what you ask. If you, as the owner, do not realize his physical limitations, it could jeopardize the whole relationship with your mule, thus limiting pleasure.
 A professional trainer can be a qualified coach for you and your equine. His or her training program should include proper conditioning of muscles through a specific and scheduled series of exercises. The more difficult moves, such as sliding stops and spins, will come in natural succession as his body is strengthened. Frustrations are then minimized as the animal is able to perform. Most of us are contented with general knowledge about training. However, professional trainers, like athletic coaches, need to be able to evaluate each individual animal and decide upon a training program to suit his individual needs. Sure, professionals cost money, but they can also save you money by ensuring your equine’s good health and good manners. The “vet” bills you save could be your own!
 In the case of Bucky and Walter, not only did they have difficulty with their leads, but their gaits were rough and one-sided. Correct body strengthening, balancing and conditioning was not the only problem. To add to their problems was incorrect shoeing. In Walter’s case, the shoeing had resulted in contracted heels on one side of his body, undoubtedly causing a lot of stress and strain when coupled with weak core muscles. More than incorrect shoeing, Bucky’s problem of tripping and falling was due to improper posture and body carriage. Today, both mules are strengthened, balanced and able to perform to the best of their ability. They are not put under undue stress when ridden and are noticeably calm and contented while being handled, and the ride they provide is much smoother. Alan and Sally were particularly pleased since their 15-hand mules will now stretch, lowering their backs about four inches which makes mounting much easier. What a pleasure they have become!
The benefits you will reap from professional training can be numerous. You will have a smoother ride because the animal is correctly balanced and strengthened in good equine posture. The animal will have more stamina, agility and endurance. He will have a higher resistance to disease due to increased circulation in good equine posture which greatly reduces vet bills and maintenance costs. There should be no worry about his behavior in public, but most of all, he will be an enormous pleasure to his owner and a credit to his breed.
To learn more about Meredith Hodges and her comprehensive all-breed equine training program, visit LuckyThreeRanch.com, MEREDITH HODGES PUBLIC FIGURE Facebook page, or call 1-800-816-7566. Check out her children’s website at JasperTheMule.com. Also, find Meredith on Pinterest, Instagram, MeWe, YouTube and Twitter.
Covered in TRAINING MULES & DONKEY: A LOGICAL APPROACH TO TRAINING, TRAINING WITHOUT RESISTANCE and EQUUS REVISITED at www.luckythreeranchstore.com.
© 1986, 2016, 2024 Lucky Three Ranch, Inc. All Rights Reserved.

LTR MULES: Efficient Grooming Practices 12-1-21
On November 22nd, of 2021, I posted, on my MEREDITH HODGES PUBLIC FIGURE Facebook page, information about how to maintain your tack and equipment, and how to keep a neat and tidy tack room. There were a lot of comments about it and many people indicated that they thought it would be easy if you had the staff that I have.
Just for the record, when it comes to my equines and their tack and equipment, I do most of the work myself. My TWO guys do clean the stalls and runs daily, and the larger dirt pens weekly when the animals are overnighted there, and they do feed in the mornings, midday and evenings. TWO of my girls take care of the inside and external cleaning of the multiple buildings that we have, and they condition the tack and equipment as needed, but mostly every three months because we clean things as we use them.
My THIRD girl assists me in the office checking the website and Social Media connections, making Social Media posts (with the exception of Facebook that I do myself), editing articles, advertising and the newsletter, fulfilling orders and MUCH more. TWO of the girls and I film and take photos of EVERYTHING we do so we have material for our posts, articles, video Training Tips and Documentaries. We put these together with our TWO remote videographers and we have ONE remote graphics artist that also assists with publications. Our JASPER MASCOT also doubles as a website tech person. So, we have a VERY SMALL staff to cover all the work that we do. We are prompt in doing what we do because we want to provide all of you the information that you need to have the same success with your equines that we have with ours. In this post, I will address how I efficiently keep all 17 of my equines clean and healthy.


I find that when you have a regular weekly grooming routine along with good environment cleaning practices, the animals do not seem to get as dirty as they would otherwise. Spring is obviously the most intensive time of the year because of mud and shedding, but during other times of the year, grooming can go quickly. During the summer months, they have short hair coats and will only need to have bridle paths trimmed, faces, ears and nostril cleaned, Johnson’s Baby oil in the manes and tails, Neosporin for any cuts and scratches, and a quick go-over with the Dandy brush. Since I keep them barefoot with regular trims every 6-8 weeks, they rarely need their feet cleaned. I carry the grooming tools in a bucket and visit them wherever they happen to be, either in their stalls or in turnout. Because they are all taught the same manners, they come to me and line up for their turn wherever they are.
We have had good weather this fall, but with the lack of moisture, they are all pretty dusty. Since we are using my Tack Barn as an art studio and getting the BELLE, JASPER, MOXIE & KYLIE bronzes ready to be cast for their placement in our newest project, the OLDE WESTERN TOWN OF ASSPEN here at the ranch, I opted to vacuum everyone in the alleyway of the barn.
The first thing I did was to have them exit their stalls and be tied in the alleyway. I brought in Augie, Spuds and Billy from their barn and added them to the eight mules from the South Barn. As I retrieve them, I ALWAYS open the door, ask them to come to me, reward them and then put on their halter. They learn to stand quietly and will not exit the stall until I give them permission to do so.
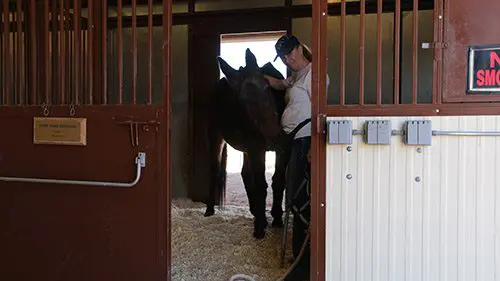

So I can be hands-free with the halter, I will often allow them to eat their reward directly from the fanny pack of crimped oats that I ALWAYS wear around my waist. If they get pushy, I will say, “NO!” and put my hand up like a stop sign and ask them to back off. If that doesn’t work, a quick slap to the side of their mouth after they have been asked does work. Consistency in MY behavior is key!


They have all been introduced to the vacuum cleaner and stand quietly while I go from one to the next. If they start picking at each other, I just holler the name of the perpetrator and say “NO!” VERY LOUDLY! They always stop because they know the next thing is a pop on the rump from me!


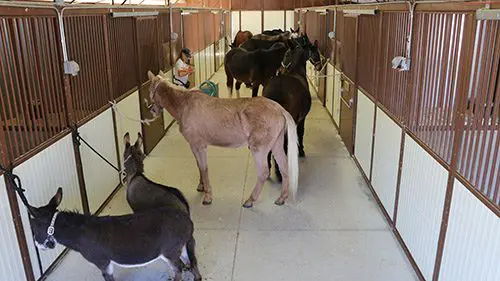
I am always aware of each animal, but I do not “move over” for them. I ask them to “move over” for ME. Then they are rewarded with crimped oats. Once they learn, for instance, that I need to return the vacuum to its spot, and that they will all get rewarded for standing quietly, they give me my space as I work around them, even during rolling up the extension cords!


Since I have so many animals, I do have to refill the fanny pack often, so I keep a full bucket available in a convenient spot for refills. Once they are all vacuumed, I ten move down the line and wipe everyone’s faces. They get their eyes, ears and noses cleaned thoroughly. They quickly learn to accept the process and then I reward them once they are all done. When I do them individually before riding, I will reward each immediately after each task. When they are all together, they will behave better when they have to wait to be rewarded when they are ALL done with each task. Then I go down the line and sprinkle Johnson’s baby oil in all their manes and tails and reward their good behavior when that is all done.


My 28 year old mule, Merlin, poked his eye on a tree branch when he was a yearling. I opted not to have his eye removed, so we have been treating it for 27 years. We keep him in a fly mask all the time to keep the dirt and debris from irritating it. Twice a day face wiping keeps it sanitary and it is easy enough to do at feeding time. We just carry a wet rag with us when we see him.
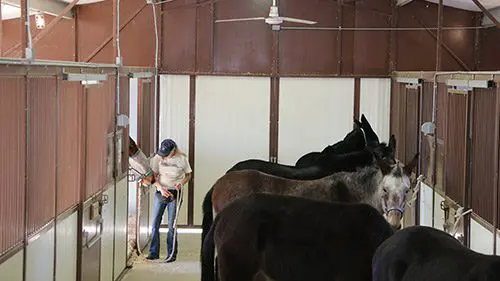

When they are all done, I lead them back to their stall, send them in while I stay at the door and ask them to turn back to me for their reward. As they chew their reward, I remove the halter and bid them a fond farewell!


With the 11 mules and mini donkeys finished in the South Barn, I next go to the North Barn to repeat the process with the remaining six animals, two Large Standard Donkeys (Wrangler & Chasity), a miniature mule (Francis), a miniature horse (Mirage) and two saddle mules (Jubilee & Brandy).

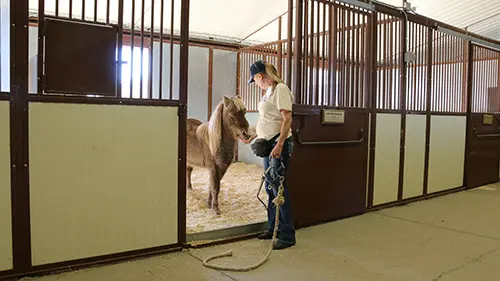
Again, I ask them to come to ME, give them their reward and then halter them as the chew. They are all happy to stand still until I tell them they can walk out the door.

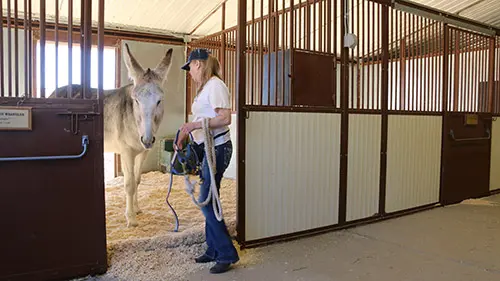


I repeat the whole process with the vacuum cleaner and again, they have all been trained to accept it, so they stand quietly and happily. I do believe that they really DO enjoy being cleaned…even if they do go back and roll almost immediately…LOL!


Then comes the face-wiping followed by the Johnson’s Baby oil in the manes and tails. I do not cut their bridle paths in the winter. It gets very cold here and I don’t want them to lose heat from their bodies.


Then it is time for them to be returned to their stalls. I have two rescues (re-trains) in this group and they watch intently as the old troopers enter their stalls and behave impeccably!


When Chasity was returned to her stall, I asked her to walk through the narrow space between my truck and the wall of the barn. My assistant was filming from the bed of the truck and as I said earlier, we do not move over for them! Chasity walked quietly through the narrow space, did not rush or push me, but followed obediently. She was sent into her stall, turned around and got her reward. Then, it was Wrangler’s turn.

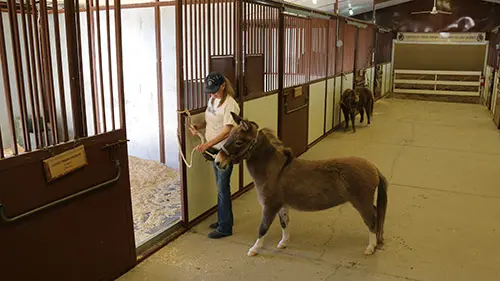
Francis is a mini mule that I got 10 years ago and to this day, she is still suspicious of humans, but is learning to trust. She can be fully groomed in her stall with no halter, but she can become quite a handful when outside the stall. Her natural reaction is to bolt and run any time she get the chance. When I return her to her stall, I set her up for success by looping the end of her lead rope around the stall bar so if she does bolt, she won’t be able to pull the lead rope from my hand and will be forced to turn around and face me. She didn’t even try to bolt this time, kept the rope loose and returned to me for her reward. Then I went and got Mirage, our 26-year-old miniature horse, and returned him to his stall. The grooming of all 17 animals only took me 2 hours! Organized practices and teaching good manners makes all the difference!


MULE CROSSING: The Responsible Use of Restraints in Training
By Meredith Hodges
There is a lot of discussion about training mules versus training horses. There are some who say that training mules is harder than training horses, and others who say just the opposite. It has been my experience that it isn’t really that one animal is more difficult to train than the other. They each have their redeeming qualities and individual limitations. The people who are dealing with them also have their own redeeming and limiting factors. For instance, if you are leading a horse, and he does not want to follow you, because he hasn’t the strength in his head and neck as a mule, or donkey, does, he can be more easily bullied into compliance with a quick jerk on the lead rope.
 On the other hand, if you are leading a mule, or a donkey, they can easily jerk the rope right out of your hands, or jerk you right off your feet, because of the incredible strength they have in their head and neck. When you teach a mule or donkey something one day, he will ponder what he has been taught during the days between lessons. Regardless of how many days or weeks pass, he will comply more easily during the next lesson because he never forgets what has been taught. A horse will tend to forget and will need to be reminded where mules and donkeys will not necessarily need those constant reminders.
It makes sense that the handler needs to adjust his training program such that the horse has many frequent and consistent lessons to refresh his memory. Longears will only need lessons as frequently and consistently as it takes to maintain good postural conditioning. When applying lessons more frequently, the handler has the ability to make subtle adjustments to get the best from the horse. If he wants a Longears to respond properly, it is critical that he teaches the mule or donkey correctly the first time. They will learn EXACTLY what the handler teaches them the first time and will continue to repeat it. The option of changing your approach during the training sequence is limited Longears. What this all amounts to is that one is really not more easily trained than the other. Rather, it is the experience and knowledge of the handler or trainer, that makes the difference with both Longears and horses.
Mules and donkeys, sensitive creatures that they are, seem to be more concerned about the overall attitude of the trainer than are horses. With the intelligent use of negative reinforcement, a positive attitude and informed use of restraints, modification of any equine behavior becomes a lot easier.
When your mule does not comply with your wishes, first you need to get his attention and do something to temper his defensive attitude. When we are intelligent about a situation, it will minimize the animal’s negative reactive responses. Our politeness and consideration promote an overall positive attitude on both parts, and opens up the lines of communication between you.
Since these equines out-weigh us by several hundred pounds, careful and informed use of restraints can sometimes be humanely used to perpetuate and escalate the close relationship between you and your Longears (and even horses) in the training environment. Restraints should be used to help “explain” what you wish from your equine, but should not be used as a perpetual training “crutch.” Intelligence, attitude and restraints should always be used in conjunction with a pursuit of “the path of least resistance” in mind to promote successful training sessions.
If we realize that correct development of mind and body takes time, we should relax, be patient, allow the equine learn at his own pace, humanely utilize helpful restraints to minimize resistance in difficult situations and actually enjoy the training process with our animals. For example, in the case of Draw Reins, they should be used in conjunction with your regular reins, only if you have Good Steady Hands and only when necessary. In the beginning, this might mean pressure on them at every stride. As  with any restraint, they will need to be slowly phased out over time. This is pretty easy to see with Draw Reins and the response they elicit from the equine.
But what about a restraint such as the Scotch Hobble where the hind foot is tied up to make handling the feet easier? The first time you need to use the Scotch Hobble, you will probably need to secure the hind foot so that the toe cannot touch the ground when you try to pick up the hind foot. In order to tie the Scotch Hobble, you will first tie a Bowline (non-slip knot) around the neck loosely, then take the slack, hold the very end and work it between the back legs. When you get it in position, you can walk back to the front toward the loop around the neck while taking up the slack.
From the shoulder, give a quick tug on the rope to see if he will yield the hind foot. If he does, you can let him keep the toe on the ground when you run the rope through the loop around the neck and finish going around the back leg again. Then bring the rest of the slack back to the front loop and tie it off.
The Scotch Hobble can be helpful just teaching them to yield the hind leg with this method, without actually tying it off. See if he allows you to transfer the hind foot into your hand. If he does yield the foot and let you hold it for a few seconds, set the foot back down and reward him with oats immediately! If you do have to tie it off, do it looser every time you need to use it until it is so loose that you only have to put the loop around the neck and leave the rest of the slack laying on the floor between his legs. Pretty soon, you won’t have to use it at all. This is called phasing out the restraint. If he becomes fidgety at any point in the process, just back up one step and try again the next time.
 There are many kinds of restraints available in the equine industry today: Martingales, Tie-Downs, Side Reins, Draw Reins, Chambons, Hobbles, Breeding Hobbles and the list goes on. In my opinion, most of these are being used much too freely as “crutches.” They are responsible for terrible body posture and severely limit calm and compliant responsiveness among today’s equines.
A restraint should only be used as a temporary helpful tool to allow you to get a desired response from the animal…to help to show them what you expect from them. Once you get the desired response, it is your responsibility to phase out the restraint in order for the new behavior to become his new normal way of responding…correct behavior. Restraints help to reshape behaviors!
Early in a Longears life, he should \be taught to be calm in restraints which will make routine tasks much easier. Your Veterinarian and Farrier will thank you, and it might save your mule’s life if he should get caught anywhere, fall in a hole, or encounter any other potential for disaster. Your goal is to get him to stay calm and think before he begins to struggle, or bolt, and tries to run. Many Longears will stand still naturally when they are trapped, but it is always better to reinforce this pause for thought with regular lessons.
NEVER USE A FACE TIE OR ANY HARD-TIE ON A HORSE! They have a completely different reaction to being hard-tied than a mule or donkey. They will frantically fight it and throw their bodies around so wildly that they can hurt you or themselves quite easily! I do use my Elbow Pull on horses, but do not hard-tie it. Rather I tie it with loops that slip over their back when they pull against it.
 The following technique is useful when working around very young mules, although it also works well with adults. If your Longears begins to struggle, simply step back and wait for him to calm down, reward with crimped oats when he’s are calm and then resume what you were doing. The Face Tie is a very useful restraint for worming, giving shots, clipping bridle paths, clipping on the head and for teaching an ear-shy Longears how to accept the bridle over their ears. The technique is easy.
Find a good, stout hitch rail or post:
- Wrap your lead rope around the hitch rail once until your animal’s face is over the rail. This may take coaxing as you take up the slack one step at a time. Remember the oats reward as he takes steps forward.
- Slip the rope through the nose band again and secure it. For a more secure tie that will keep him sideways to the hitch rail so he cannot swing his haunches into you (like when you are giving shots), Run the rope first though the nose band as previously described, then com back through the nose band, take the rope further down the hitch rail toward the shoulders, go through the throatlatch and tie it off there. With his head secured in two places, he will not be able to pivot at the chin anymore to swing the haunches very far.
 If your mule or donkey is difficult to lead and tends to bolt and run, rather than using chains that can cause unsightly bumps on the face, you can use what I call the Quick Twist. A quick twist of your lead rope through the nose band and over his nose will provide adequate leverage. Just stand your ground and don’t move if he pulls against you. The rope will tighten around his nostrils and restrict his ability to inhale deeply. He will soon discover that if he comes toward you, it loosens and allows for free breathing again. If he becomes insistent about running off, be sure you are always leading in a confined space and just let go of the lead rope and let him run off… it’s better not to lose a pulling battle with him and let him think he can win. The coax him back by reminding him that you have the crimped oats in your fanny pack! If he still won’t come back, leave him for awhile and try again later. He’ll be back!
NEVER TIE UP YOUR EQUINE WITH THE QUICK TWIST!
 Hobbles can be helpful when clipping the legs, but I don’t recommend using them very much. Longears are truly adept at running off in them and most hobbles will cause rope burns on the pasterns that will scar permanently and never really heal. Do not use nylon hobbles for this reason unless they are lined with fleece. Leather hobbles seem to be fine for supervised use. When camping, it is better to tie them UP to a High Line, or just tie up a horse to the High Line and leave the mules free to roam loose with no halters on. They will stick near the horse.
Choosing the right restraint for a given situation takes a lot of thought and consideration. You must ask yourself which restraints are available for you to use? Which restraint will most likely bring about the correct response from your equine? Will the response come with little or no resistance, and is it humane? Will it cause other more serious problems with the animal? And finally, can the restraint be phased out easily?
 Keeping these things in mind when using restraints will help to keep the relationship with your mule from becoming a battleground. Bear in mind that whatever restraint that you use might vary from situation to situation, and from animal to animal. So, carefully weight your options! Remember, using intelligence, a good attitude and informed use of restraints can greatly enhance your training experience together!
To learn more about Meredith Hodges and her comprehensive all-breed equine training program, visit LuckyThreeRanch.com or call 1-800-816-7566. Check out her children’s website at JasperTheMule.com. Also, find Meredith on Facebook, YouTube, Pinterest, Instagram, MeWe and Twitter.
Covered in TRAINING MULES & DONKEY: A LOGICAL APPROACH TO TRAINING, TRAINING WITHOUT RESISTANCE and EQUUS REVISITED at www.luckythreeranchstore.com
© 1989, 2016, 2024 Lucky Three Ranch, Inc. All rights reserved.

LTR Training Tip #45: Leading Through Lateral Obstacles
After your equine has mastered moving straight through obstacles, try some of the obstacles that require lateral movement.

MULE CROSSING: Stubborn As A Mule
By Meredith Hodges

“Stubborn as a mule” is hardly an appropriate cliché to describe today’s mules who are sweeping the countryside with their remarkable abilities! But why now? Why haven’t mules been used successfully as saddle animals before this? My only guess is that in the past, we did not afford ourselves much leisure time out of necessity. Therefore, mules used for packing and farming had to be broke quickly to help with the work. They were generally trained by older and more experienced animals by working in teams. People did not have the time to spend training one horse, much less one mule! If an animal refused to learn under the “team” plan, he was quickly discarded for an animal that would. Today we find that to train mules successfully for a variety of uses, we must spend a lot of quality time with them to get the desired response. Mules do not profit from hasty or forced training. With this new approach to training mules, they are rapidly becoming a preferred saddle animal.
 It does not seem strange to me that this phenomenon with mules is finally taking place. A mule usually inherits his strength and intelligence from the jack and his beauty and athletic ability from the mare. Of course, both the jack and the mare can contribute more and less, of each other’s major attributes varying the looks and abilities of the offspring. Still, the offspring of a given mare will exceed the abilities of that mare after adding the jack’s incredible strength and intelligence. It is no surprise, then, in the face of this evidence, that using an athletic, sport mare will produce a sport mule, and so on.
 In Europe, the Equestrian Arts are revered and preserved on a majority basis. In the United States, equestrians are a minority, taking a back seat to baseball, football, and other sports of the “common man.” Still, there is a marked growth of equestrian skills and equine performance that CAN carry us into the future with added equestrian interest. The spectators of Equestrian Sports must be considered. It is the spectator who pays to support us and it is the nature of the spectator to want to be entertained. In order to preserve their interest, we must keep them abreast of new developments in our industry, new events, new people, and new animals that now include mules! Since mules are now successfully competing with and against horses, it only stands to reason that they can be an asset to the industry as new talent. A complete list of uses and accomplishments of the mule is still not possible since the mule has not been tested completely, but that which has been tested is positive, including testing as an embryo transplant recipient. The mule has many redeeming qualities that make him attractive to Equestrians: he is durable, intelligent, extremely surefooted and less expensive to maintain than are horses. An added bonus is the affectionate, mischievous nature of the mule when treated kindly and fairly.
 Sometimes we humans fall into the belief that one breed is better than another (with mules at the bottom, of course?!!!) when we should actually be looking at the whole picture a lot more realistically! It really isn’t that one breed is better than another. Rather, there are individuals within every breed who will excel. Whether that individual is a Warm Blood or a mule, shouldn’t he have the support of the entire equine industry and not just the support of his own breed?! If we had not integrated baseball, or football, for example, do you think it would have grown into the industry that it is today?! Probably not! Together we stand, divided we fall. Bickering over such trivialities in or own industry creates dissention and separation of resources. Better to use all the resources we have available to us in a positive and favorable manner for the support and preservation of our entire equine industry. Let’s get our priorities straight and do it for the survival of our industry, do it to improve your own skills, and do it to improve your equine’s skills! Try to keep your personal feelings in check for the sake of the whole and appreciate the art and skill of all our equestrians in the learning process. We can all learn from each other. “Mules can make a viable contribution to equestrian events… if we only give them a chance!!!!”
To learn more about Meredith Hodges and her comprehensive all-breed equine training program, visit LuckyThreeRanch.com, MEREDITH HODGES PUBLIC FIGURE Facebook page, or call 1-800-816-7566. Check out her children’s website at JasperTheMule.com. Also, find Meredith on Pinterest, Instagram, MeWe, YouTube and Twitter.
Covered in TRAINING MULES & DONKEY: A LOGICAL APPROACH TO TRAINING, TRAINING WITHOUT RESISTANCE and EQUUS REVISITED at www.luckythreeranchstore.com.
© 1989, 2016, 2024 Lucky Three Ranch, Inc. All Rights Reserved.

LTR MULES: Learning with Lancelot 3-5-21
By Meredith Hodges
Longears thrive with a routine management and training program. Their performance and longevity is greatly increased. Sir Lancelot is now a 27-year-old ranch mule that has had the benefit of my management and training protocol. Done over two years when he was much younger, the result of his postural core strength leading exercises, lunging, ground driving and later riding in my postural “Elbow Pull” self-correcting restraint is apparent in his youthful enthusiastic attutude and body structure. Since, I did not show Lance, I had no need to make the transition from the Eggbutt snaffle bit to the curb bit. He was extremely responsive in the snaffle bit all these years. Today, we are going to make the transition to the curb bit and document it as an addition to our training series.

Lance executes the gate perfectly! He stands quietly while I put on the “Elbow Pull with the curb bit that conveniently has a crosspiece connecting the two ends of the shanks where I can run it through (instead of running it through the snaffl rings as I did in the snaffle bridle). Commonly, the equine will raise his head during his first introducion to the curb bit. Lunging in the “Elbow Pull” will remind him of his good posture with the addition of the new bit.
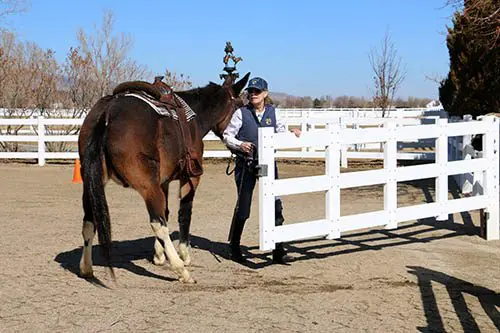

Lance starts to raise his head, but almost immediately resumes his good posture. The “Elbow Pull” goes loose and he moves out nicely at the trot.
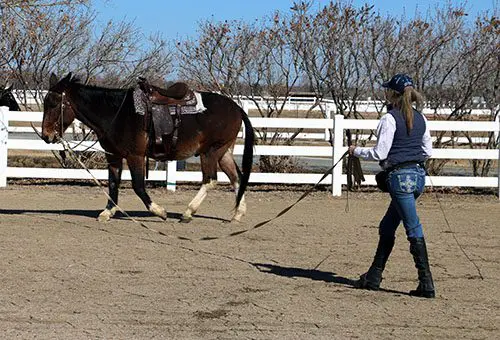

The canter poses no problem at all. Lance stands quietly after being called to halt while I change lungeline to the new side of his face.


Lance remains on the arc of the circle with a squeeze from closing my fist as his outside front leg comes into suspension, maintaining his balance and bending correctly through his rib cage as he first learned in the Round Pen.


Lance steps well underneath his body and maintains the critical upward balance intiated by hind quarter engagement.
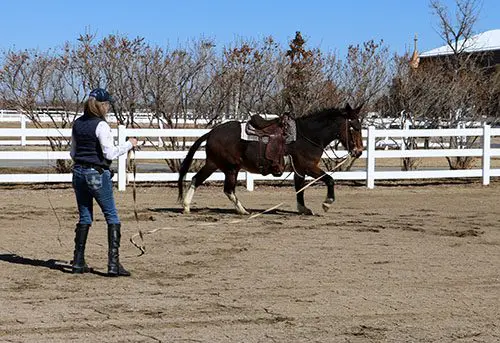

Lance waits patiently as I roll up the lunge line, remove the “Elbow Pull” and then follows me obediently to the gate.
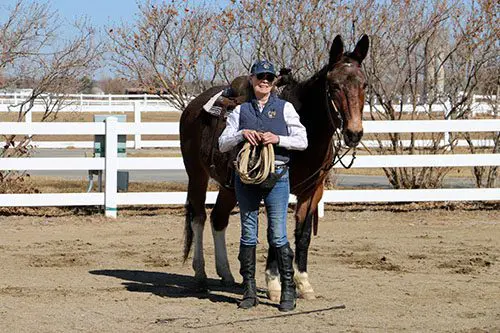

The mounting block was new, but he didn’t mind! He knows how to stand still. He followed my seat easily around the first turn, bending appropriately through his rib cage while staying erect in his posture around the cone.

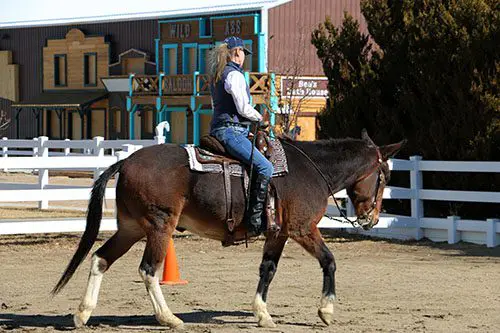
I kept my hands in front of the saddle horn. On the straight lines I alternated leg pressure from side to side. Through the turns, I lightly squeezed/released the direct rein while continuously nudging the opposite side with leg pressure from my leg. Otherwise, I kept my hands quiet. Lance remained in good equine posture.
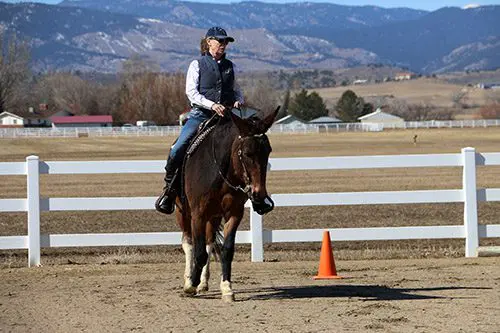

I verbally counted to Lance as he negotiated the Hourglass Pattern. On straight lines, I matched my alternate leg pressure with the verbal command, “One-Two, One-Two…” and on the turns, I matched the one-sided leg pressure with, “Two-two, Two-Two…” He halted with his hind quarters still engaged.


Lance kept his mouth quiet and responded well to my leg pressure with hardly any movement necessary on the reins. We finished with a bow (He really likes to bow!)! He then stoood quietly and waited for my next cue.


Lance was so proud of himself! When you take the time to break things down into very small steps so your intent is clear and concise to your equine, it is easy to successfully make the transition from one thing to the next during training, even when going from the snaffle bit to the curb while maintaining the same light and responsive contact with your equine’s mouth. Although it may take more time, the journey and the end result is much more relaxed and enjoyable. One learns to appreciate the “little” victories along the way. In turn, our equines appreciate US because they know in no uncertain terms that we have their best interest at heart and are the ones that keep them healthy and comfortable. This makes for a deep and abiding, everlasting partnership!

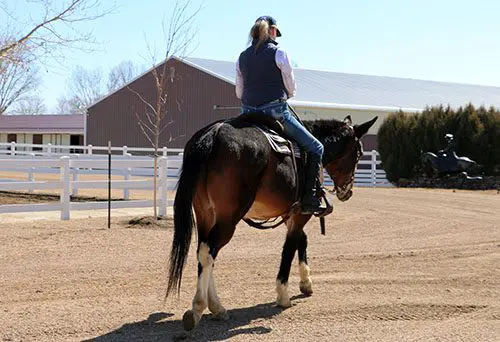


What’s New with Roll? Happiness is a Fanny Pack Full of Oats!

Roll is standing quietly as he usually does while I was speaking to a tour group with the gate wide open, but this was not always the case with him. He used to hide behind Rock and snort at me when he first arrived with Rock in December of 2010.
Behavior Modification is a reward system of training that requires that the trainer has the ability to distinguish between good and bad behaviors, to reward them promptly and appropriately…and, to do it politely with respect for the animal. The oats are a reward that is both safe and enjoyable for equines, and is something that they will continue to work for.

When dealing with an equine that is easily ten times your own weight, it is hard to imagine that the way we talk, touch and interact with our equine would really need to be ultra considerate, light and reassuring. However, if you want their complete cooperation, that is exactly what needs to happen. For instance, when applying fly spray talk gently and calmly, and be careful not to get the spray in their eyes…or it will burn and they will be less likely to comply the next time!

The same consideration hold true when bathing. Be careful not to get water in the ears, eyes and nostrils…and accustom the equine to cold water by spraying the feet and front legs first and work your way up to the face.


When you are kind and considerate, and give the equine time to adjust, even mechanical equipment like a massage thumper for muscle relaxation, or an equine vacuum cleaner used not only to clean but also to promote better circulation, can become a real source of pleasure and enjoyment for your equine.


When the equine is relaxed and accepting of the equine chiropractor, veterinarian and farrier, they are better able to do their jobs with maximum efficiency and successful outcomes.


And jobs you have to do like clipping, bridling and taking off the bridle all get much easier, preserving the trust between you. Now at 26 years old, Roll is a NEW draft mule!

What’s New with Roll? Leading the Hourglass Pattern
After being off last week, Roll was more than happy to come with me today. The air was brisk with a bit of a breeze and Roll was even a little snorty walking up to the work station. We spent a good amount of time with the Goody hairbrush getting the undercoat loose and I then went over him with the shedding blade to get the excess on top. He was still shedding hair all over, so I decided to go ahead with the vacuum cleaner. The vacuum cleaner serves a dual purpose: it pulls the remaining loose hairs from his coat while stimulating the capillaries to come to the surface of the skin. This increased circulation makes for an extremely soft and healthy coat. He still has a lot left to shed, but his hair now feels silky to the touch. I then put Roll in his surcingle, Eggbutt Snaffle bridle and “Elbow Pull” for his core muscle, postural leading lessons.

Roll practically pulled me down the alleyway to the dressage arena, but was very well behaved when we stopped to give Augie and Spuds a treat of oats. Roll was okay with sharing as long as I gave him more oats, too!

Roll and I then walked to the gate and he went through beautifully as always.

We marched along the pens and gave treats to all the mules who would be his audience.

Roll launched into the hourglass pattern on the lead rope with a lot of energy and enthusiasm. He squared up easily, but was still reluctant to put all the appropriate weight on his right hind foot.


He kept an upright balance through the turns and was markedly better in balance over the ground rails.

He even trotted a bit along side of the pens once I got out in front of him, but when I asked him to trot back to the gate, he was too tired! The chiropractor had come out to see him last week and said that he was locked up in his right hip, so it may be he needs another chiropractic visit this week as well.

At any rate, I was pleased with his progress and even though he missed his lesson last week, he still did better than in prior weeks. The hind feet were no longer twisting after his trim on May 19th.

It may very well be that he can graduate to the round pen soon for bulk muscle building. His core is solid now and after his workout, he was much tighter in the abs and filled in nicely over his topline.

Roll is carrying just a little more weight than I would like to see, but he did look less obese after his lesson and when we begin the bulk muscle building, it should disappear rapidly as the fat evolves into muscle. At twenty-six, Roll is doing so much better than I ever would have expected given his questionable history.


What’s New with Roll? Leading the Hourglass Pattern
Roll was a muddy mess when I went to get him today. He had been lying down and decided to roll in the wet dirt and pea gravel. Thank heavens it wasn’t all mud! I did my best to get most of it off of him, but clearly, the vacuum cleaner was not going to work for anything but getting the hair off the floor. I first went over his body with the hairbrush, then the shedding blade and afterwards, the dandy brush. Then I baby-oiled his mane and tail, put on his gear and we were good to go.

Roll seemed happier today than he had been last week. Roll was walking better and appeared to have gained some core strength back.

Instead of being really off behind, he was only slightly off and did not want to bear weight on the right hind in his squaring up…until the last one when he finally weighted the foot entirely.

Roll’s rein back was much better than last week. I had him checked by our resident farrier, LTR Ranch Manager Chad in case he was developing fungus in that foot (after his bout with White Line in his left hind). better to be safe than sorry, but he showed nothing but a packed-up foot, and that very well could have been the culprit since we just had a really good rain and everything was muddy in the arena where we were working.

It is truly amazing how slight, but visible his improvement has been from week to week. His whole body looked much more symmetrical this time. It is awesome to be able to celebrate each of Roll’s “little victories” along the way at 26 years old! However, Roll wasn’t too sure if he wanted to share his rewards with Sir Guy!!!
Roll decided that celebrating with a friend is probably okay and back to the work station we went to untack and then it was time for turnout!